Accessing File Sharing/Upload Via the Web Portal
Updated Mar 31st, 2026
Who is this guide for?
Web Portal Users
This guide will show you the File Sharing options available in the Web Portal
When logging in as either a Client or Associate, the following screen will appear listing all client matters that an associate or client has been linked to. (The screen will vary dependant on either associate or client login)
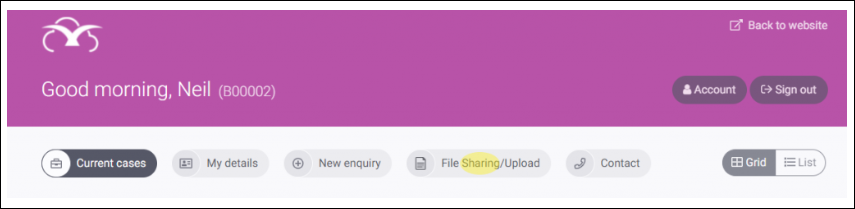
Select File Sharing/Upload then use the option of Filter by Client to select an appropriate client, then use the Filter by Matter drop down to select an appropriate matter. (If logged in as a client, the matter list will be the only option). This will then list any documents published to the deal room.
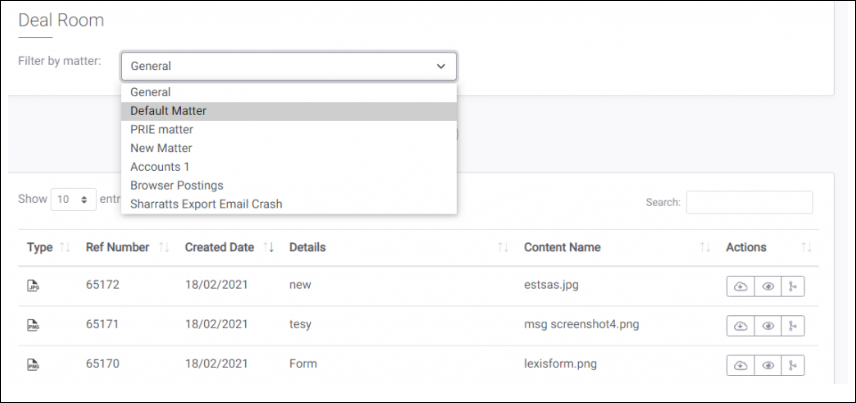
The following options are available,
(Options will be dependent on the permissions of the Associate or Client)
The Create New Icon:
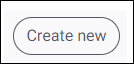
Enables the option to browse and upload any document type to a specified Client and matter.
The Download Icon

Selecting this option allows a user to download a copy and save locally.
The Preview Icon

Selecting this option opens a preview screen
Document History

Selecting this option will show all history on the document such as date created, revision comments and version number.
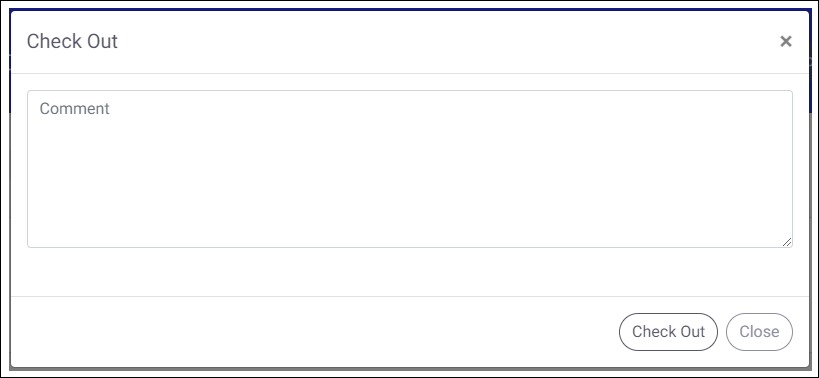
Check Out

This option enables the Client or Associate to automatically download a copy of the item to make changes.
Once selected, a comments box will appear allowing comments to be made, these comments are then visible to any users viewing the document within Osprey
Check In

This option allows the Client or Associate to browse and upload changes made to checked out items. When changes are made within the deal room, either checking in in or out, email notification is sent to relevant parties notifying them.
Undo Pending Changes

Selecting this option will undo the previously checked in document
To Check out a document to make changes
Select the Check Out icon next to the document to be amended.
The following screen will appear:
Enter a comment, select Check Out.
A prompt should pop up giving the option to open or save.
Select ‘Open’ to make changes immediately then re-save locally, or select ‘Save’ to amend later on.
To check the item back in with the newly saved changes, click the ‘Check In’ icon.
The following screen will appear allowing you to browse for the amended file.
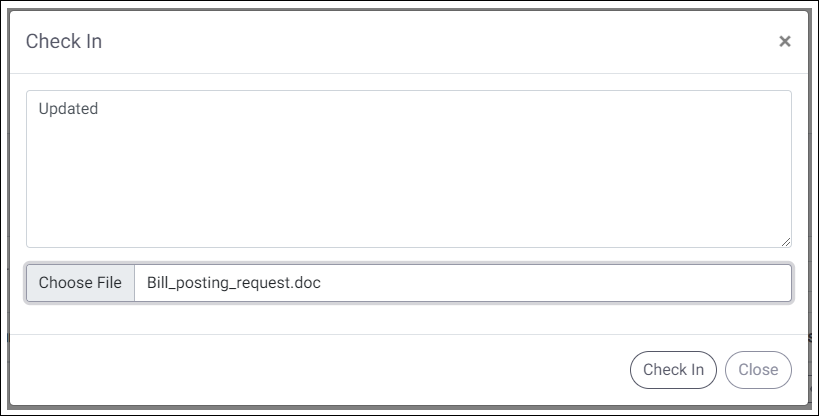
A comment is compulsory at this time. This is generally a brief description of the changes made and will be visible in the revision history.
Click Choose File to browse for the required document, then select check in. If the file was saved with a different name, you will receive a prompt asking you if you do wish to save with a different file name. Click ok if you wish to continue.
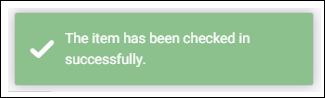
You will see a notification confirming the item has been checked in.
Finalising Documents published to the Osprey Deal Room
Once an agreement has been made in relation to changes to a document, the document is finalised.
Finalising a document will disable the check out option from the Deal Room.
To Finalise a version:
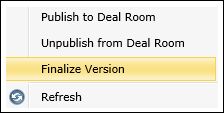
Ensure you have the relevant client and matter selected, then from within Matter History, select the Deal room folder to reveal any published documents.
Right click the document in question and then select ‘Finalize version’.
Click ‘ok’ in the confirmation screen.
If you wish to reverse this action, right click and you will now see the option to ‘Unfinalise version’ with a prompt to confirm once selected.
Any finalised version can then be unpublished from the deal room which in turn, will remove from the deal room altogether.