Adding and Managing Key Dates
Updated Mar 31st, 2026
Who is this guide for?
Any Users
Stay on track with deadlines, tasks, and key dates with ease
Released September 2025
Osprey’s key dates tool provides a central diary and task management system to help all users stay organised and on track with their schedule. Key dates can be used to schedule important meetings, court appearance, or client consultations and it can be used to track reminders, matter reviews, deadlines, or case tasks. Easily view, edit, and track key dates across your matters or across the firm.
Watch: an overview of the new key dates features
This short video gives you a quick tour of the latest key dates updates in Osprey. See how to create, edit, and review key dates, use the new fields, and explore the updated matter workspace and ‘all key dates’ page.
GET STARTED
The client and matter tables are only available on v1.5. Contact your CSM or the support team to get access to the new client and matter tables and start your migration to v1.5.
Adding a key date
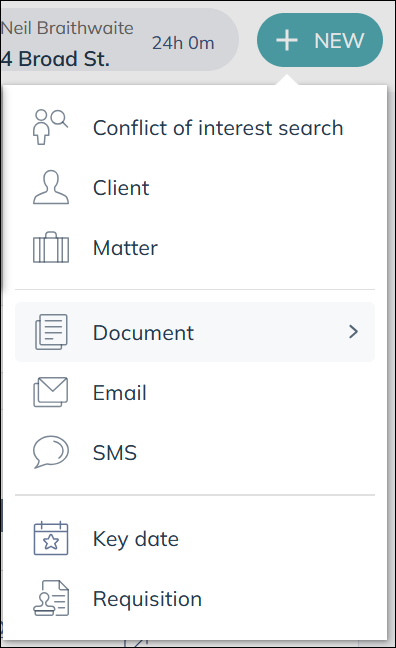
Key dates can be added clicking the ‘New’ action button, followed by Key date.
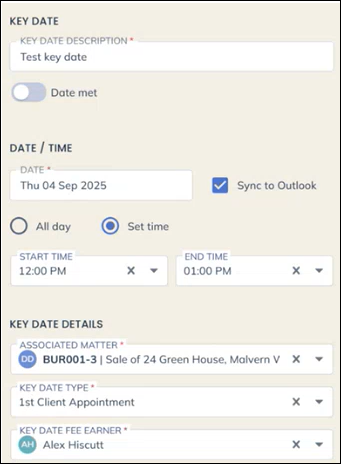
The key date panel will open to input the relevant key date details. The key date will be added, by default, to the matter you’re currently on, but you can select another matter within this panel. See more information on each available field below.
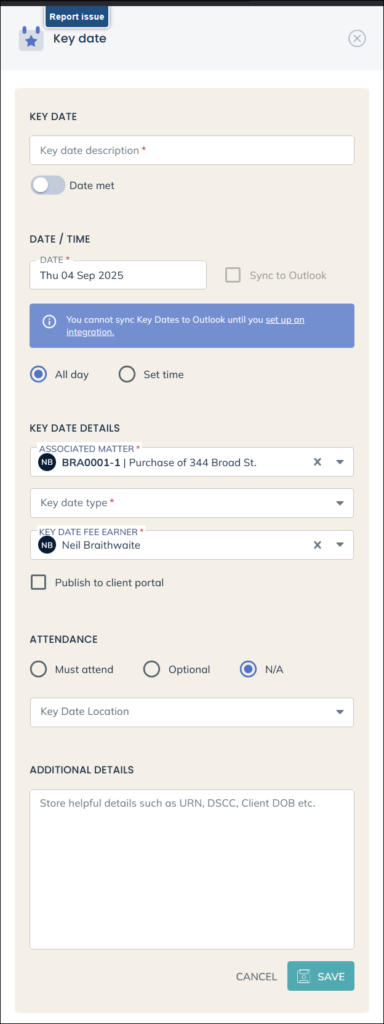
Available fields to complete when adding a key date:
Key date description – a description about the key date. This is a required field.
Date met – you can toggle this setting to set the key date as ‘met’.
Date – set the date for the key date
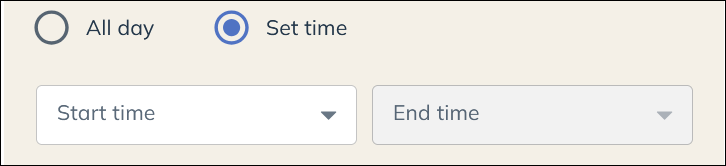
All day / Set time – if you choose Set time, you can set a start and end time.
Sync to Outlook – when selected, your key date will sync to your Outlook Calendar, so it’s visible in both Osprey your Outlook. You will need to validate your Office 365 account by clicking ‘Set up an integration’. This only need to be done once.
Associated matter – shows the currently loaded client and matter but you may choose another.
Key date type – Select the Key Date type from the dropdown menu. This is a pre-set list by your supervisor.
Key date fee earner – Select the fee earner associated with this key date using the drop down list.
Publish to client portal – For users who have our Client portal set up, ticking this option enables the client to see the key date in the portal.
Attendance – You can choose from Must attend, Optional or N/A
Key date location – choose a Key date location from the drop down list. If you wish to add unique locations, specific to your firm, please contact the support team and provide a list you’d like to upload.
Additional details – you may enter any relevant information here associated with the task, appointment, or meeting.
Once the boxes have been completed click SAVE to create the key date.
Viewing your key dates
You can view a list of your key dates in three places in Osprey.
- From the Coming up panel, which shows your unmet key dates. This can either be found on the matter workspace (and so is showing only key dates associated to that matter) or on your Osprey home page which is all key dates assigned to you.
- From ‘All key dates’ in the main navigation. This shows all key dates across all matters in Osprey in a table view.
- From the Matter workspace key date tab, which is a table view of all associated key dates for that matter.
View your key dates: The Coming up panel
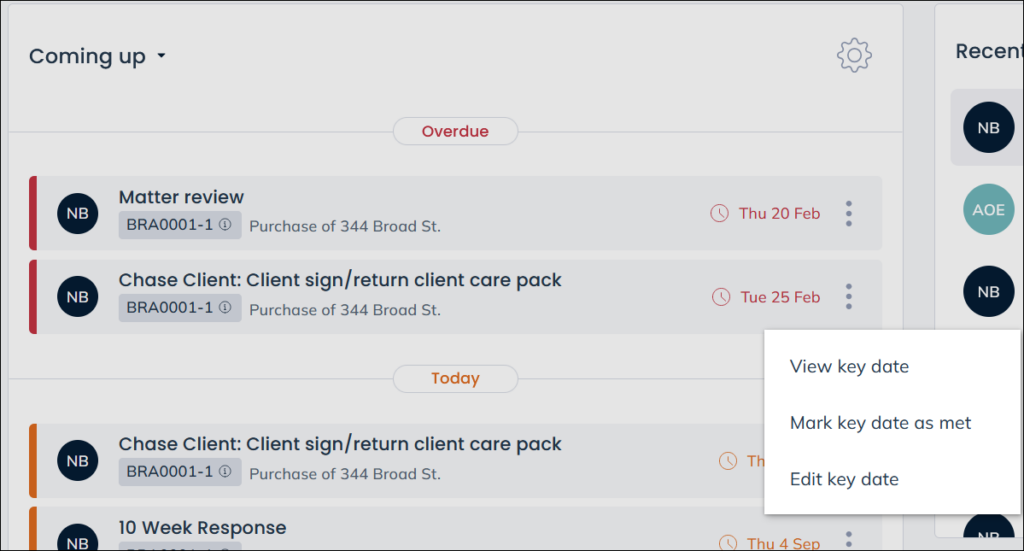
The coming up panel is visible on your Osprey home page as well as the matter workspace. The panel will show outstanding key dates and matter review tasks including overdue, today’s tasks, and upcoming actions.
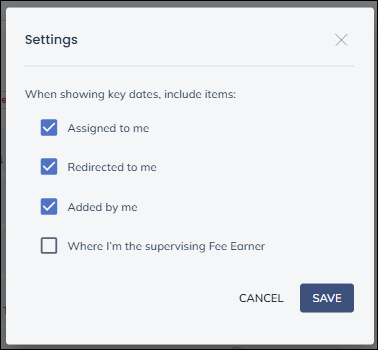
When shown on the home page, the Coming up panel, by default, displays all your key dates, across all your matters. Using the cog setting icon, you can select different option including, show key dates that are assigned to me, redirected to me, added by me, where I’m the supervising Fee Earner.
When shown on the matter workspace, the Coming up panel displays all the key dates associated to that matter.
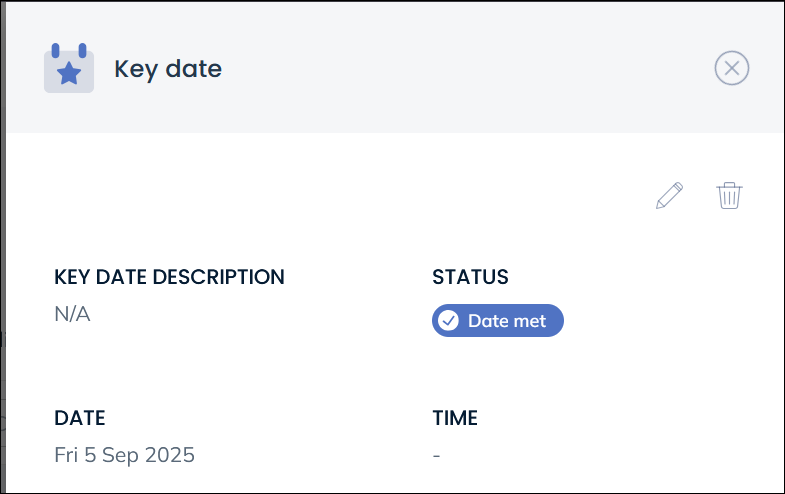
Simply click on each key date to view additional information. When clicked, the key date panel will appear to show you all information inputted about that key date.
Clicking the ellipsis will show a short menu with options to: view key date, mark key date as met and edit key date.
View your key dates: All key dates
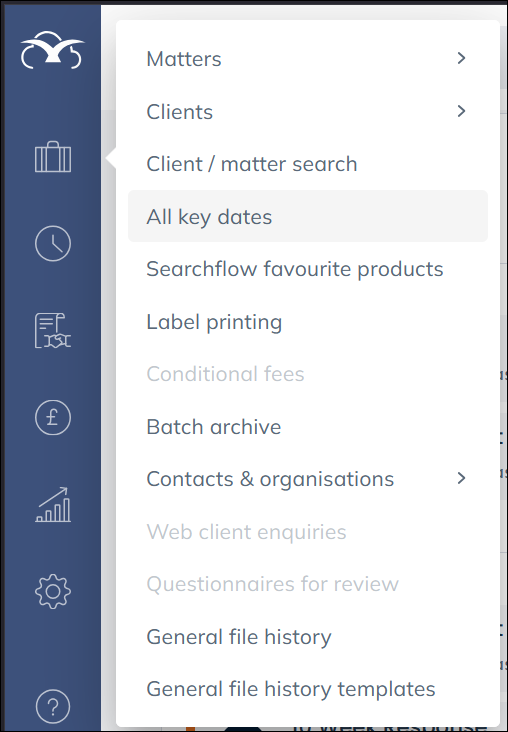
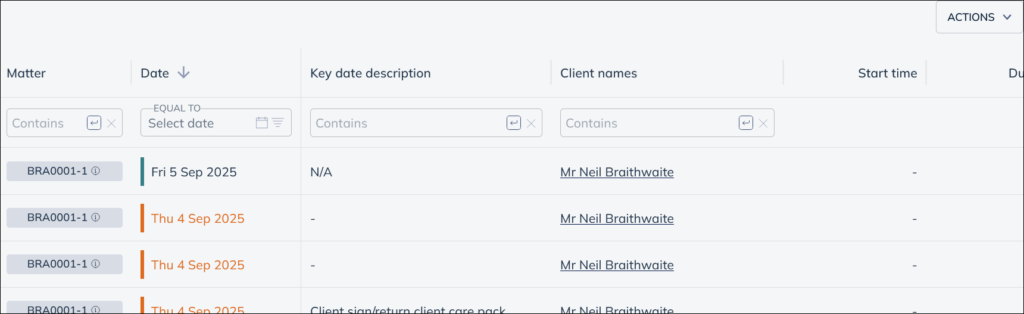
You can view all key dates, across all matters in Osprey, by going to the Case management area in the main navigation menu and clicking All key dates.
The key date table enables you to filter and search the data as needed. Use the search bars to search the column and display only the data you need. You can drag and drop the columns to change your view.
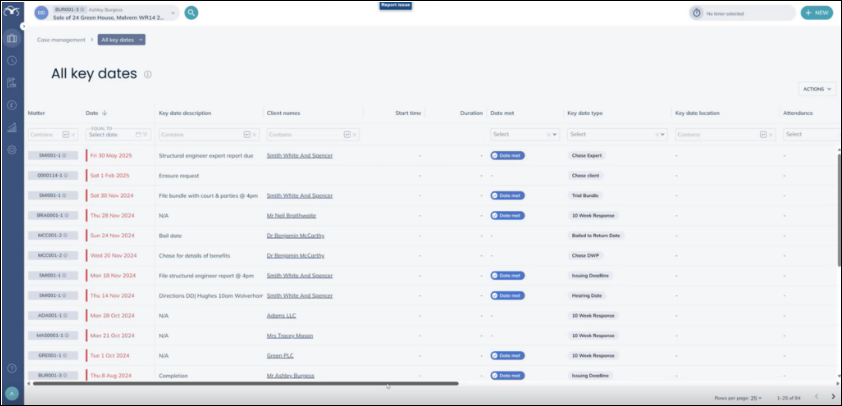
Clicking the key date will open the view key date panel which shows the details of the key date and gives you the options to edit or delete the key date
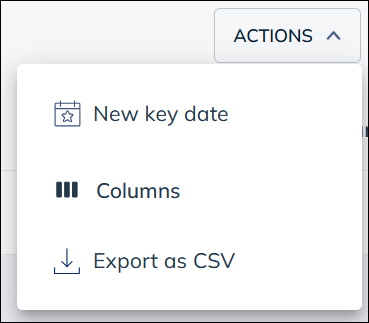
Above the key date table, on the right, is the Actions button. From here you can choose to add a New key date, view and edit the Column display, and Export the table as CSV. Exporting the table will export all key dates, regardless of the filters that are selected.
Clicking Columns enables you to customise your table view. The display will list the column options which you can add or remove from your view.
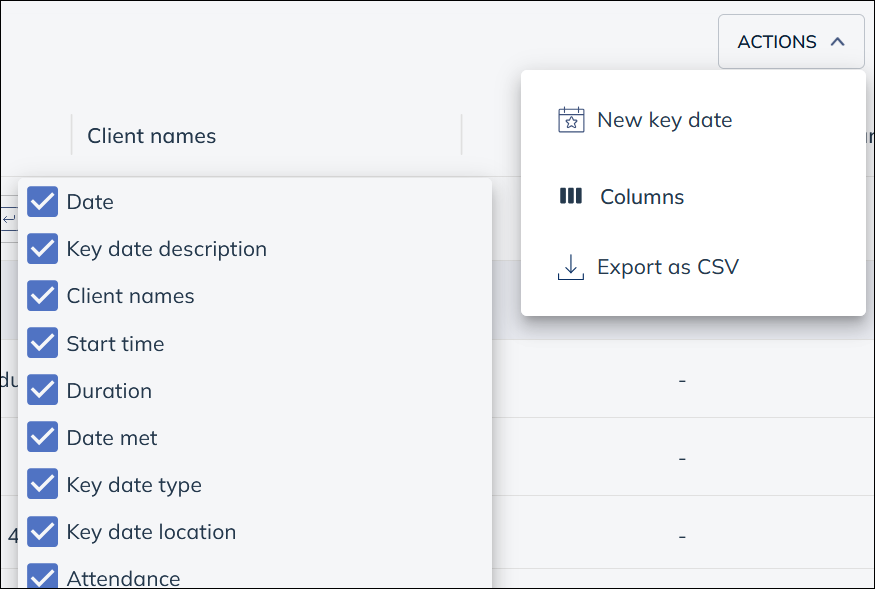
Available columns:
- Matter
- Date
- Key date description
- Client names
- Start time
- Duration
- Date met
- Key date type
- Key date location
- Attendance
- Additional details
- Holiday status
- Fee earner
- Fee earner Legal Aid PIN
- Created date
- Created by
- Updated date
- Updated by
View your key dates: Matter workspace key dates
From the Matter workspace, there is a key dates tab that enables you to view all key dates for your selected matter in a filterable and searchable table view.

The key date table enables you to filter and search the data as needed. Use the search bars to search the column and display only the data you need. You can drag and drop the columns to change your view.
The table works in the same way as the All key dates table described above. Refer to the above section to understand how to customise the view of the table.
Sync key dates to Outlook
Key dates added to Osprey can be synced to your Outlook calendar. This helps you stay compliant and increases visibility of your calendar. When you add, edit, or delete a key date in Osprey that is already synced with Outlook, the amendments will automatically sync too.
Setting up the integration with Outlook
Ahead of syncing key dates to Outlook, you’ll need to set up the integration. If your integration is not yet set up, you’ll see the warning box displayed below. Simply click the link ‘set up your integration’ and you’ll be taken through a simple Microsoft authentication process that takes less then one minute. Once complete, you’ll be able to sync key dates with Outlook.


How to sync a key date with Outlook
You can choose whether to sync your key date with Outlook when adding or editing the key date. Simply tick the ‘Sync with Outlook box’.
This will automatically push the key date into your Outlook calendar. Within Outlook, the calendar block will display the matter number, key date description, and the client surname.

Within the body of the calendar block, you’ll see attendance status, associated Fee Earners, and additional details.
Osprey Key Dates – demo walkthrough
Watch our full demo of the upgraded Key Dates feature in Osprey. This walkthrough shows how to record, track, and manage important deadlines across all matters, with improved views and streamlined tools to make staying organised easier. Perfect for fee earners, managers, and partners who want to get the most from Key Dates.