Adding and Managing Key Dates
Updated Jun 19th, 2024
Who is this guide for?
Any Users
Osprey allows users to add Key Dates to their matters as a reminder to do something on the matter. This guide will take you through your options
Adding a key date
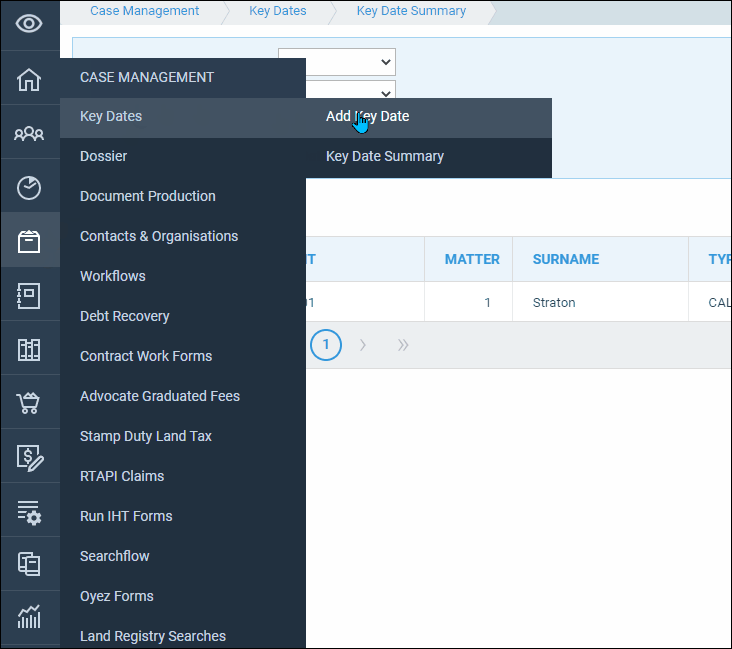
Key dates can be added from the Case management area of Osprey. Navigate to Case Management – Key Dates – Add Key Date
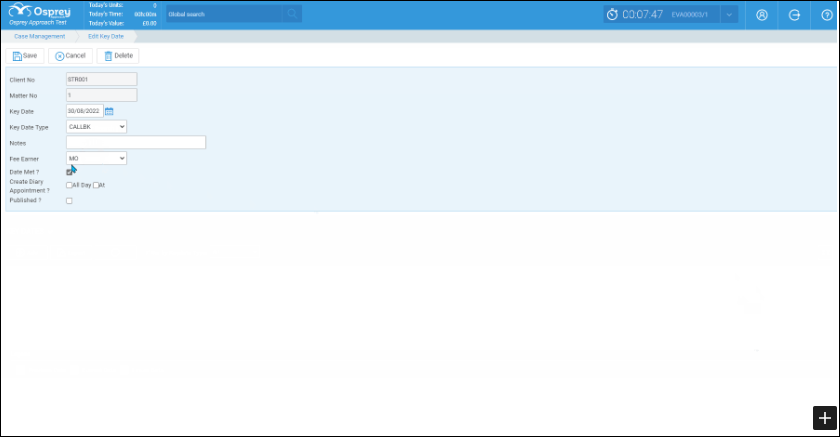
In the page that opens up you can now enter the details for the Key Date, Once the boxes have been completed click SAVE to create the key date.
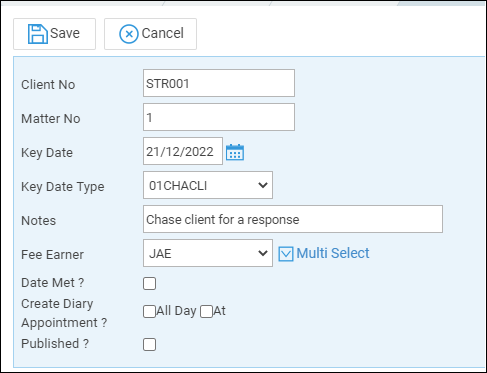
Client and Matter number – shows the currently loaded client and matter. You cannot change that on this page so ensure you have the correct client and matter loaded before creating the Key Date
Key Date – Type or select a date from the calander for the Key Date
Key Date Type – Select the Key Date type from the dropdown menu. These are set up by your supervisor.
Notes – Displays the detail for the Key Date type previously selected
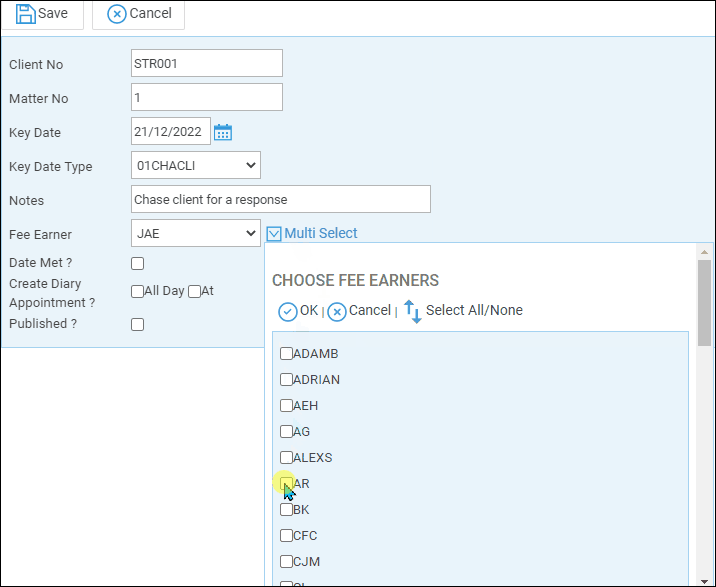
Fee Earner – Select the primary fee earner associated with this key date using the drop down list. If more than one Fee Earner needs to be aware of this key date you can use the Multi Select button to choose additional Fee Earners
Date Met – Once your Key Date has been met, place a tick in this box.
Create Diary Appointment? – For office 365 users you can place a tick in one of these boxes to create an outlook diary appointment/reminder for the Key Date
Published? – For users who have our Client portal set up, placing a tick here will allow their clients to see the key date in the portal.
Viewing your key dates & your key date summary
You can view a list of your key dates in three places in osprey.
- From the Home screen
- From the Case Management Key Dates Screen
- From the Key Date Summary screen
The home screen
Navigate to the Home Screen, on this screen you will see two lists for key dates, Your Key Dates and Key Dates Added by you. Your key dates shows a list of key dates with which you are associated as the fee earner, and Key dates added by you shows a list of key dates that you have created but are not directly associated with.
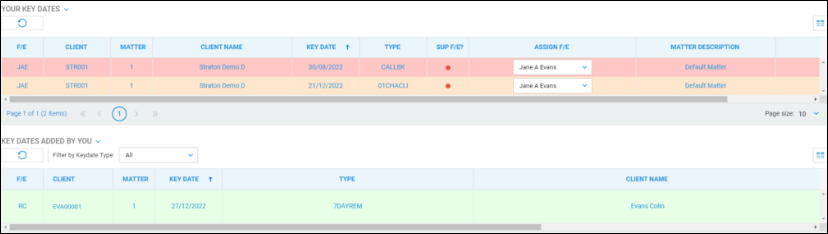
Red key dates are overdue for attention
Key dates in Orange are due for attention today
Key dates in Green are due for attention in the future.
Both of these lists are interactive and you can navigate directly to the key date on the matter by left clicking on the line of the key date and choosing select.
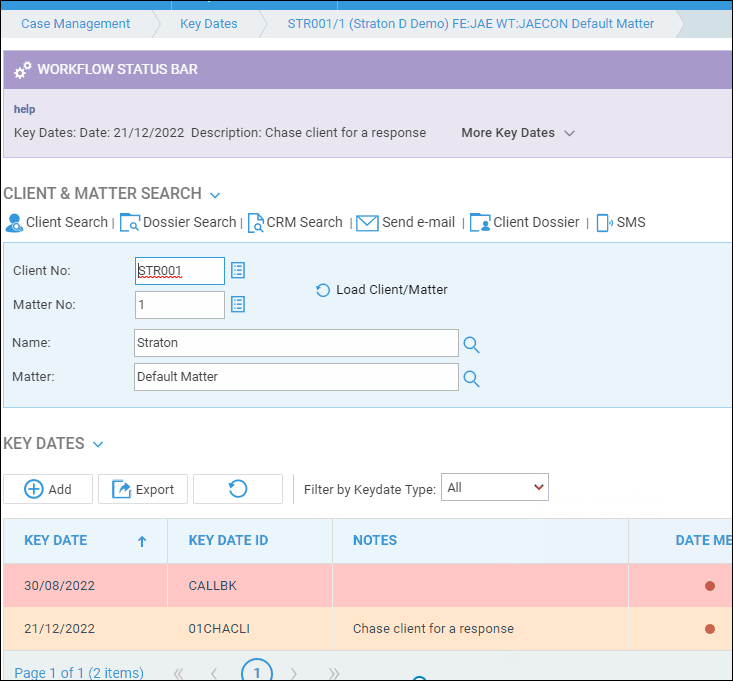
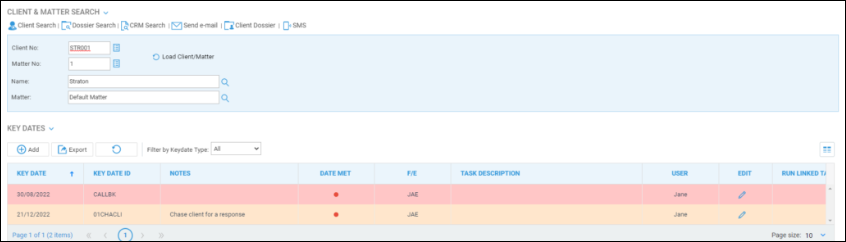
Case Management
Navigate to Case management – Keydates. This will open the page showing all of the key dates on the currently loaded matter
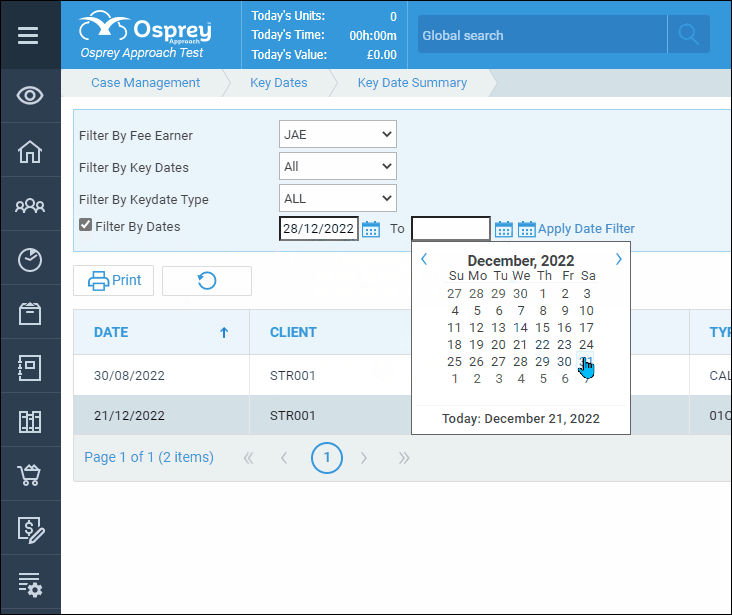
Key date summary
Navigate to Case management – Key dates – Key Date Summary
In this screen you can choose which key dates you want to view, this screen is not interactive as with the home screen, but the results can be printed to enable further review.

1. Filter By Fee Earner – Using the dropdown arrow choose the fee earner for whom you want to view their Key Dates
2. Filter by Key Dates – Use the dropdown arrow to filter by Met or Unmet Key dates for the selected fee earner.
3. Filter by Key Date Type – Use the dropdown arrow to filter by a key date type.
4. Filter by Dates – Enables boxes to select a date range for key dates associated with the selected fee earner. You can either type the date into the box or use the calendar to select a date
Managing your key dates
From the key date list in the case management area you can amend the details of the key date or mark the key date as being met.
Navigate to Case management — Key dates
To edit the details, click on the pencil icon on the row you want to edit under the EDIT column

This will open the same details screen used when creating the key date. You can now edit any of those details except the client and matter numbers.
From the lists in the home screen you can change the Fee Earner associated with the key date. Navigate to the Home Screen. On the row of the key date you want to re-assign use the drop down list in the box under the Assign F/E column to select a new Fee Earner.
You will see a message asking if you want to proceed, click ok on this to confirm the change. This Key Date will now no longer appear in the Your Key Dates List.

Mark key date as met
Once you have completed any actions, you will want to mark that key date as being Met. This will stop any reminders and remove the key date from the lists on the Home page. The met key dates will still be visible on the key date page in the case management section.
Navigate to Case management – Key Dates, or select the key date from the home page as previously described. All keydates that are not met will have a small red dot in the DATE MET column. Click onto the pencil icon in the EDIT column, place a tick into the Date Met box and click save. The key date will now be marked as met. It will have a small green dot in the DATE MET column