Adding Remuneration Types
Updated Feb 23rd, 2026
Who is this guide for?
System Supervisors
This guide will take you through the process of adding new remuneration types
First, we will look at adding a new remuneration type. The second part of the guide will look at amending an existing remuneration type.
Adding your remuneration type
To add a Remuneration Type, navigate to Supervisor> Code setup and select Remuneration types.
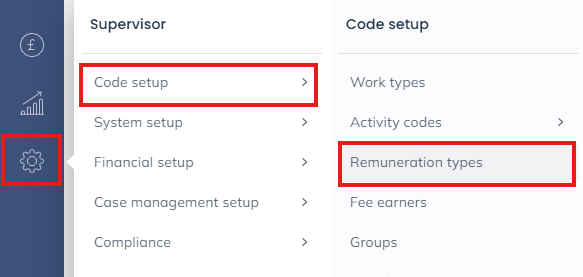
Then select the New button at the top of the screen.
The below screen will then appear.
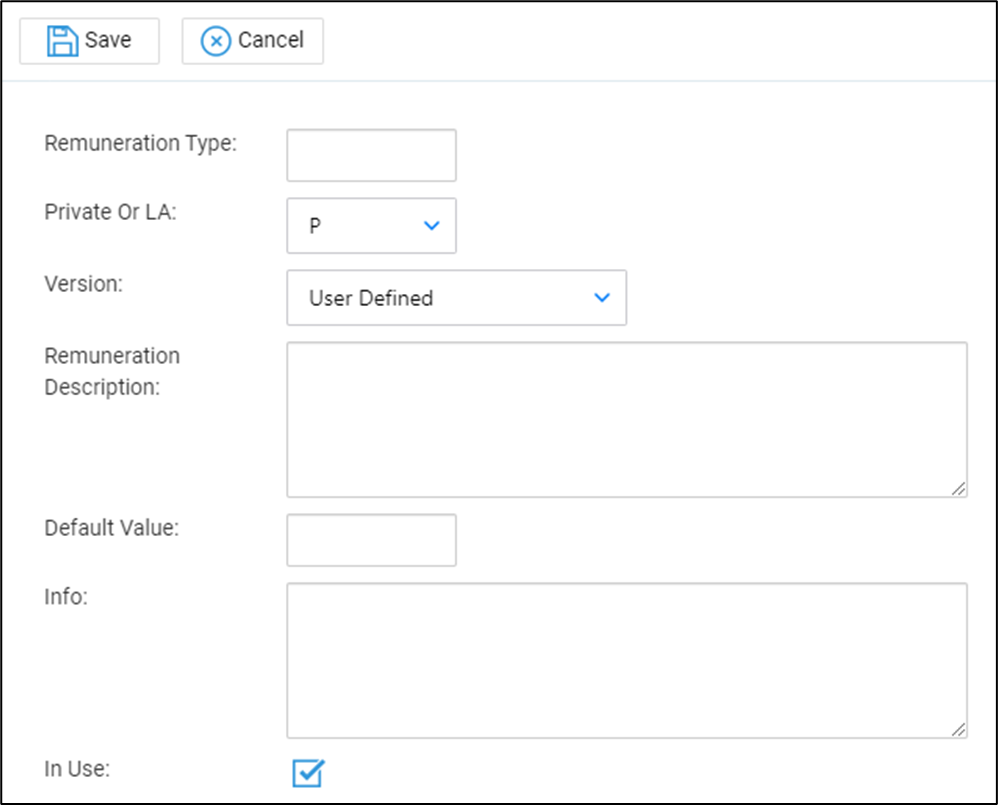
Enter the Remuneration ID, avoiding using spaces or other special characters.
Leave Private or LA on P, and Version on User Defined.
Enter the Remuneration Description.
Enter the hourly rate in the Default Value box. This is the value per hour which will be charged by any fee earners who are NOT linked to this remuneration type.
Enter further info in the Info box if required, and leave In Use ticked if you want to be able to use this Remuneration Type when setting up new matters.
Click Save when finished. Your new remuneration will be added to your list, ready to be linked to your fee earners.

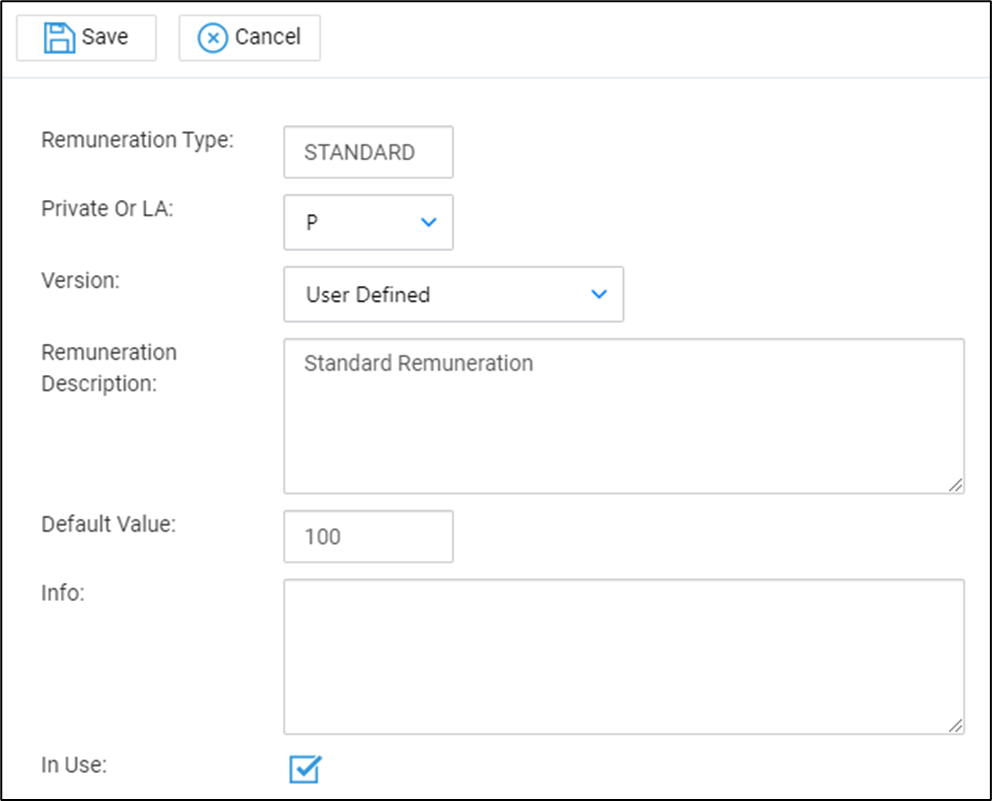
Editing a remuneration type
You may amend your remuneration types by navigating back to Supervisor > Code Setup > Remuneration Types and selecting the Edit (pencil) icon.
You may amend any details other than the Remuneration ID or whether it is private or legal aid.