Checking Out a Document for Editing
Updated Feb 25th, 2026
Who is this guide for?
Case Workers
This is a step-by-step guide showing users how to check out a document for editing
Osprey’s check out functionality allows you to “check out” a document for editing, preventing other users from also making amendments, and keeping a history of revisions available for preview and downloading.
Checking out
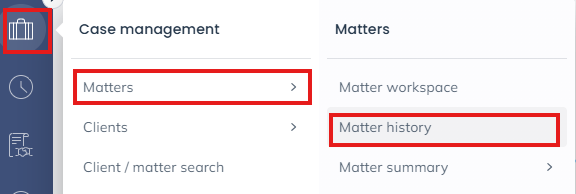
To check out a document, navigate to the matter history by selecting Case Management.
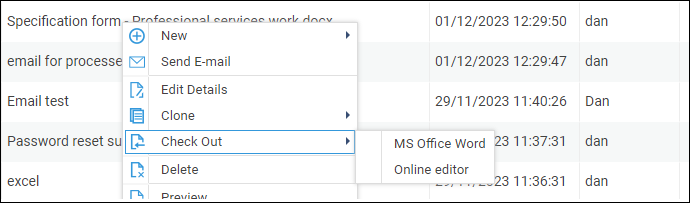
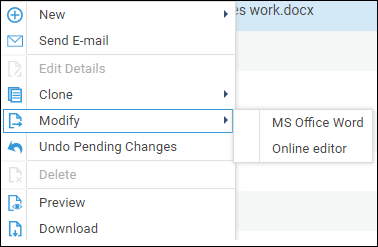
Right-click the desired document, and select Check Out
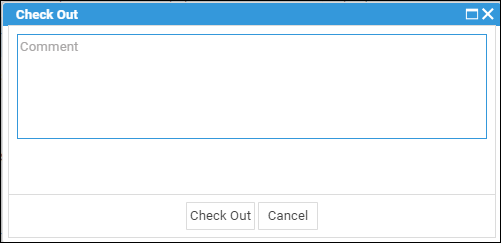
A prompt will appear. You can leave an optional comment, then click OK
Word will now open, allowing you to continue editing the document.
Checked-out document options
Documents that are checked out will display the details within the Items Details pane under Checked Out Info.
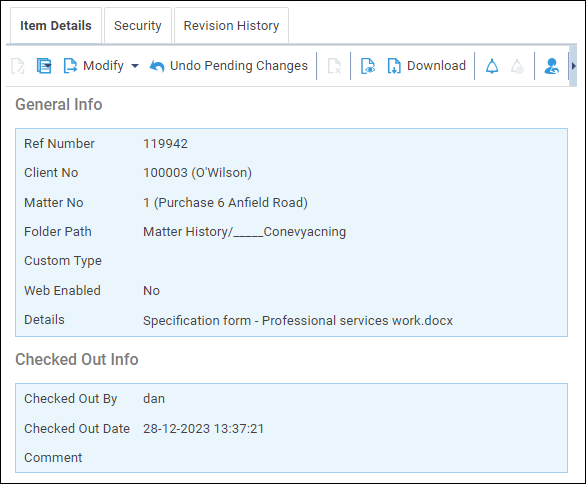
If you right-click this document again, you will see a new set of options.
Other users who try to modify this document will have these actions greyed out, preventing any other users from making changes until the document is checked back in.
Saving in options
When you have finished with any amendments, close the document.
Osprey will then present a Check In screen. You are required to leave a comment at this stage.
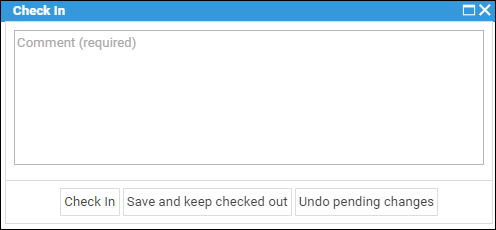
Click Check in. The document will now be saved, with previous versions visible within the Revision History.
If you wish to save your progress but keep the document in a checked-out state, select Save but keep checked out.
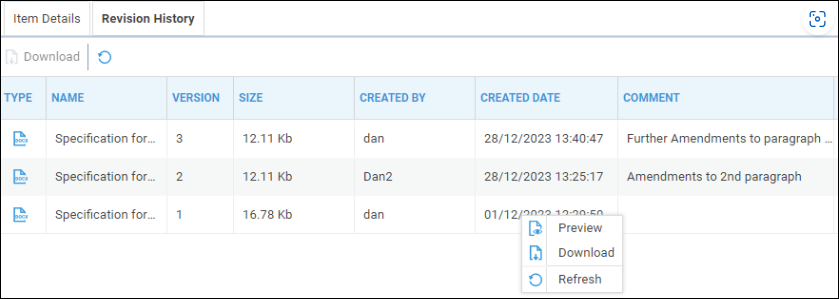
Revision history
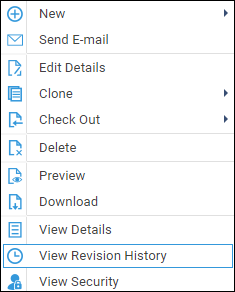
To view the Revision History, right-click the document, and select Revision History.
A history of the amendments to the document will be visible, along with any comments.
Previous versions can be downloaded or previewed by right clicking the relevant version.