Clear Temporary Files, Cache and Cookies
Updated Feb 20th, 2026
Who is this guide for?
Any Users
This guide will take you through clearing your temporary internet files
Several problems can be caused by the temporary internet files folder being full of files which are out of date or otherwise not required. This can include incorrect figures on screens and/or reports, or other error messages to appear.
Before clearing your temporary files you must ensure all browser windows are closed. Please choose your browser from the list on the right.
Google Chrome

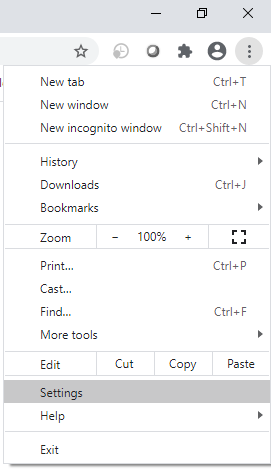
Log out of Osprey, then navigate to the top right corner of Chrome and click the Menu button, highlighted below:

Click the menu button and select Settings.
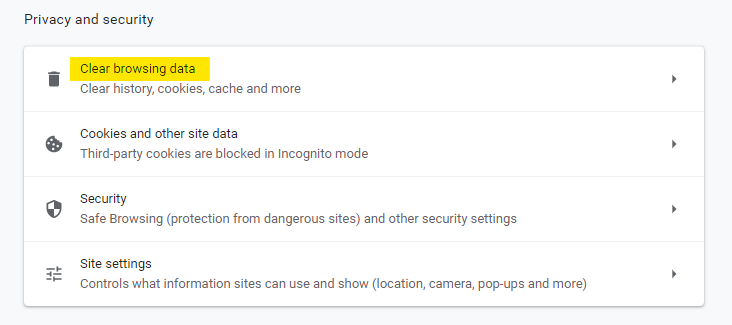
Scroll down to the Privacy and Security section. Select Clear Browsing Data
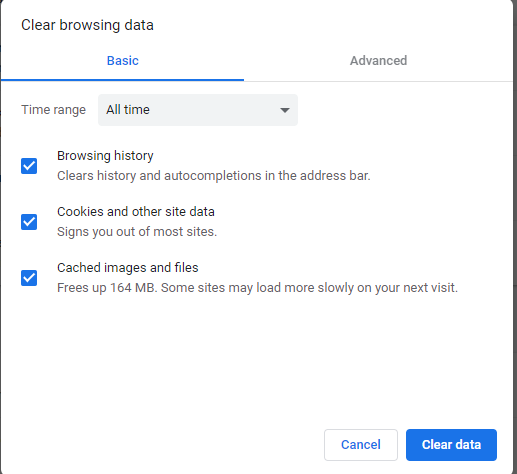
Ensure that Cookies and Other Site Data and Cached Images and Files are selected and that the Time range is set to All Time. Click Clear Data.
Microsoft Edge

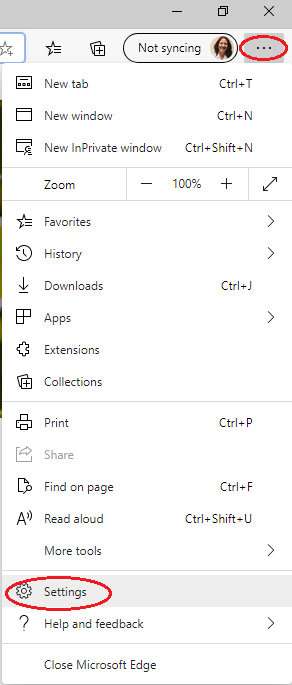
Log out of Osprey and click the … menu button in the top right hand corner of Edge. Select Settings.
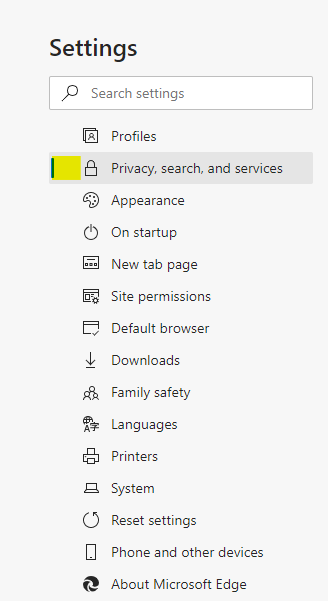
On the left hand menu, select Privacy, search and services
Click the Choose What to Clear button in the main screen.

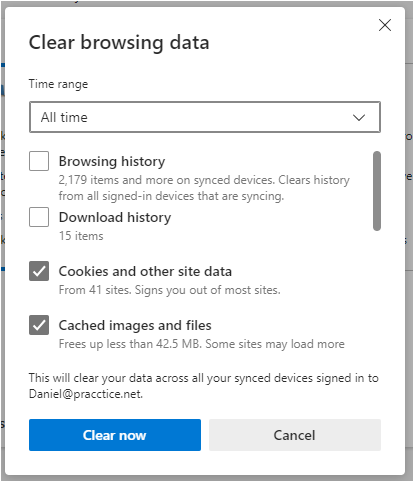
Ensure that Cookies and Other Site Data and Cached Images and Files are selected, and that the Time Range is set to All Time. Click Clear Now.
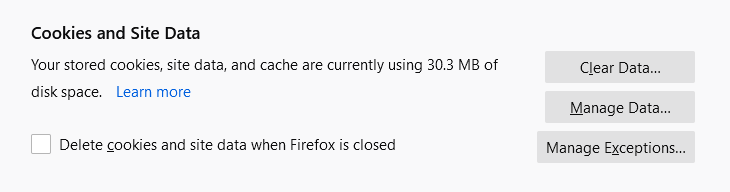
Mozilla Firefox

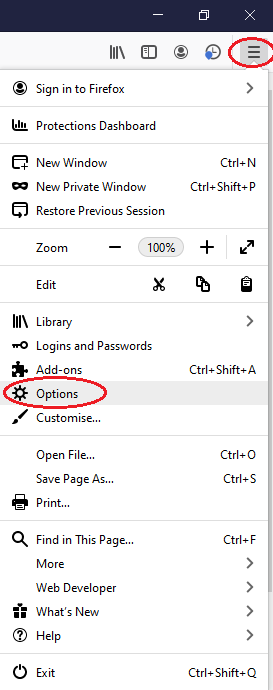
Log out of Osprey and click the menu button in the top right hand corner. Select Options.
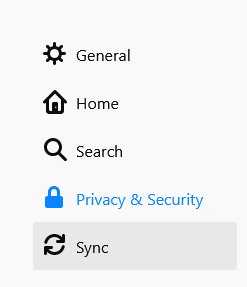
Select Privacy and Security.
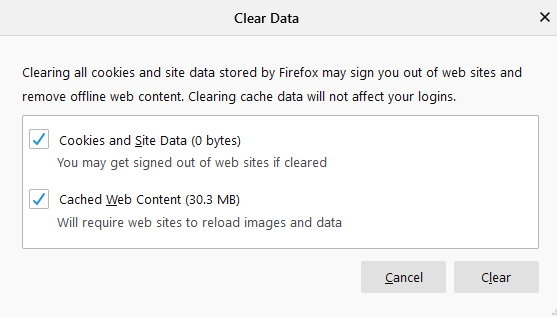
Scroll down to the Cookies and Site Data section, and click Clear Data.
Ensure both boxes are ticked and click Clear.
Windows Temporary Files
Other temporary files are stored in a folder under your local network username. These should also be removed to ensure the smooth running of Osprey Approach.
Navigate to your local files on your computer. If you don’t know how to access these you can do the following:
Hold down the Windows Key on the keyboard and select the ‘R’ key to bring up the ‘Run’ box. Enter %temp% in the ‘Open’ box and click ‘OK’.
File explorer will open to a folder named ‘Temp’

This contains all of the temporary files saved locally on your machine.
To clear these, hold down the ‘Ctrl’ key and then click the ‘A’ key on your keyboard to highlight all of the files. Then click ‘Delete’ to remove them.