Client & Matter Tables
Updated Feb 17th, 2026
Who is this guide for?
Any Users
Improved visibility of your client and matter data
Released May 2025
Osprey’s client and matter tables provide enhanced visibility of data for all users of Osprey. Without the need to create custom reports, all users can access their client and matter data, including custom data, in the configurable tables. View all your data in one-place with easy filter and sort options, so you can stay organised and ahead.
GET STARTED
The client and matter tables are only available on v1.5. Contact your CSM or the support team to get access to the new client and matter tables and start your migration to v1.5.
Accessing tables
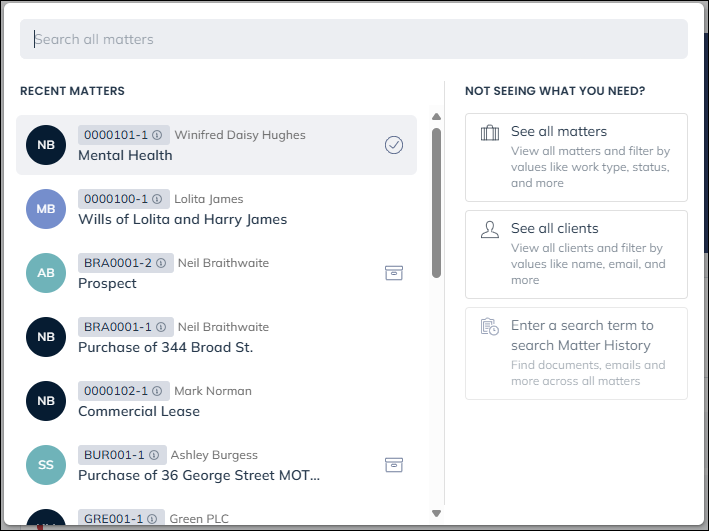
Client and matter tables can be accessed by clicking in the search bar and then clicking ‘See all matters’ for the matter table, and ‘See all clients’ will display the clients table.
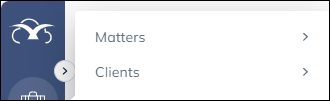
Alternatively, you can use the Case management menu option. Clicking ‘Clients’ will show the Client table, and clicking ‘Matters’ will take you to the Matter table
Client table
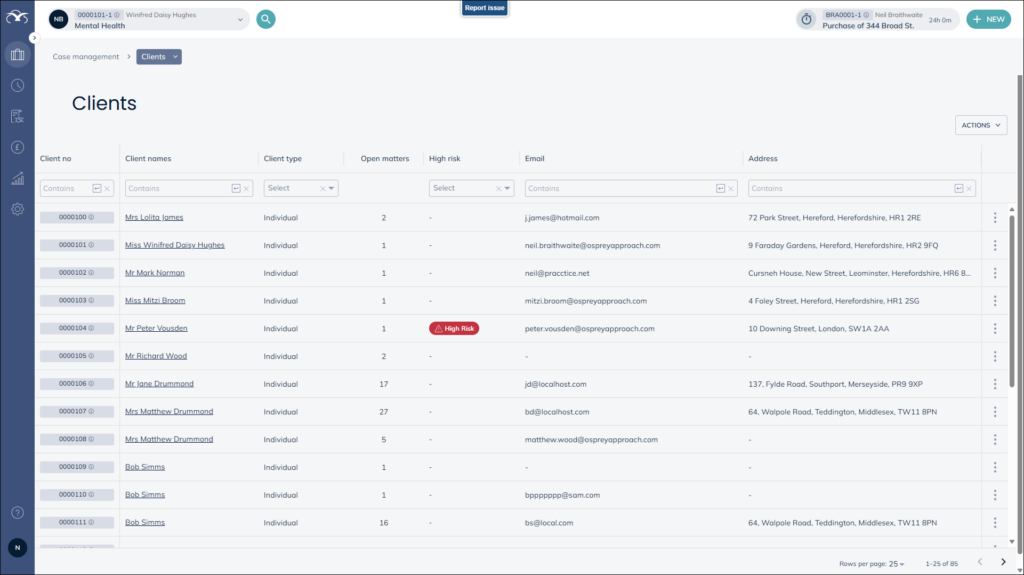
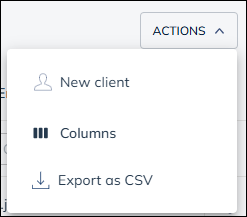
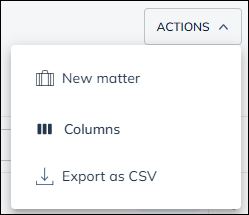
Clicking the Actions menu you may create a client by choosing New client, you can also open the list in Excel by choosing Export as CSV.
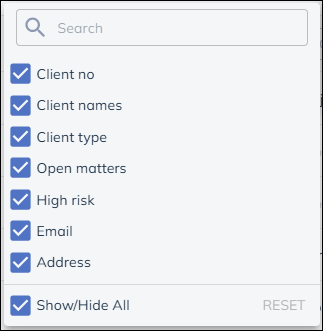
The option Columns shows a list of columns you can untick (hide) and tick (reveal) the information you wish to see listed.
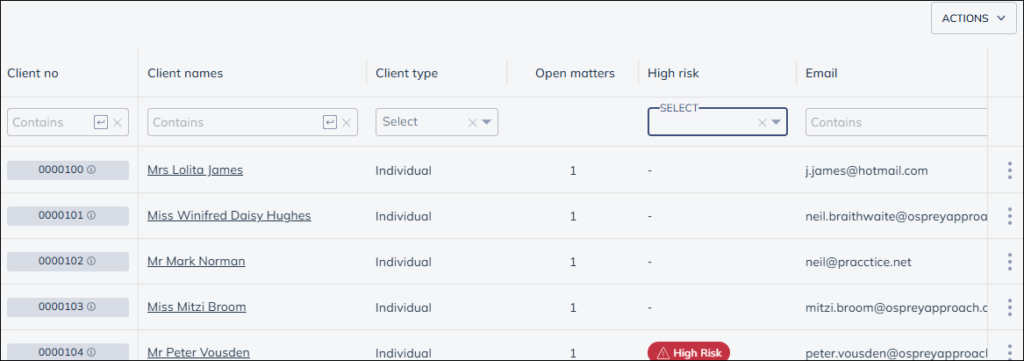
The clients table allows you to set filters to search with in it. You can type where it says contains and press return or choose options where it says select.
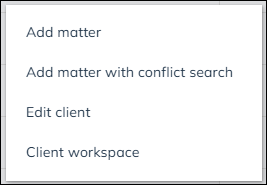
Selecting the vertical ellipsis at the end of each row shows further options which allows you to Edit the client, add matter and view the client workspace
Matter table
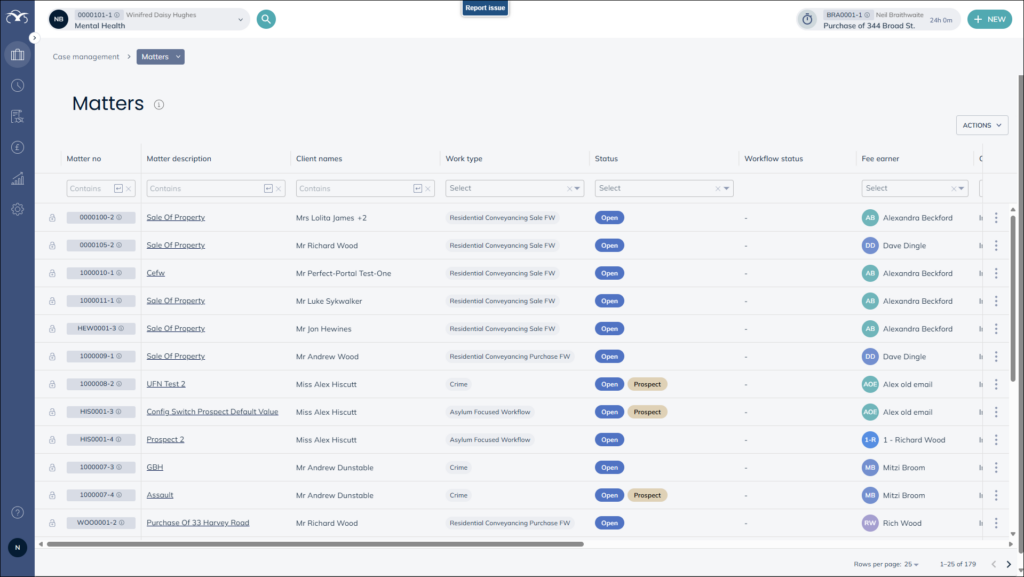
Clicking the Actions menu you may create a new matter by choosing New matter, you can also open the list in Excel by choosing Export as CSV.
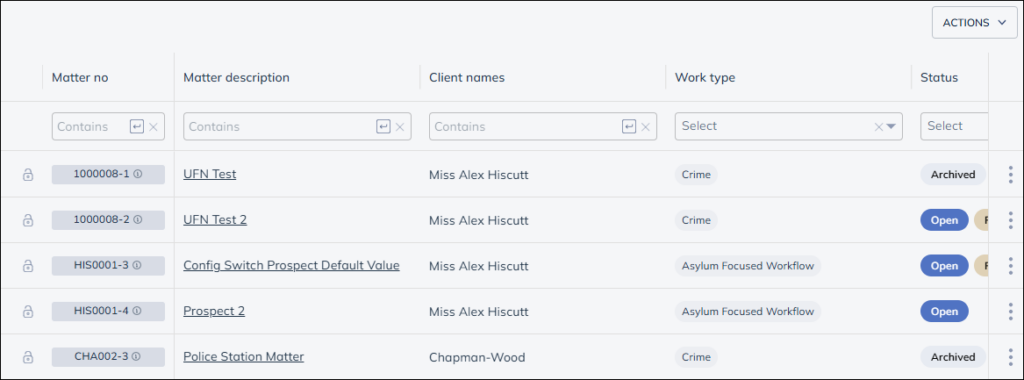
The option Columns shows a list of columns you can untick (hide) and tick (reveal) the information you wish to see listed.

The matters table allows you to set filters to search with in it. You can type where it says contains and press return or choose options where it says select.
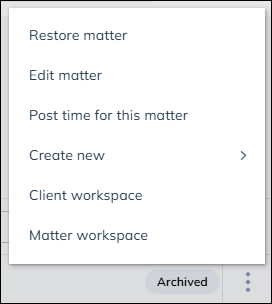
Selecting the vertical ellipsis at the end of each row shows further options which allows you to Edit the matter, post time for the matter, as well as viewing the workspaces and create new documents, emails, key dates and even requisition.