Performing a Conflict of Interest Search
Updated Apr 14th, 2026
Who is this guide for?
Any Users
A Conflict Check is available in Osprey to ensure that you do not add a client who is already present on the system, or another side in the relevant case. This guide will take you through running one
Released December 2024
Conflict of interest searches should be carried out whenever you add a new matter in order to ensure that the other side is not already listed as a client on your system.
When you are creating new clients, a pop-up will display any similarly named clients, to ensure you are aware you may be adding a duplicate client if you continue.
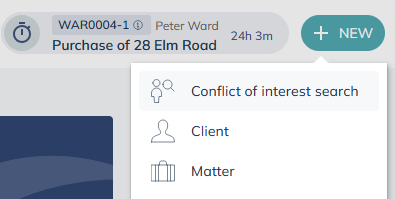
To run a Conflict of Interest Search, select + New > click Conflict of interest search
Enter the details you wish to check for.
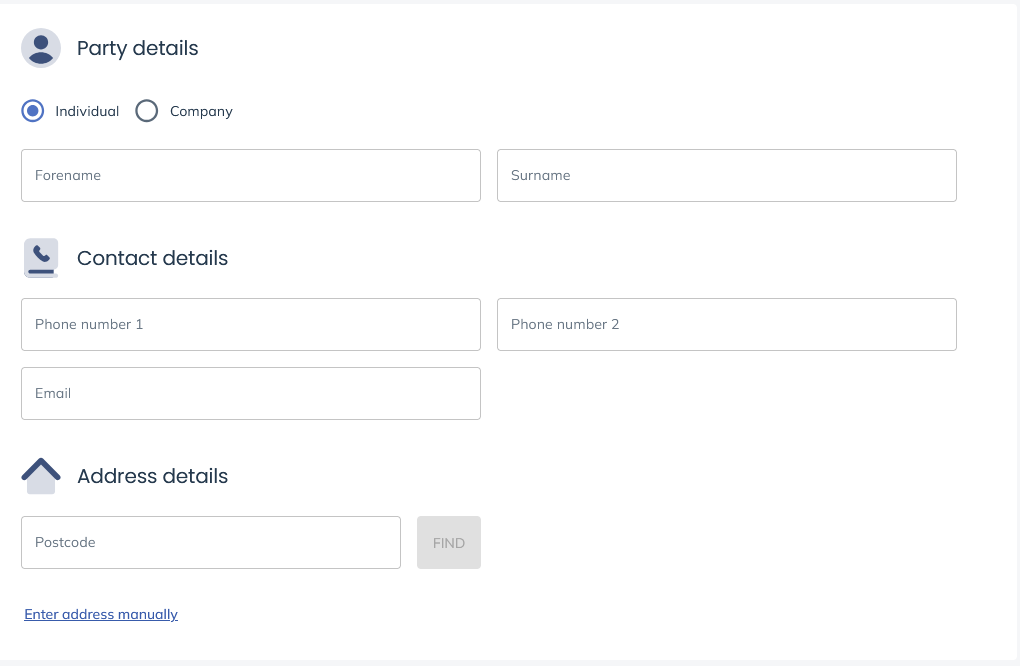
Select Continue
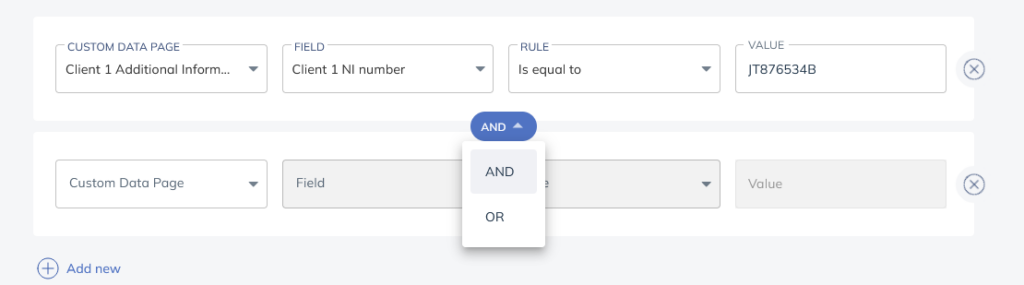
You will then be prompted to do a Custom Data Page Search, this search is optional and the fields can be left blank if you prefer.
Select the page and field you wish to search by selecting the relevant entries in the drop-down lists. Then select a Search Type.
IS EQUAL To will return results that exactly match the specified criteria.
CONTAINS will return results that include the specified criteria but are not necessarily an exact match.
Place the data you wish to search for into the Value box.

You may click on Add new to add more search values
You may refine your criteria search if you wish. The AND setting will enable you to search for results matching all set criteria.
Alternatively, use OR if you wish to find matches for more than one criteria.
Click Continue to run the search.
Any matches will show on the following screen. Hovering your cursor over the Conflict Score column will give you the reasons for the matches.

You can now print or save to a new client’s Matter History or the Matter History of an existing client should you wish.
There are also several other ways to search for clients