Create a Letter to a Contact or Organisation
Updated Mar 12th, 2026
Who is this guide for?
Case Workers, Case Management Supervisors and System Supervisors
You can select a contact or organisation to send an ad hoc letter to – This guide will detail the process required
Using the Browser
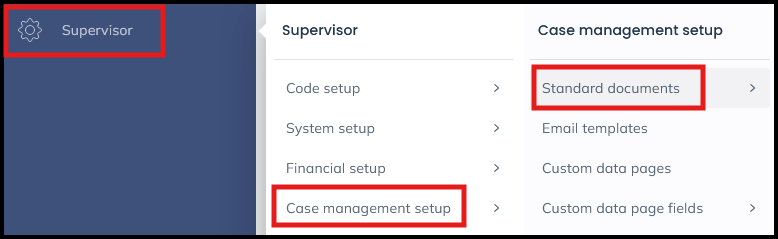
Navigate to Supervisor > Case Management Setup > Standard Documents, then select Add Standard Document.
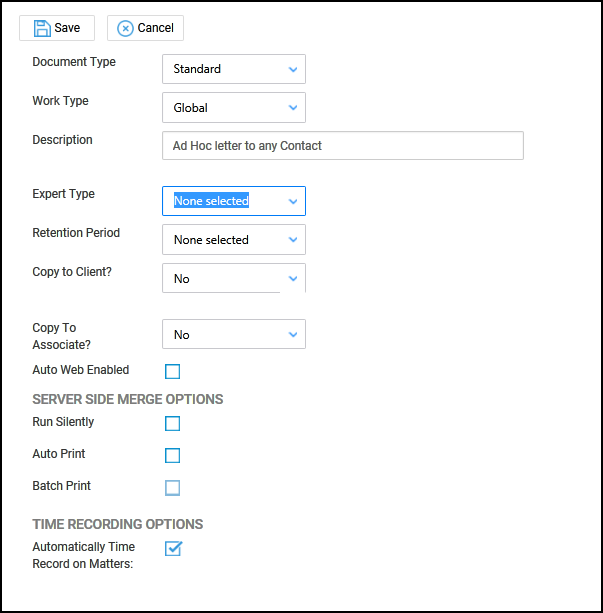
Choose the work type, if any, or leave set as Global to appear on all work types.
Give the document a description.
If this is to be a letter to a certain type of contact (e.g. Estate Agent) then select the relevant Expert Type.
Fill in any other details as relevant.
Click Save when done.
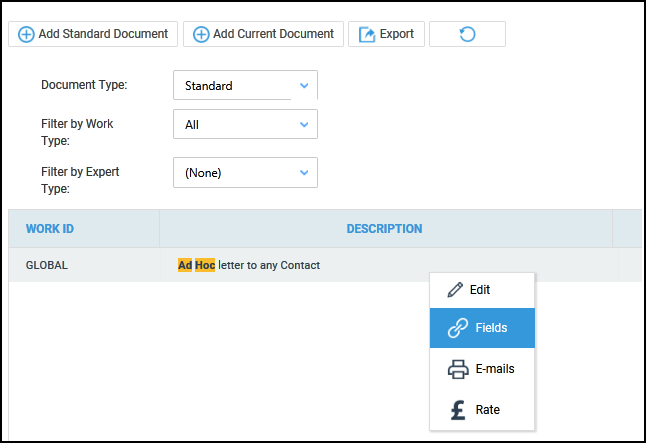
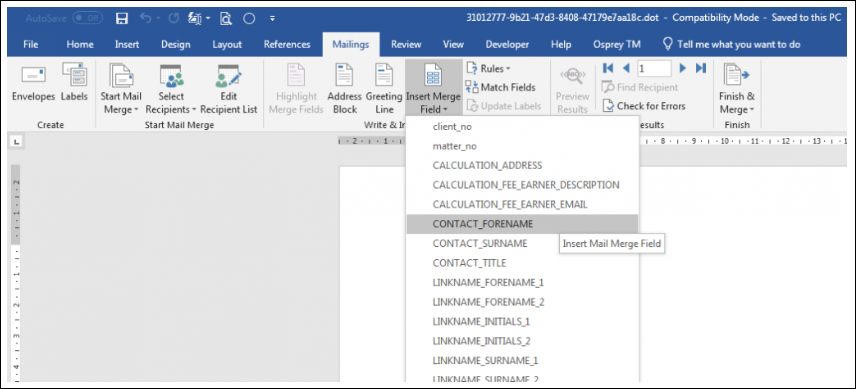
Now, locate the letter within your list, right click it, and select the Fields option:
In the Available Tables box, select Contact if you wish to send the letter to Contacts, or Organisation if you want to send the letter to Organisations:
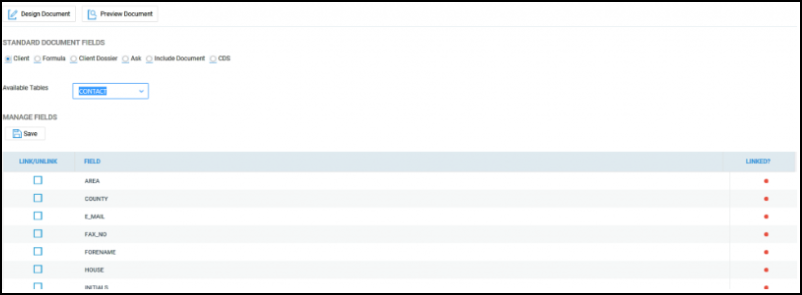
Link any fields you wish to use by ticking the Link/Unlink box and selecting Save when done.
Design your document as required, inserting fields as usual:
Close and save the document when done.
When this document is run from Document Production, you will be prompted to choose the contact / organisation to whom you would like to send the document:
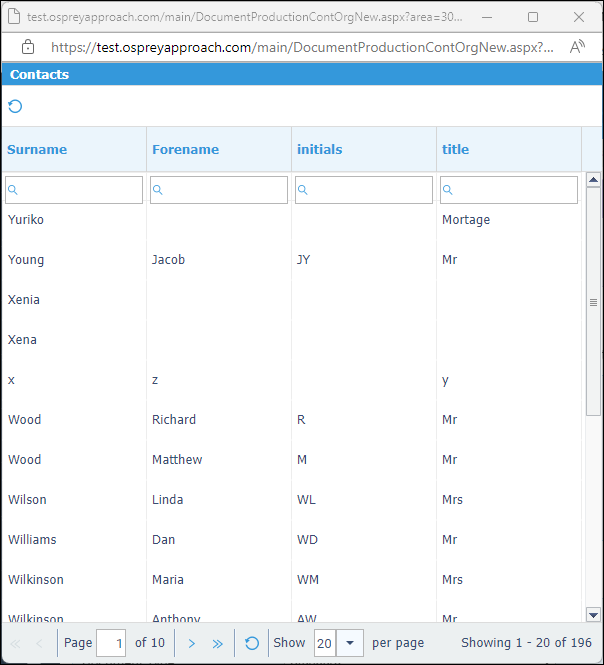
Select the contact / organisation you require and the letter will be merged with the relevant details.