Create a New Standard Document
Updated Mar 2nd, 2026
Who is this guide for?
Case Management Supervisors and System Supervisors
Standard documents can be used to speed up your communication with your clients. This guide will take you through how to add a new one to Osprey
To add a new Standard Document or precedent letter to your system, follow the steps below.
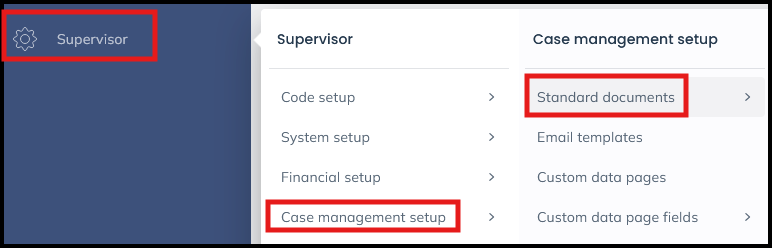
Navigate to Supervisor > Case Management Setup > Standard Documents.
Add Standard Document – use this if you want to create a completely new letter from scratch.
Current Document – use this if you want to create a new document based on an existing document.
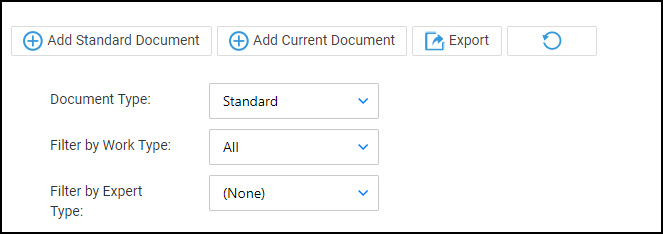
Add Standard Document
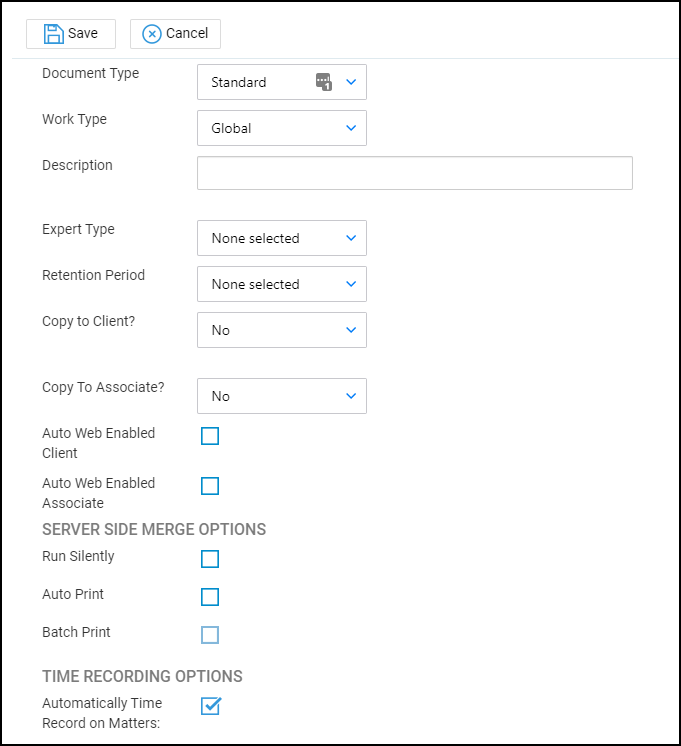
Document Type – leave this as Standard for a Word document to send to your clients. Choose Excel/PDF for the option to upload one of these documents, or choose General to save this document to the General File system.
Work Type – choose the work type you wish this letter to be available for, or Global if the letter is to be available for all clients. Remember that if you have dossier pages specific to your different work types, these will only be available to link into your letter if you have selected the correct work type.
Description – enter a description for the letter e.g. Blank Letter to Estate Agent.
Expert Type – if required, select the expert type to which you would like to send this letter, or leave as None Selected if you wish.
Retention Period – set the retention period for any documents created using this template. If a retention period is set, all letters created using this template will be deleted from the matter history after the set period.
Copy to Client – setting this to Yes will automatically email a copy of the letter to the client’s email address on saving. Setting to No will not give you the option. Setting to Ask provides you with a tick box on the save screen when saving a letter based on this template so that you can decide whether to automatically email the letter to the client.
Copy to Associate – as Copy to Client, but relating to the linked associate if you are using the web portal.
Auto Web Enabled Client – tick this box if you are using the web portal and want all letters based on this template to be web published automatically for your client.
Auto Web Enabled Associate – tick this box if you are using the web portal and want all letters based on this template to be web published automatically for the Associate.
Server Side Merge functions – defunct.
Automatically Time Record on Matters – tick this if you wish to time record your letters easily. (The option to time record can be amended at the point of save).
Click Save when you are done. Next, Link fields to your documents >
Add Current Document
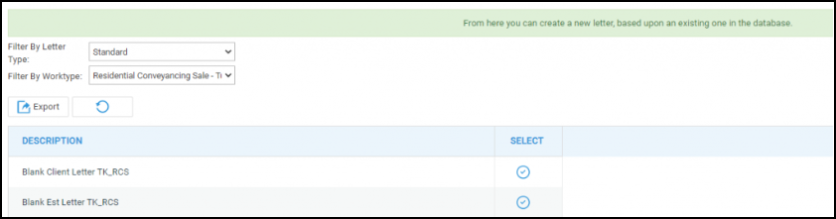
Select the work type you wish to search for existing documents within to base your new letter template on, and click the Select option once you have located it.
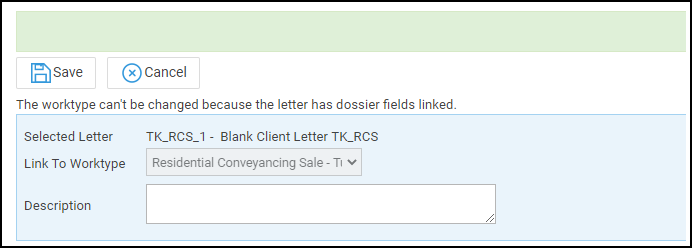
The work type will not be editable, but you can enter a new description for the document template and click Save. This will save an exact replica of the letter you chose to base your new template on. You can now progress to linking fields > and editing the text of the letter.