Creating New Custom Data Fields and Pages
Updated Mar 24th, 2026
Who is this guide for?
Case Management Supervisors and System Supervisors
This guide walks you through the process of creating custom data fields and adding them to a custom data page
You can use custom data pages to store additional data on your matters which can then be merged into your documents.
Creating List Fields
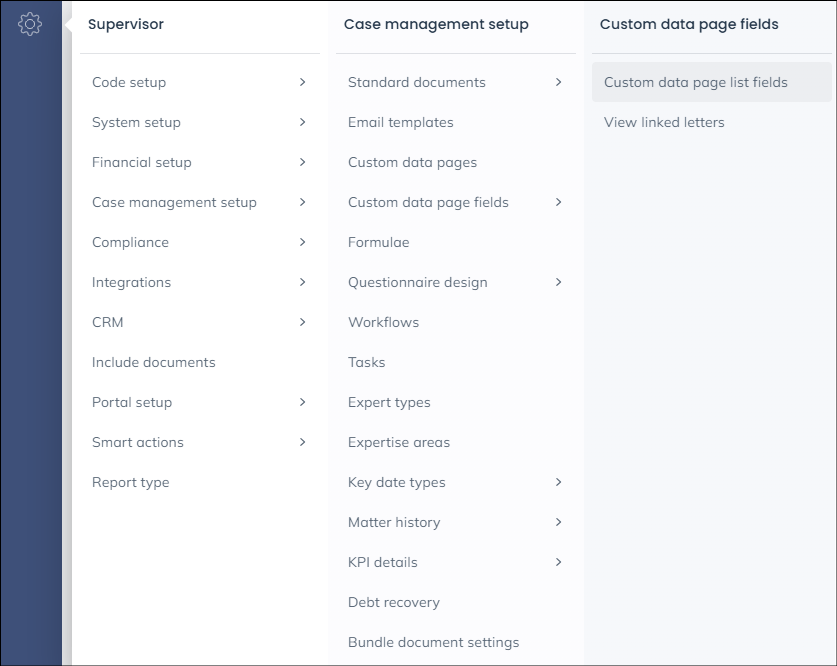
Navigate to the ‘Supervisor’ area within Osprey and select ‘Case Management Setup’ followed by ‘Custom Data Page Fields’ and then ‘Custom Data Page List Fields’.
Select this to open the ‘List Overview Screen’.
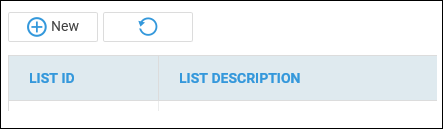
You may select ‘New’ to create a new list.
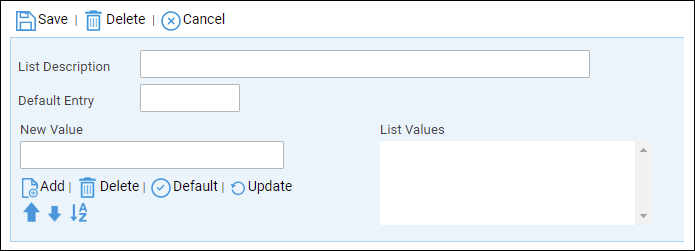
The list description can be up to 60 characters and can include spaces, as it is a description rather than an ID.
Type the first entry in the New Value box and select ‘Add’, you may add as many entries as required.
You may move items up and down using the arrows.
To set the default entry select an item and select ‘Default’.
Finally, select ‘Save’
You will be returned to the list of fields with your newly created one visible in the list, as well as any existing Dossier List Fields set up if any others have been created.
Repeat this process for all list you want to create. Once all lists have been created you will then need to create Dossier Fields to host the lists.
Creating Custom Data Fields
Navigate to the ‘Supervisor’ area within Osprey and select ‘Case Management Setup’ followed by ‘Custom Data Page Fields’.
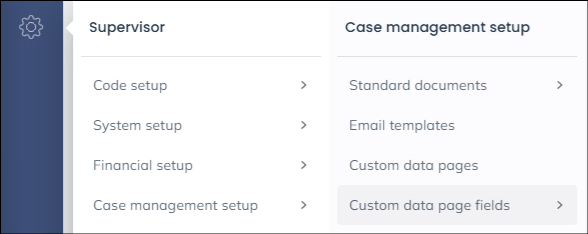
There will be a ‘New’ button available at the top right of the fields table. Click on this.
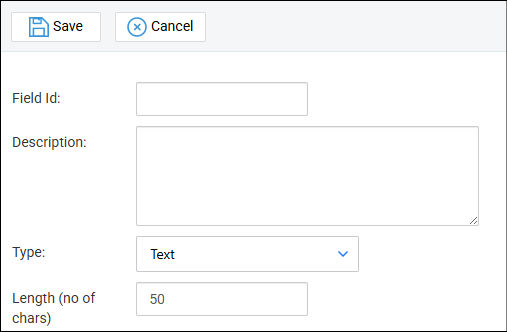
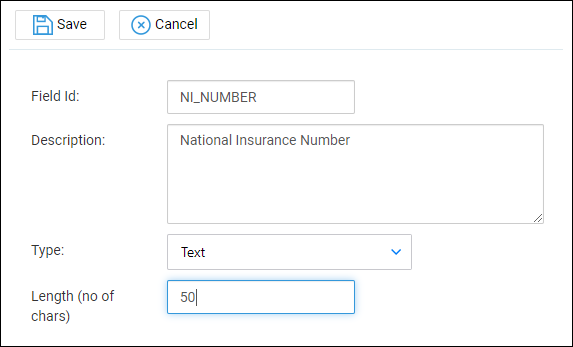
You are now able to enter the new ‘Field ID’ and ‘Description’ to be created. The description will be the name shown against the custom data field. The field ID is shortened text of the description which is used when mapping custom data fields onto your document templates and views.
Please note that no spaces can be used in the field ID so would suggest using ‘_’ in replacement of this. The field ID is also limited to a maximum of 15 characters.
So for example, NATIONAL INSURANCE NUMBER could be created as NI_NUMBER
You will also have to select the ‘Type’ of field you are wanting to create. The following fields are available for selection.
- Address
- Contact
- Organisations
- Date
- Decimal
- Email Address
- Formula
- Integer
- List
- Money
- Text
- Multiline Text
- Web Address
Once we have entered the details for our field, select the ‘Save’ button.
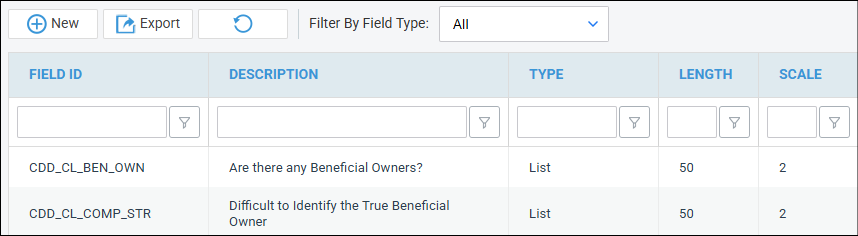
You will be returned to the list of custom data fields with your newly created one visible in the list, as well as any existing fields set up if any others have been created.
Repeat this process for all fields you want to create. Once all fields have been created you will then need to populate these onto the relevant dossier page.
Creating a Custom Data Page
Select ‘Case Management Setup’ under the ‘Supervisor’ area. Then select ‘Custom Data Pages’
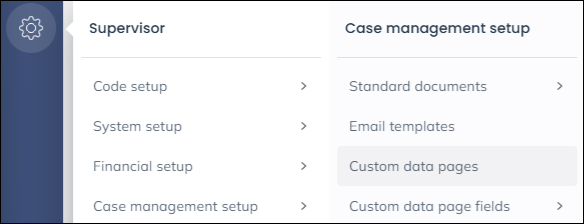
Click on the ‘New’ button in the top right.
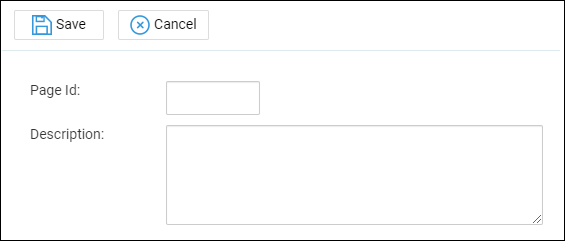
You can now enter the new page ID and description. The description needs to be relevant to the fields stored on the custom data page, so that it can easily be located.
The page ID will be a shorter version of the description. No spaces can be used in the ID, so an underscore will have to be used. The page ID is also limited to a maximum of 15 characters.
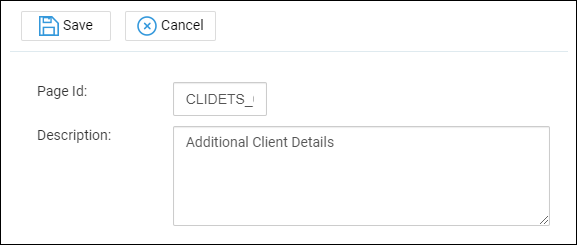
Now select ‘Save’ to be returned to your list of custom data pages, with your newly created one now available for selection.
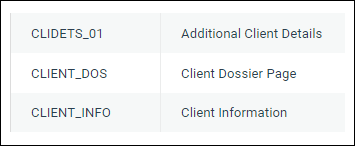
Alongside the name of the new page, when you right click on the relevant page, you will see the following options available:
- Edit
- W/T Links
- Fields
‘Edit’ will allow you to change the page description shown. However the page ID will be greyed out as this cannot be edited once created.
‘W/T Links’ will allow you to link the new page to the relevant work types or to set it as GLOBAL, which means that it will be available across all clients and matters.
The ‘Fields’ option will allow you to link any relevant fields to the page. Please note that pages only allow up to 20 fields to be stored, however you are not limited on the amount of custom data pages you can create.
Once the ‘Fields’ option has been selected you will be shown a new screen with all custom data fields available where you can select the relevant fields to be linked to your new page.
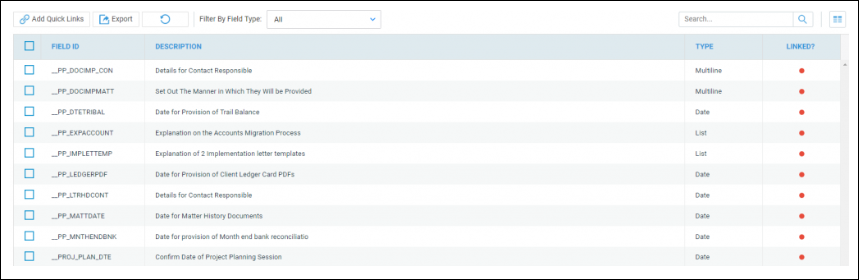
In order to link the fields, select the tick box alongside the relevant fields and the click on the ‘Add Quick Links’ button. You will be able to use the filter search available if you have a lot of fields in order to locate the relevant ones.
Once selected, a green dot in the ‘Linked’ column will denote that this field is linked to your page
Once you have located and linked all fields required you will then have the option to design the page, which allow you to place the fields where you wish.
Select ‘Design Page’.
The fields will automatically have been placed in the first available slot automatically upon linking.
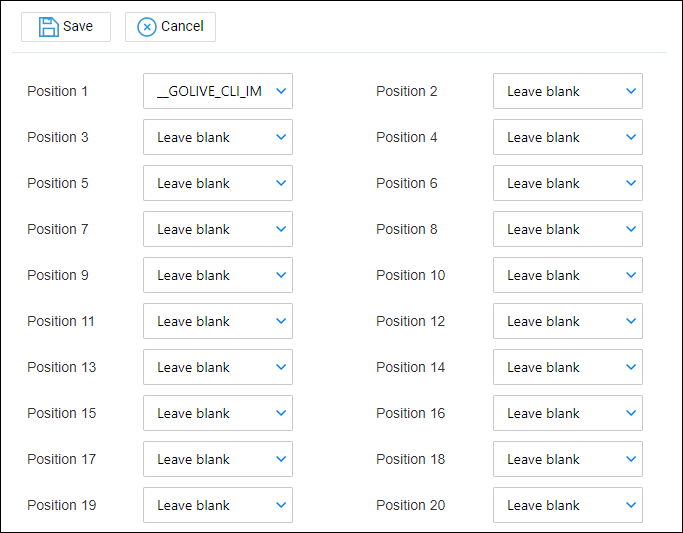
Each space in the page will allow you to click on the drop-down arrow, which will list the available fields.
Select a field to place in the chosen area.
Please note that if the field is already present in the page, then it will be removed from the original position and placed in the new one.
Once the page has been designed as required select ‘Save’ to keep any changes made.
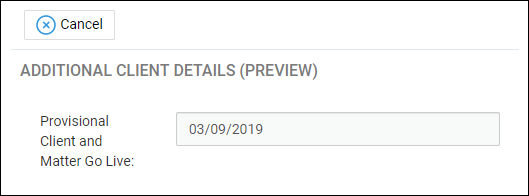
Once saved, you will see the option to ‘Preview Page’. Select this in order to see how this will look when entering details within the dossier.