GDPR: File Retention
Updated Jul 30th, 2024
This guide will go through using the file retention process with Osprey’s GDPR functionality
In line with GDPR regulations, Osprey Approach now offers you the ability to set retention dates on your matter history items, as well as setting up a retention period for any of your documents added or edited in the Supervisor area.
You can add retention periods by selecting ‘Supervisor’ and then going to ‘Case Management Setup’ and selecting ‘GDPR’. Now click on ‘Retention Policies’ to add a retention period to be used against a particular item or document.
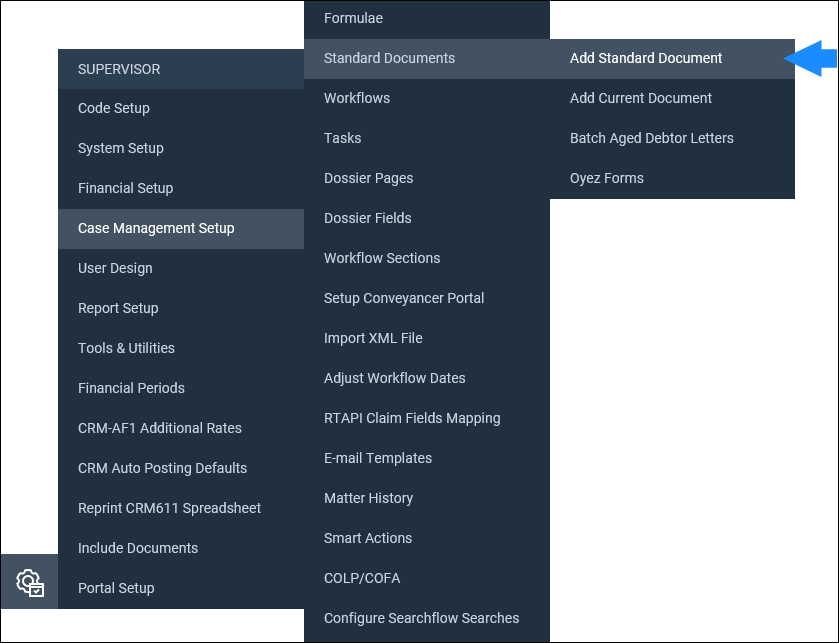
To apply a retention period to a new document. Navigate to the ‘Supervisor’ tab and select ‘Case Management Setup’. Then click on ‘Standard Documents’ and select ‘Add Standard Document’.
On the ‘Add Document’ screen, there will now be an option to select a retention period amongst the usual options, as highlighted below.
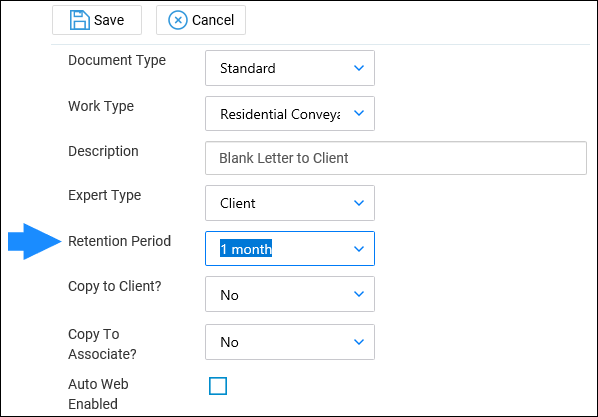
Select a suitable retention period (we will select ‘1 month’) and then click ‘Save’.
Now, when you navigate to the ‘Document Production’ area under the ‘Case Management’ tab, you will see that the retention period is displayed.

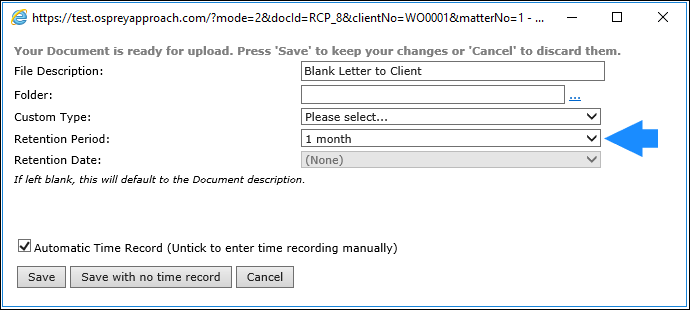
When this document is opened and saved in the ‘Document Production’ area, you will now see the default retention period displayed in the ‘Save’ window.
Now, when you save the document, the retention period will also display in the Matter History.
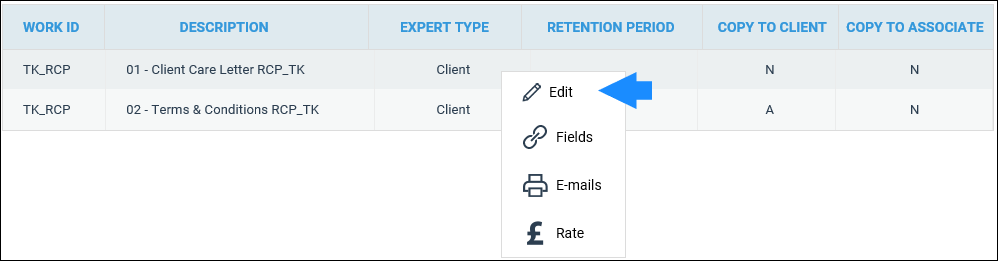
To apply a retention period to an existing document, navigate back to the ‘Supervisor’ area, select ‘Case Management Setup’ and then click on ‘Standard Documents’.
Your list of previously created documents will now appear.
Simply right-click on a document and select ‘Edit’.
You will now be able to enter the retention period in the available box.
Select ‘Save’ and the selected retention period will now be visible in the ‘Retention Period’ column, as shown below.

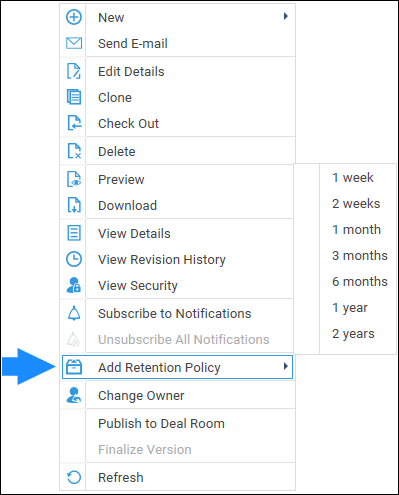
You are also able to set a retention period on an item already present in your Osprey Matter History.
To do this, navigate to the ‘Case Management’ tab in the side menu.
Now right-click the mouse on any item in the Matter History to bring up the item menu.
There will be an option to add a Retention Policy. Select this and then choose a policy to apply to the item. Once chosen, this will then appear in the ‘Retention’ column in the Matter History.
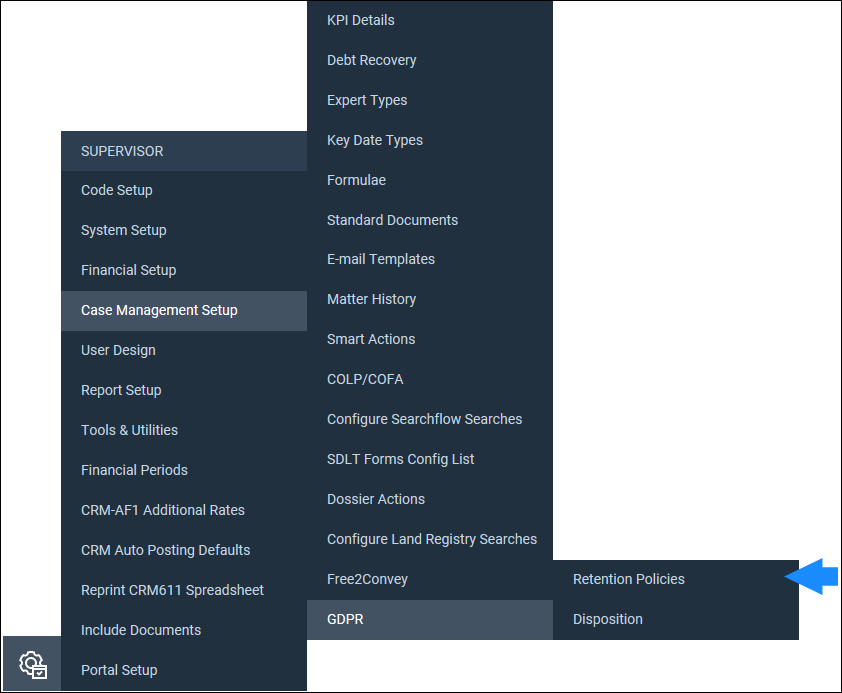
Supervisor level users will be able to add new retention policies for selection.
Navigate to the ‘Supervisor’ area and select ‘Case Management Setup’. There will be an option for ‘GDPR’ here, click on it and select ‘Retention Policies’.
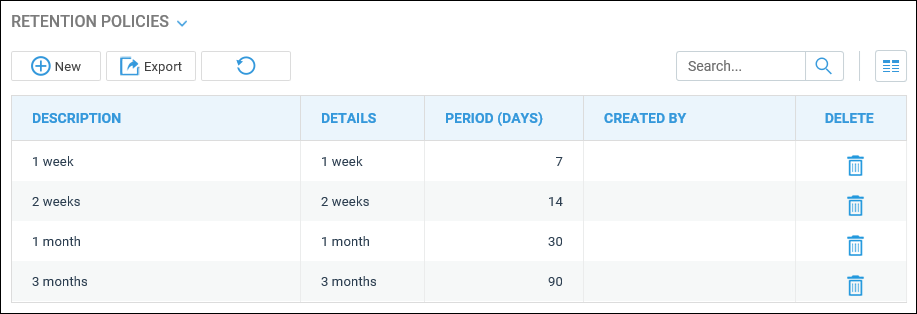
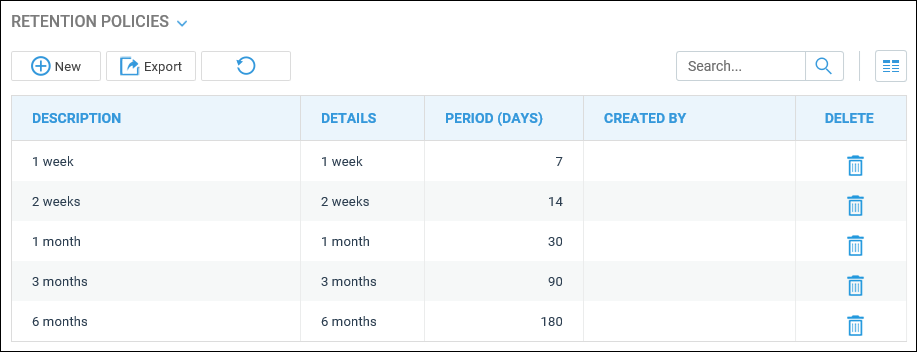
A list of previously set retention policies will now be displayed. You can add new ones by selecting the ‘New’ button at the top of the list.
Enter a suitable description and detail as shown here, for example, ‘6 months’ and then enter the number of days which would make up this period.
For example:
1 month = 30
6 months = 180
1 year = 365
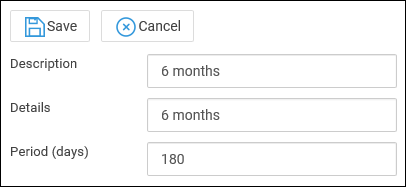
Now select ‘Save’ to add your new retention period to the list and make it available for selection when setting retention on your documents or Matter History items.
You may also remove any policies by selecting the ‘Delete’ icon and then confirming deletion. Please note that you cannot delete any policies which are in use.
Once an item has been set up with a review period, it will be added to the Disposition area. Navigate to the ‘Supervisor’ area and select ‘Case Management Setup’ and then click on ‘GDPR’. You can now select ‘Disposition’ to bring up the relevant items.

Each item will give several further options over to the right-hand side.
Extend: Selecting the ‘Extend’ icon will allow you to choose another retention policy by selecting one from the available drop-down list.
Dispose: After selecting ‘Dispose’ you will be prompted as to whether you wish to mark the item as disposed or cancel. If you have chosen to dispose, the item will now be marked red.
Undo: If you wish to undo a disposition, select this icon.