Label Printing
Updated Mar 11th, 2026
Who is this guide for?
Any Users and System Supervisors
This guide will show you how to produce a printed matter label for your paper files using Osprey
Enable label printing
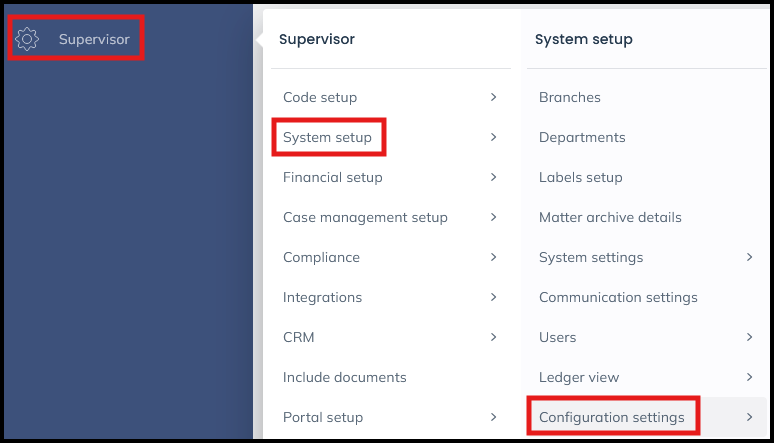
Before you can print labels for your files, you will need to turn on the option to do so. In the browser, navigate to Supervisor > System Setup > Configuration Settings:
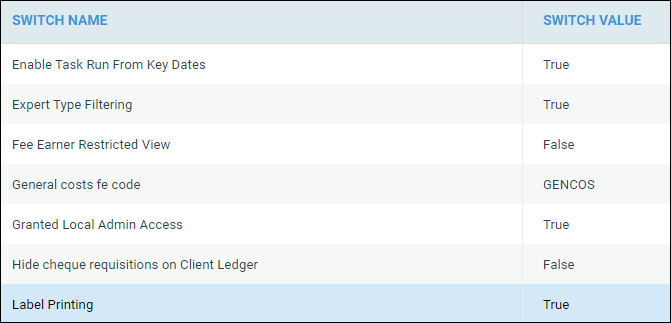
Locate the switch called Label Printing, right click it, and set it to True, then Save your changes.
Design your label template
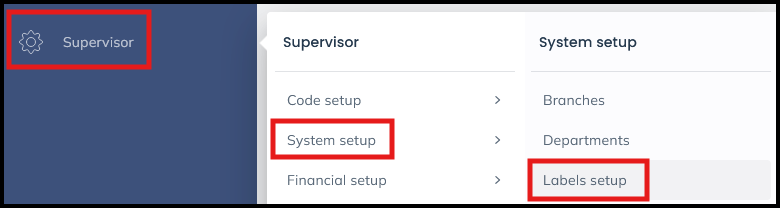
In the Supervisor Menu select System Setup>Label Setup then click New.
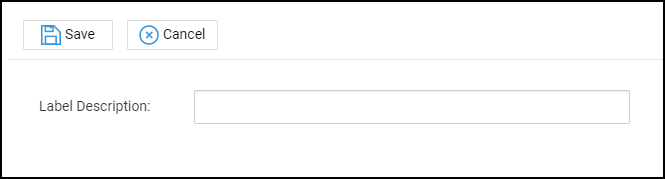
Give your label template a name, and click Save.
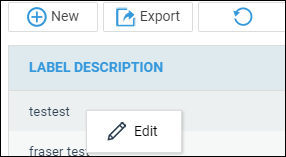
Right click your new label template, and select Edit
Select Design

Word will open. You can now design your template.
Create the template to fit the stationery you have. We would recommend using a table for this.
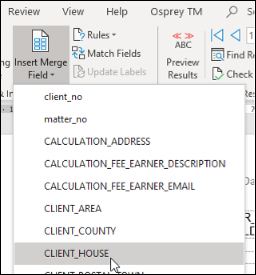
To place merge fields into the document, select Insert Merge Field from the Mailings tab on the ribbon and choose the appropriate field.
Once you have designed your first label, copy the data into the second cell. Then place your cursor at the start of the text in the second cell and select Rules click Next Record. The entire row can be copied to the remaining cells.
Close and Save the template.
Printing labels
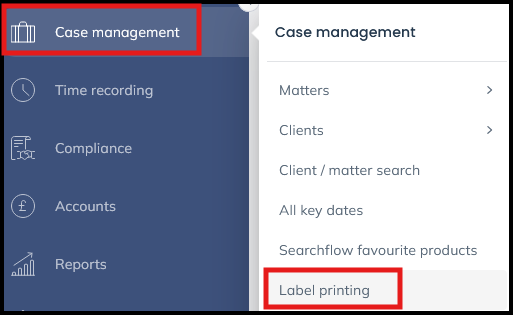
To print matter labels, Select Case management > Label Printing:
Select the relevant template from the list, to print an already printed label select Printed
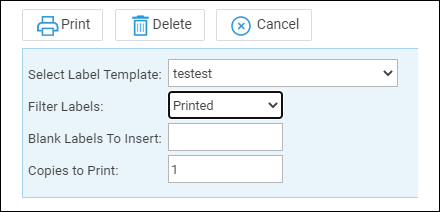
Tick the labels to be printed, click Print, the labels will be merged into Microsoft Word and can be printed.