Searching for data and Navigating around Osprey
Updated Feb 24th, 2026
Who is this guide for?
Any Users
Released December 2024
There are a few updated methods to move about Osprey
Using the left-hand side main menu
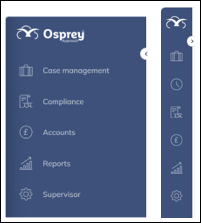
The main menu is Osprey has been decluttered and simplified so you can navigate around the system quicker. You’ll now find five clear areas within Osprey: Case management, compliance, accounts, reports and supervisor.
The menu can be expanded to show descriptions or collapsed showing top level icons only.
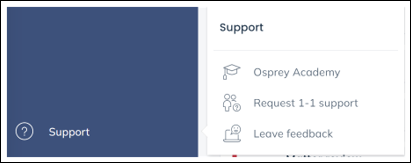
Further options are available at the bottom of the menu, the support option provides links to relevant pages on the Osprey support site.
Clicking My account allow you to change your password and enable or disable Two Factor Authentication
Clicking About provides information about the version of Osprey and company name
Clicking What’s new will play a video of the latest changes

Using breadcrumbs
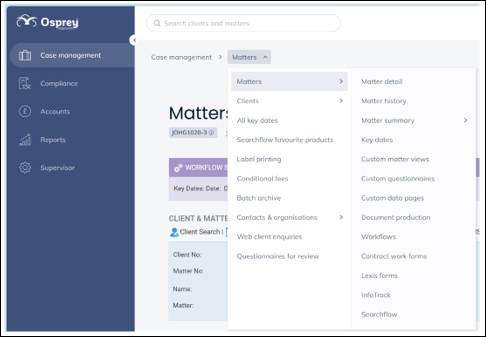
An alternative to moving around Osprey is to use the breadcrumb at the top of your loaded page.
The breadcrumbs are a signpost to your current location in Osprey and can be clicked on to move seamlessly to other areas, for your selected client. Jump from your matter history to workflows with ease.
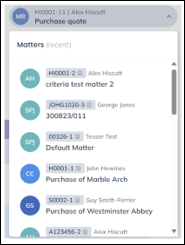
Matter selector
The matter selector is displayed across all pages.

Users can quickly switch between their 20 most recent matters from this list.
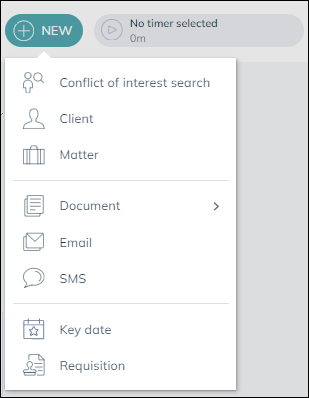
Master actions
The NEW menu allows users to quickly carry out “new” or “add” actions from any screen in Osprey.
You can start a conflict-of-interest search and add new clients and matters. You can also click the shortcuts to launch the appropriate page to create new documents, emails, key dates etc. on the currently selected matter.
Page headings and matter info
For pages relating to clients and matters you will see a tooltip which describes the page’s use.
You will also see the client and matter number, matter description and whether the matter is open, completed or archived as well as its risk status.
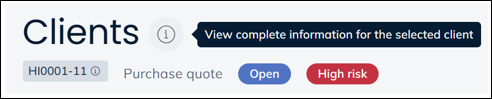
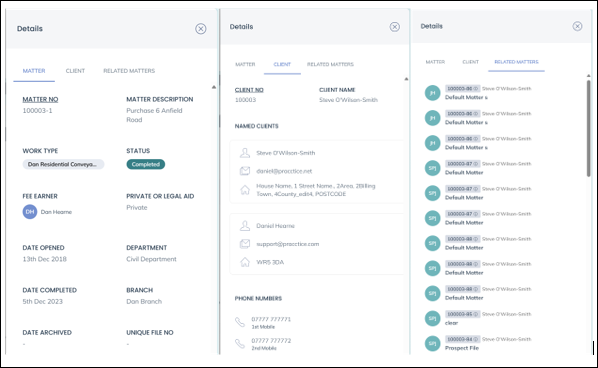
Clicking the client and matter button opens the right drawer with additional information about the client, matter and any related matters. This element is reused across Osprey showing matter, client and related matters to provide quick access to data.
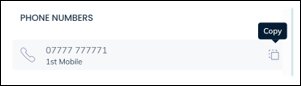
Hovering over most data will allow the user to copy it to their clipboard.
Searching (Global Search)
You will find the Search clients and matters bar at the top of Osprey whichever section you happen to in

You can search by client-matter number, matter description, name, phone number and email. It is possible to type what you are looking for in full or in part. The search supports the following client-matter format SMI001/1, SMI001-1 or SMI001_1.
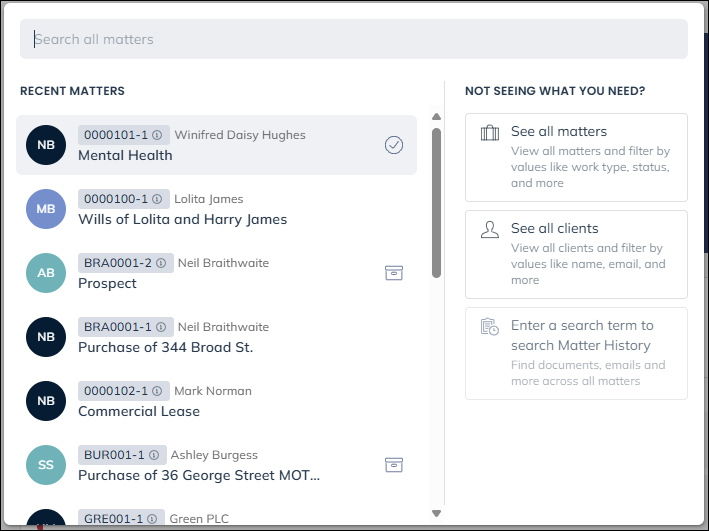
The results also show the status of the matter
 | Shows the currently selected matter |
 | Denotes an archived matter |
 | Flags a high risk client |
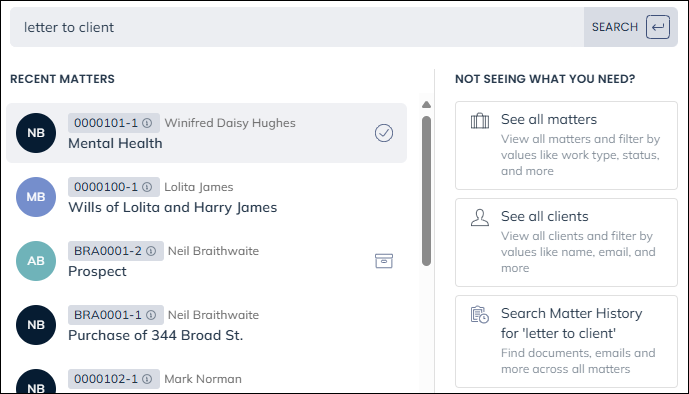
On the right we have further options, See all matters will show to the matters table, See all clients will display the clients table, entering a search term also reveals another option of Search Matter History for ‘search term’
See all clients
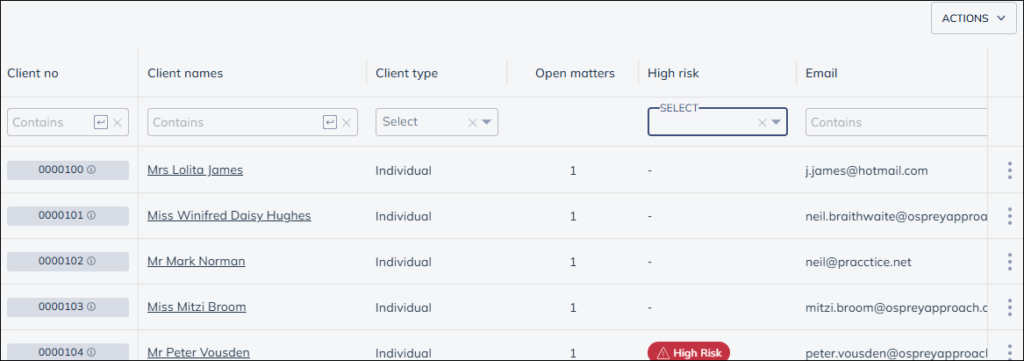
Choosing See all clients will show you the Clients table
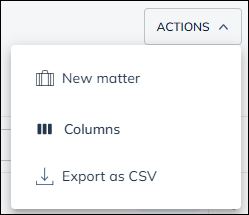
Clicking the Actions menu you may create a client by choosing New client, you can also open the list in Excel by choosing Export as CSV.
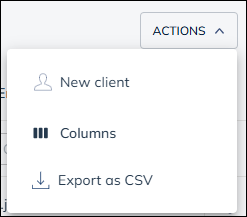
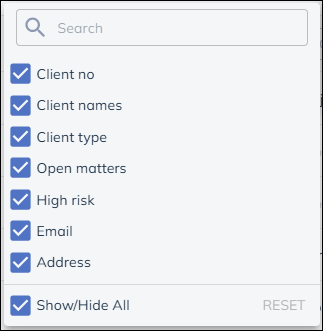
The option Columns shows a list of columns you can untick (hide) and tick (reveal) the information you wish to see listed.
The clients table allows you to set filters to search with in it. You can type where it says contains and press return or choose options where it says select.
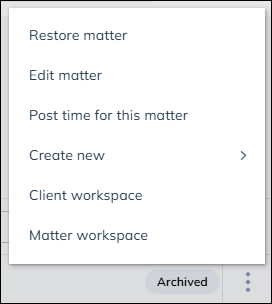
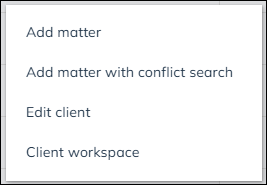
Selecting the vertical ellipsis at the end of each row shows further options which allows you to Edit the client, add matter and view the client workspace
See all matters
Choosing See all matters will show you the Matters table
Clicking the Actions menu you may create a new matter by choosing New matter, you can also open the list in Excel by choosing Export as CSV.
The option Columns shows a list of columns you can untick (hide) and tick (reveal) the information you wish to see listed.

The matters table allows you to set filters to search with in it. You can type where it says contains and press return or choose options where it says select.
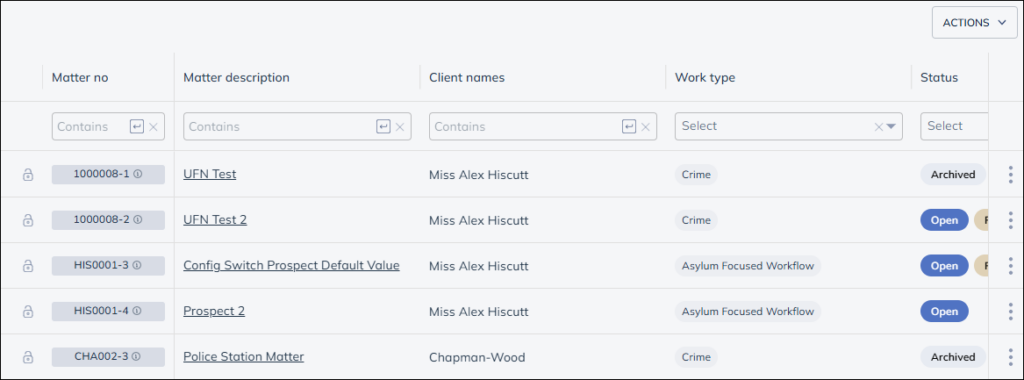
Selecting the vertical ellipsis at the end of each row shows further options which allows you to Edit the matter, post time for the matter, as well as viewing the workspaces and create new documents, emails, key dates and even requisition.