Perfect Portal Integration
Updated Mar 27th, 2026
Who is this guide for?
Any Users and System Supervisors
This guide will go through Osprey’s integration with Perfect Portal
Released June 2025
Osprey Approach integrates with Perfect Portal to simplify the client onboarding experience and streamline the enquiry to instruction process.
The integration provides a notification to users when a new matter is sent from Perfect Portal to Osprey. Users can then approve or edit the incoming data before it automatically populates the New Client and New Matter wizards to save into Osprey.
This guide take you through how the integration works in Osprey and how to configure the integration settings.
Converting a Perfect Portal quote into Osprey
The integration enables you to convert a quote from Perfect Portal into Osprey. To complete the action, first navigate to the desired enquiry or lead in Perfect portal and complete the conversion wizard to move it into Osprey. *Leads and enquiries need to be converted to a quote in Perfect Portal before converting to Osprey.
From the actions menu on the right hand side of Perfect Portal, click ‘Convert to quote’

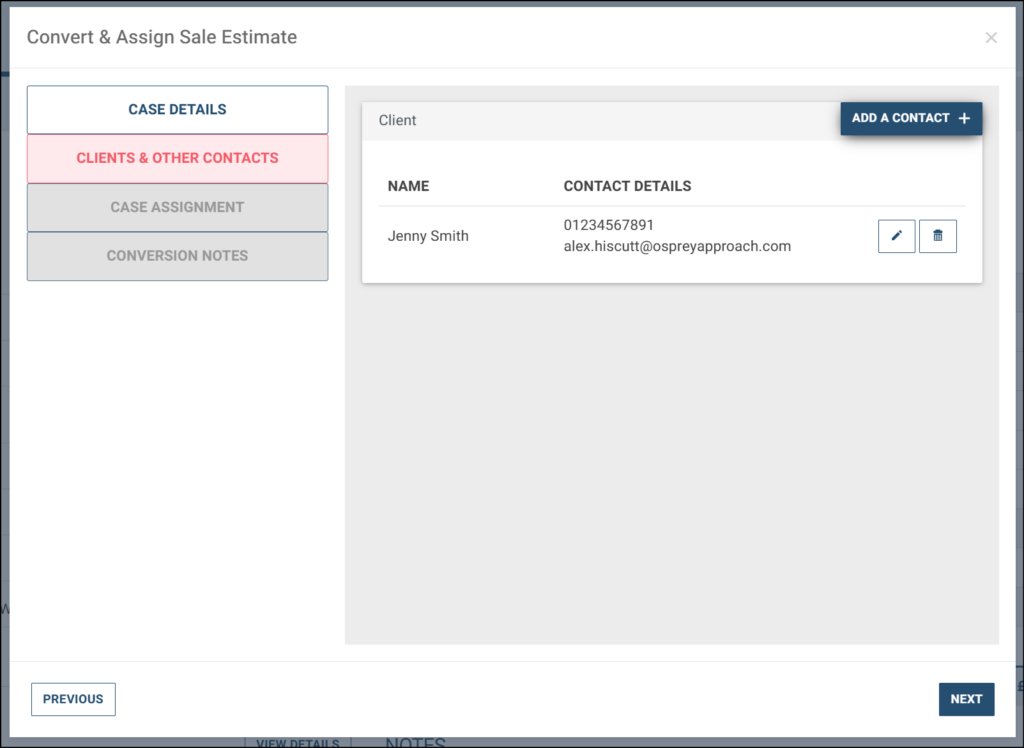
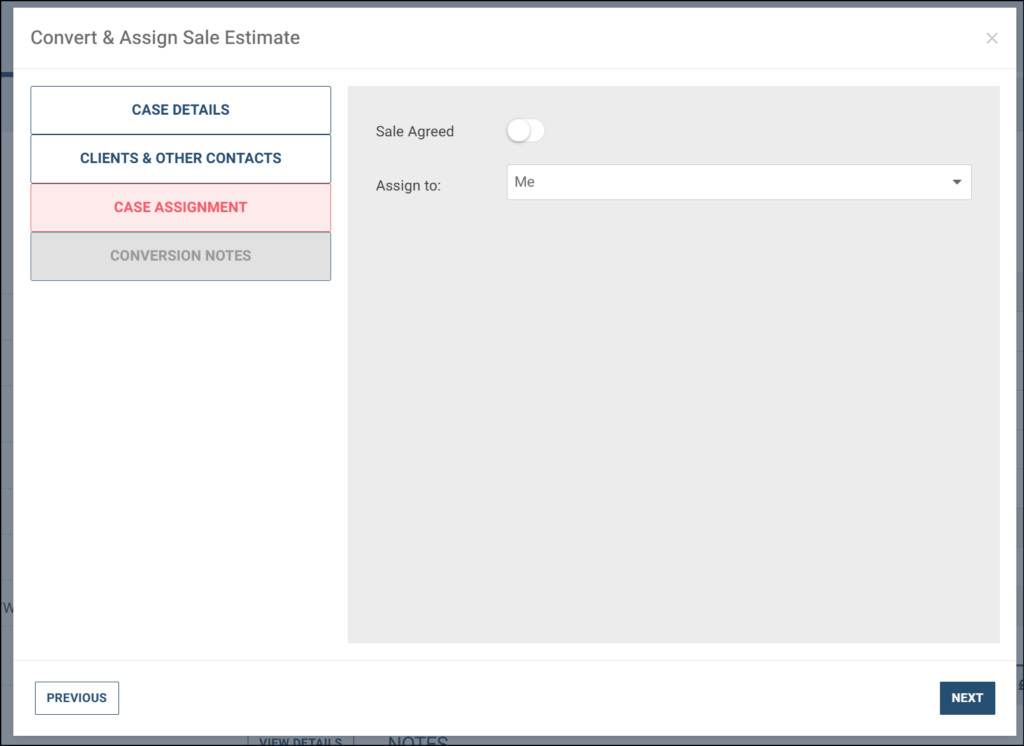
You will then follow the steps through the Perfect Portal wizard to enter case details, client details, case assignment and conversion notes.
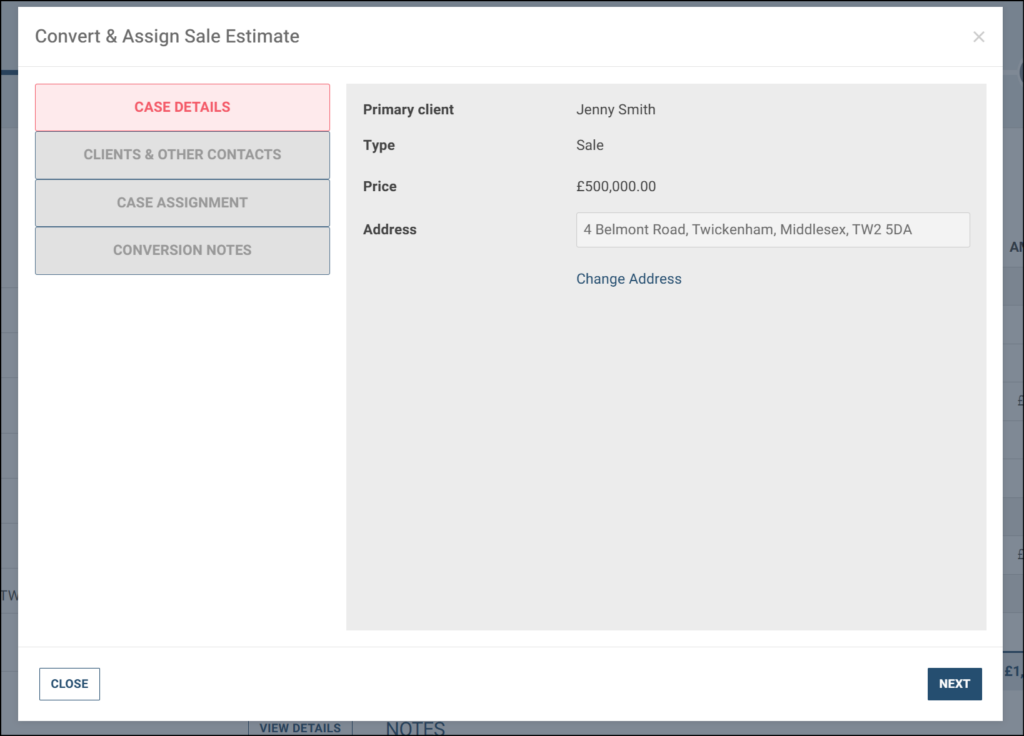
When you reach the end of the Perfect Portal wizard, click ‘Convert’.
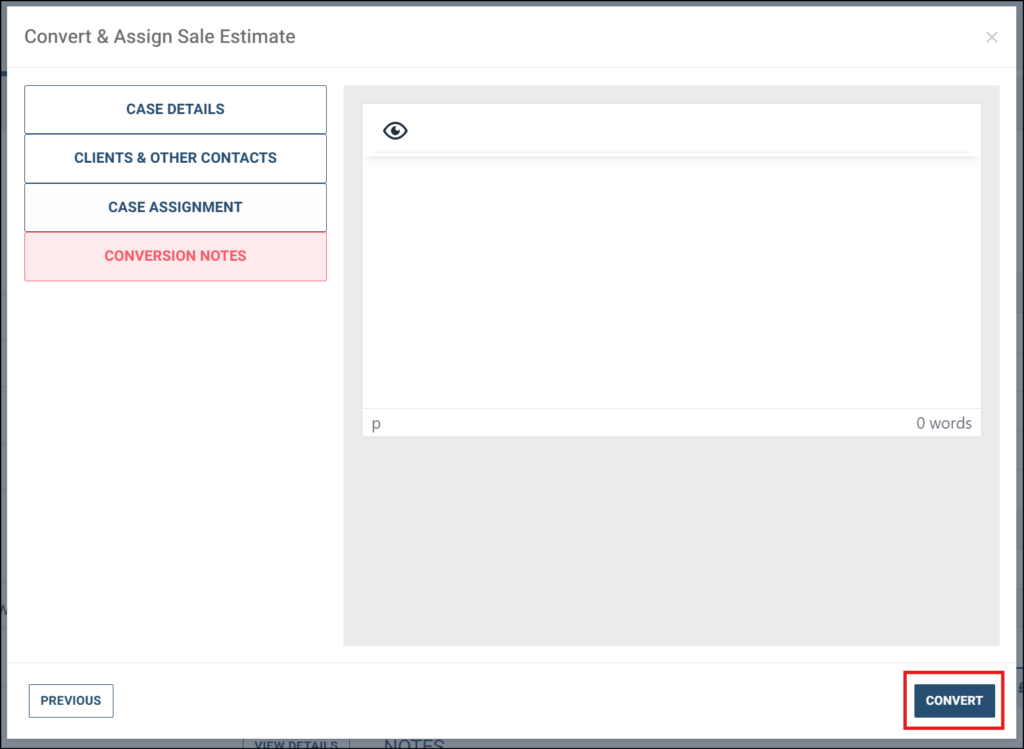
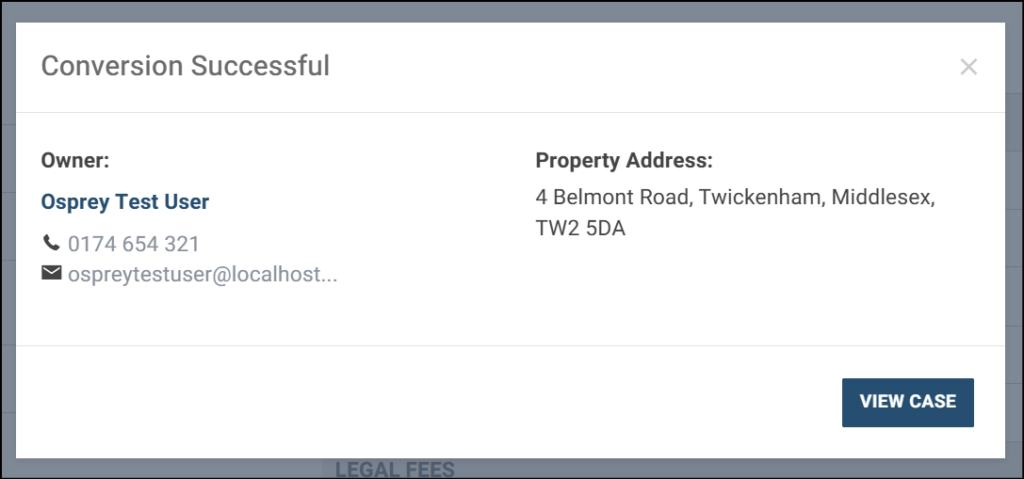
You will then receive a notification on your screen stating ‘Conversion Successful’. At this point, the case has been pushed to Osprey.
New matter notifications
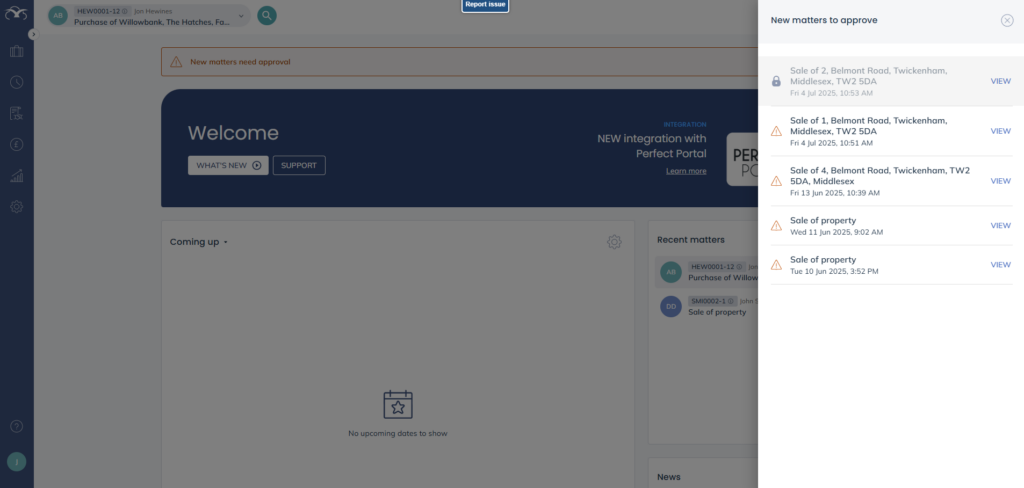
When Perfect Portal notifies Osprey that a matter has been created, notification emails are sent to a list of designated recipients (based upon user configuration as described in the Perfect Portal integration set up below). In addition, the designated recipients are shown a notification on their dashboard when they log in to Osprey.

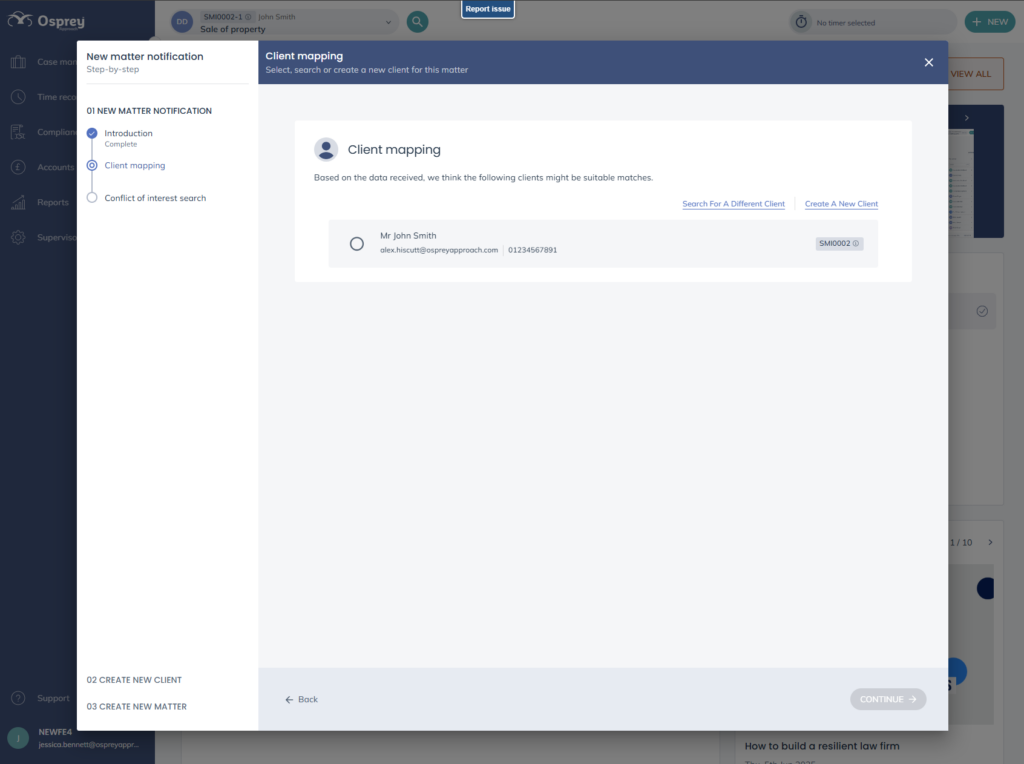
When clicking ‘View all’, users will be able to open each notification to view the incoming data from Perfect Portal.
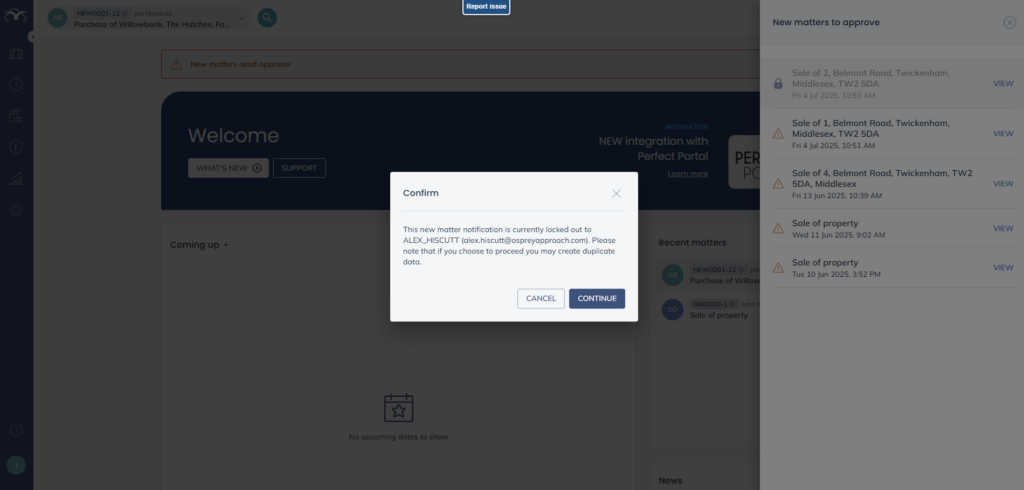
If a user is working on a new case, other recipients will see the matter is locked. When clicking ‘View’ next to the locked matter, the user will receive a warning that another user is reviewing the case and will ask them to confirm if they wish to continue. By clicking continue, the user is unlocking the notification – this should only be done if they are sure their colleague is not actively working on the notification (e.g. due to sickness, leave etc).
If a matter is not locked, the user will be able to review the matter notification in the New Client and New Matter wizards. To do this, click ‘View’. Osprey will use the incoming data to create a list of suggested clients, with the forename being treated as a “contains” search. E.g. if the search term is ‘John Smith’, we will also return results for ‘John Adam Smith’.
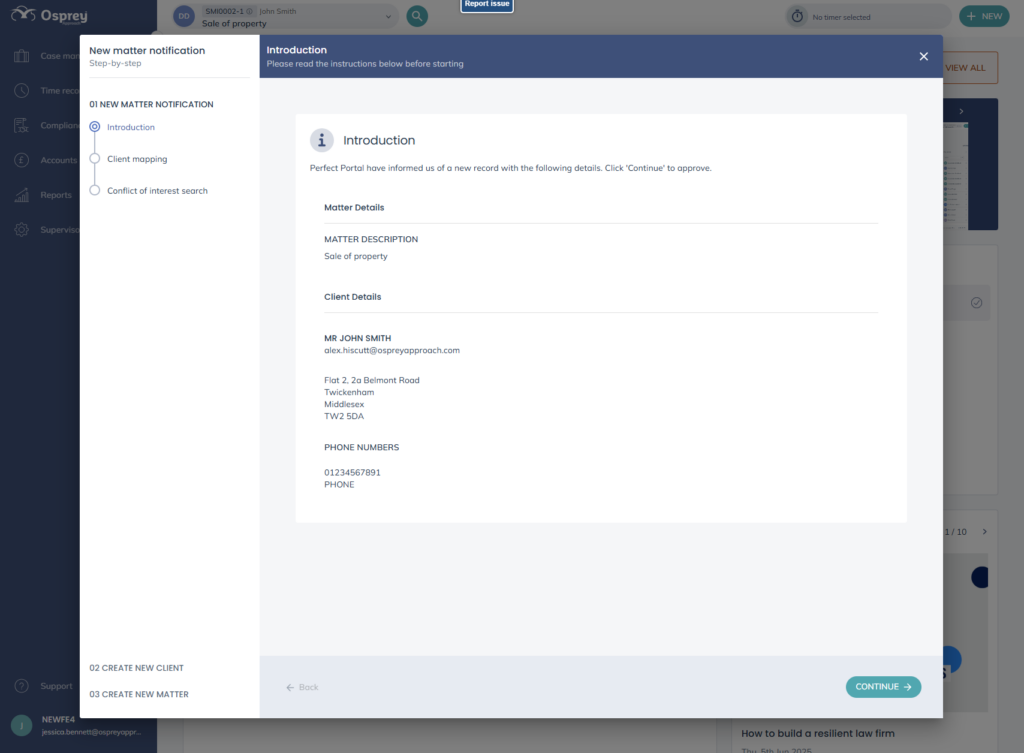
Users will have the option to:
- Proceed with one of the suggested matches
- Search for a different client
- Create a new client, using the details from the incoming data
Users can then fill in the New Client and New Matter wizards. Where possible, the fields will be pre-filled with data from Perfect Portal (or with default values that have been configured). When the user has completed the New Client and New Matter wizards, the matter is created and the notification is deleted from their homepage.
A quote PDF document is also stored in the matter history, titled ‘Perfect Portal Case Quote’.
Case stages are also updated in Perfect portal when tasks in an Osprey workflow are completed, provided the actions have been setup as part of the workflow configuration.
Perfect Portal integration configuration
In order to set up your Perfect Portal configuration, you will need to ensure you have Supervisor level access.
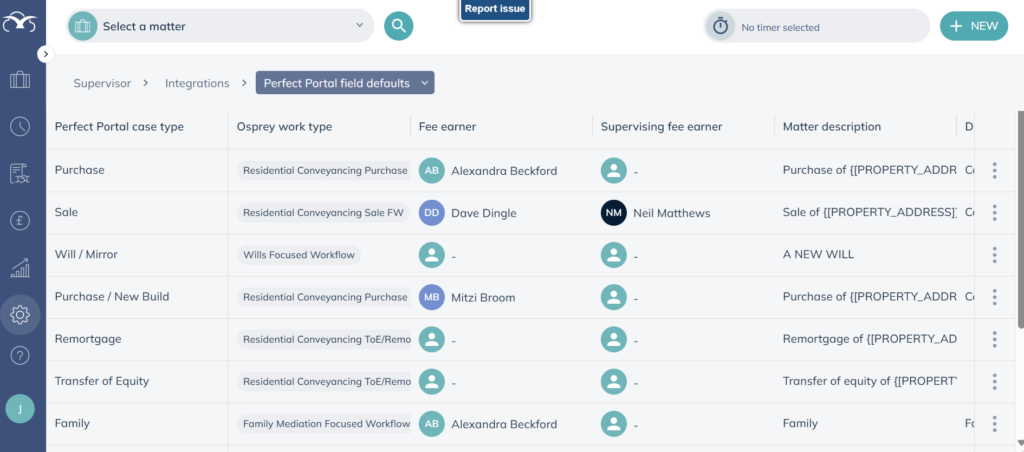
For each Perfect Portal case type, users can configure default values for:
- Work type
- Matter description
- Fee earner
- Supervising fee earner
- Department
- Branch
- Notification recipients (i.e. who should receive notifications about new matters and be allowed to process the incoming data)
To begin configuring your default settings, you will need to navigate to Supervisor > Integrations > Perfect Portal default mapping.
You will then be able to see all existing default settings, as well as create new ones.
To add a new default setting, click ‘Add new’ on the right hand side.
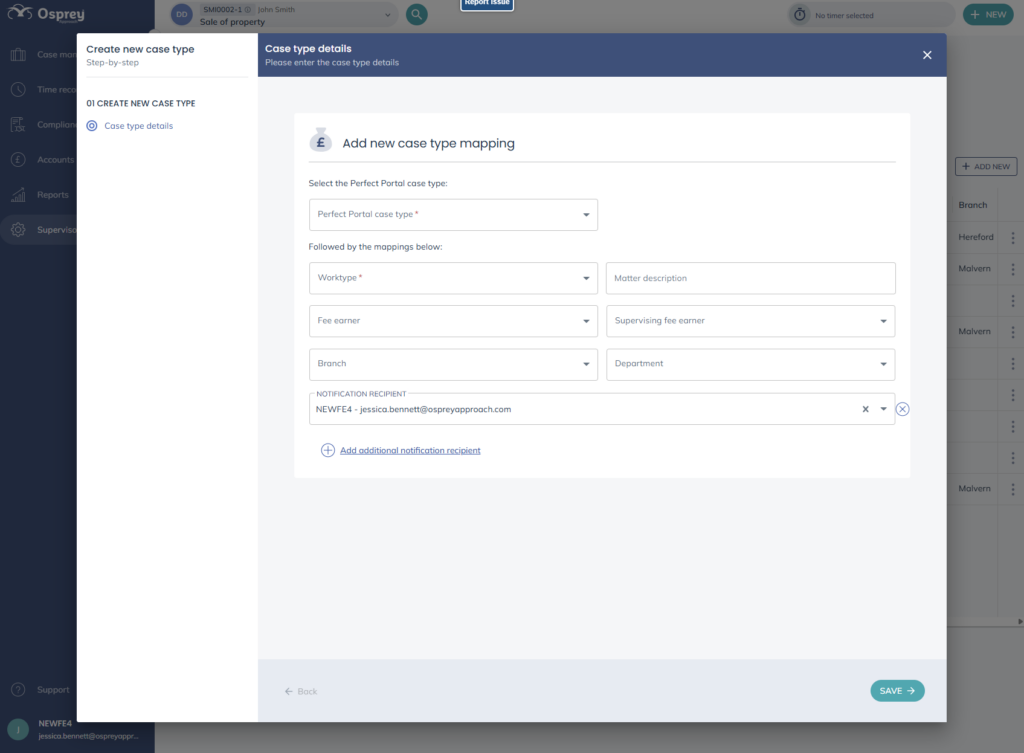
You will then be able to select the required information from the drop down lists displayed and add notification recipients from this screen.
When adding the matter description for conveyancing matters, adding {[PROPERTY_ADDRESS]} will append the property address to the end of the matter description. E.g. you may want your matter description to read Purchase of {[PROPERTY_ADDRESS]}, which would appear as Purchase of 1 Acacia Avenue, Twickenham TW1 7NH.
Once you have completed the information required, select ‘Save’.