Re-enabling the Outlook Connector
Updated Jul 30th, 2024
Who is this guide for?
Any Users
This guide will take you through re-enabling the Outlook Connector
Sometimes the Osprey Outlook connector can disappear but it is possible to re-enable so it shows up again.
Should Outlook take longer than usual to open, it can disable any recently installed add-ins to assist itself in running more quickly.
If the Osprey Connector has been disabled, the following steps will allow you to re-enable it.
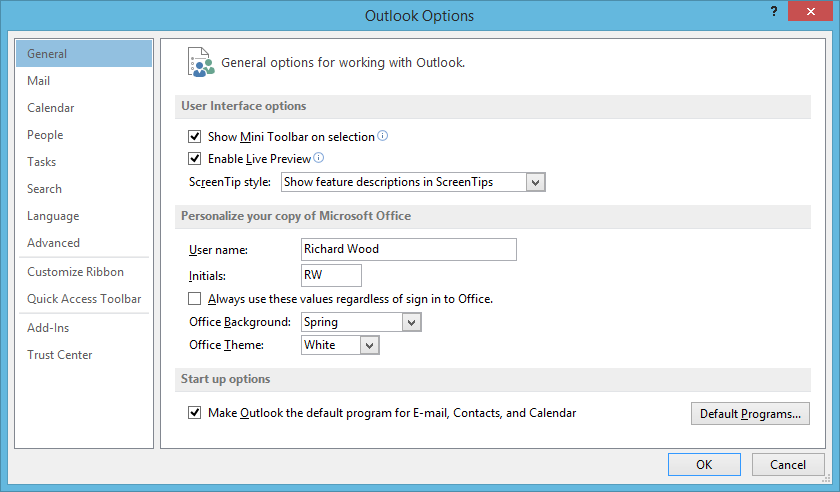
Open up Outlook and select the ‘File’ tab in the top left to open the side menu.
From here, select the ‘Options’ tab.
The ‘Outlook Options’ panel will now appear. Select the ‘Add-Ins’ button on the side menu to open up your list of currently available add-ins.
The Osprey Outlook Add-In will be present in either the ‘Inactive’ or ‘Disabled’ add-ins list.
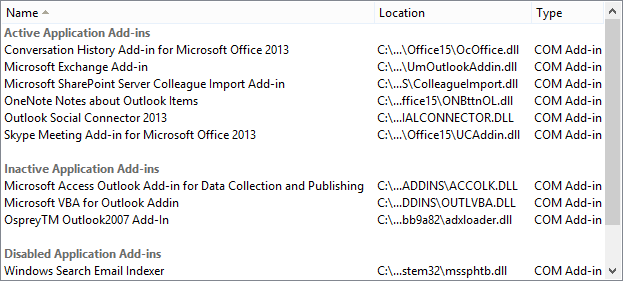
Underneath the add-ins list, there will be a ‘Manage’ drop-down list. By default, this should be set to ‘COM Add-Ins’ but if this is not the case, select it from the drop-down list and then click ‘Go’.

The ‘COM Add-Ins’ panel will now appear.
Somewhere in the list, you will see the Osprey Outlook Add-In which, if the tab has disappeared, is likely to be unticked, as below.
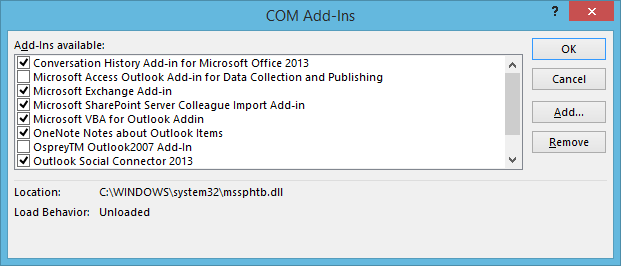
Place a tick in the box next to the Osprey Add-In and then select ‘OK’ to close the panel.
Your Osprey Approach tab should now reappear at the top of your screen. If not, you may need to close and reopen Outlook to ensure that the tab reappears.