Conditional Formatting
Updated Dec 19th, 2024
Who is this guide for?
Accounts Supervisors, System Supervisors and Report Writers
This guide will take you through using conditional formatting when creating reports
Any reports you have written for your company can be set to display with Conditional Formatting – this enables you to highlight entries on reports based on specific criteria. Examples may be to highlight monetary values below a certain amount, or dates earlier than a particular date.
In the example below, we are using an introducer report to calculate the amounts of commission paid to each introducer. This amount is based on the fee quoted to the client. The conditional formatting will be set to highlight matters where the fee quoted has not been entered.
Open the report you wish to add the conditional formatting to.

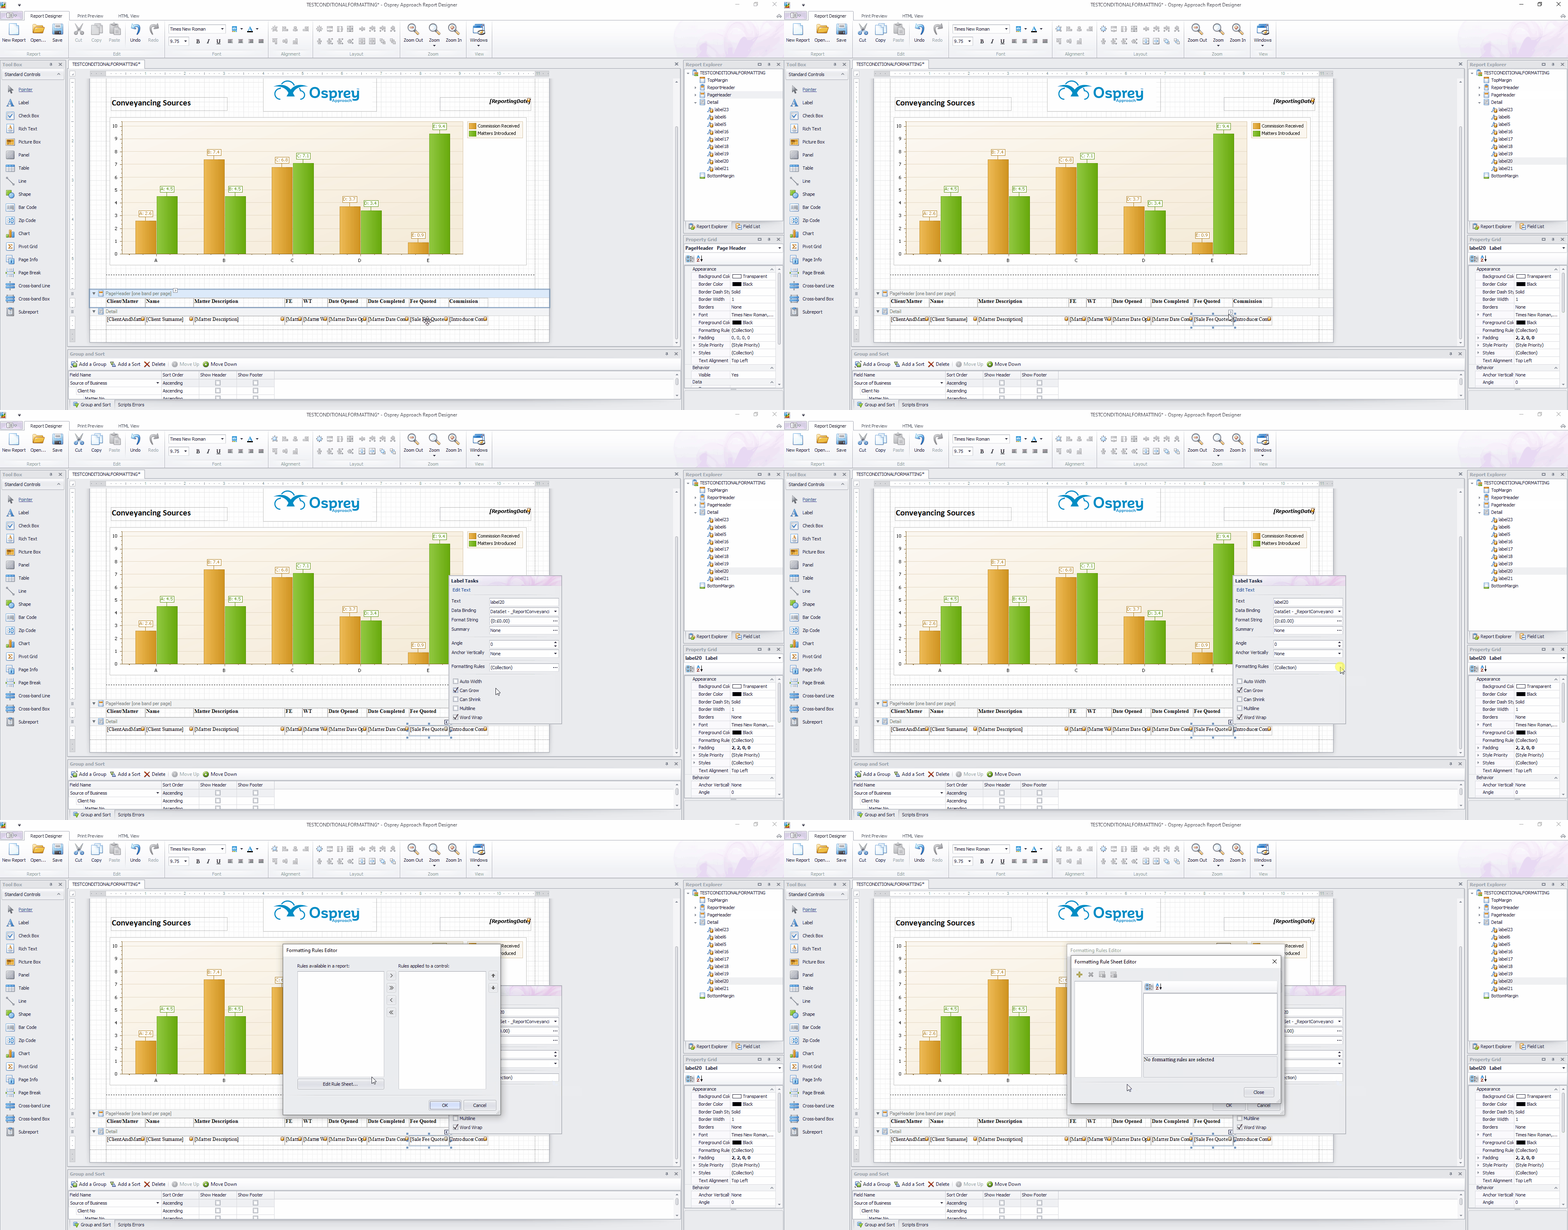
Select the field you wish to change the formatting of, dependent on the conditions. Click the chevron button in the top right hand corner of the field, and select the ellipsis (…) button alongside Formatting Rules. Then click Edit Rule Sheet.
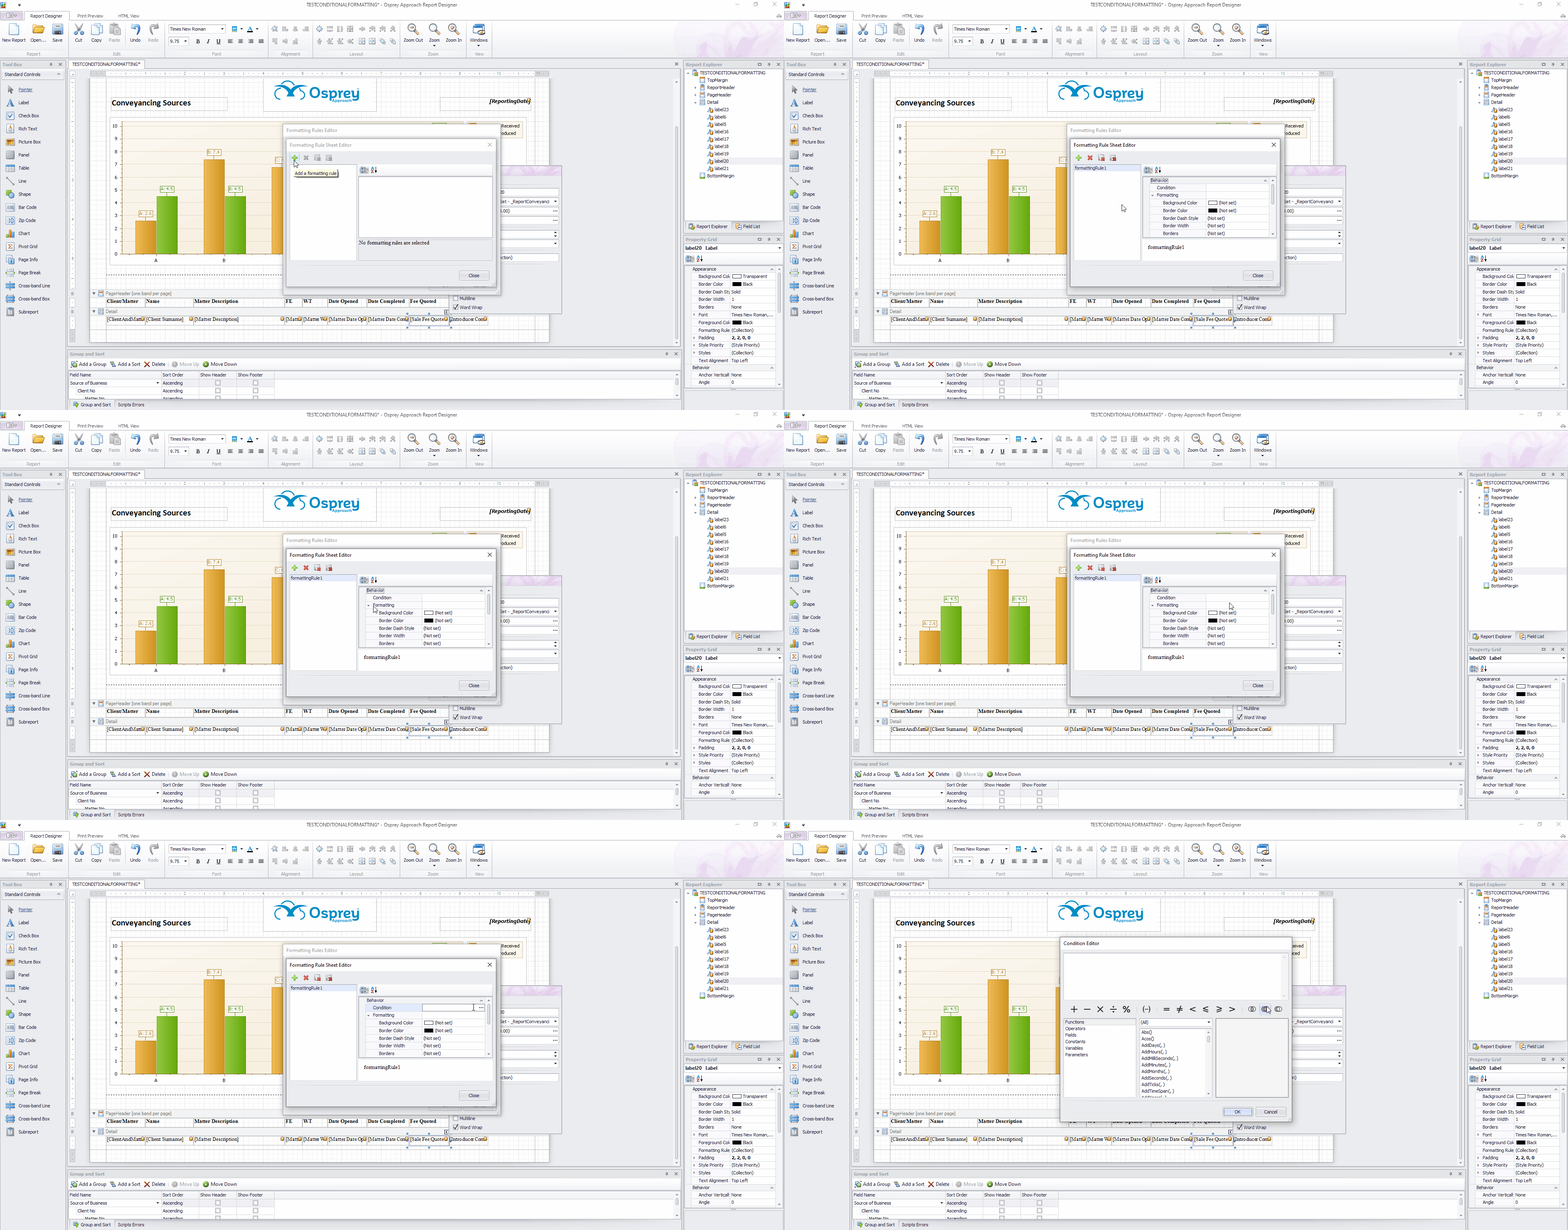
Click the + button to add a new formatting rule. On the right hand side of the resulting box, click the ellipsis (…) button alongside Condition.
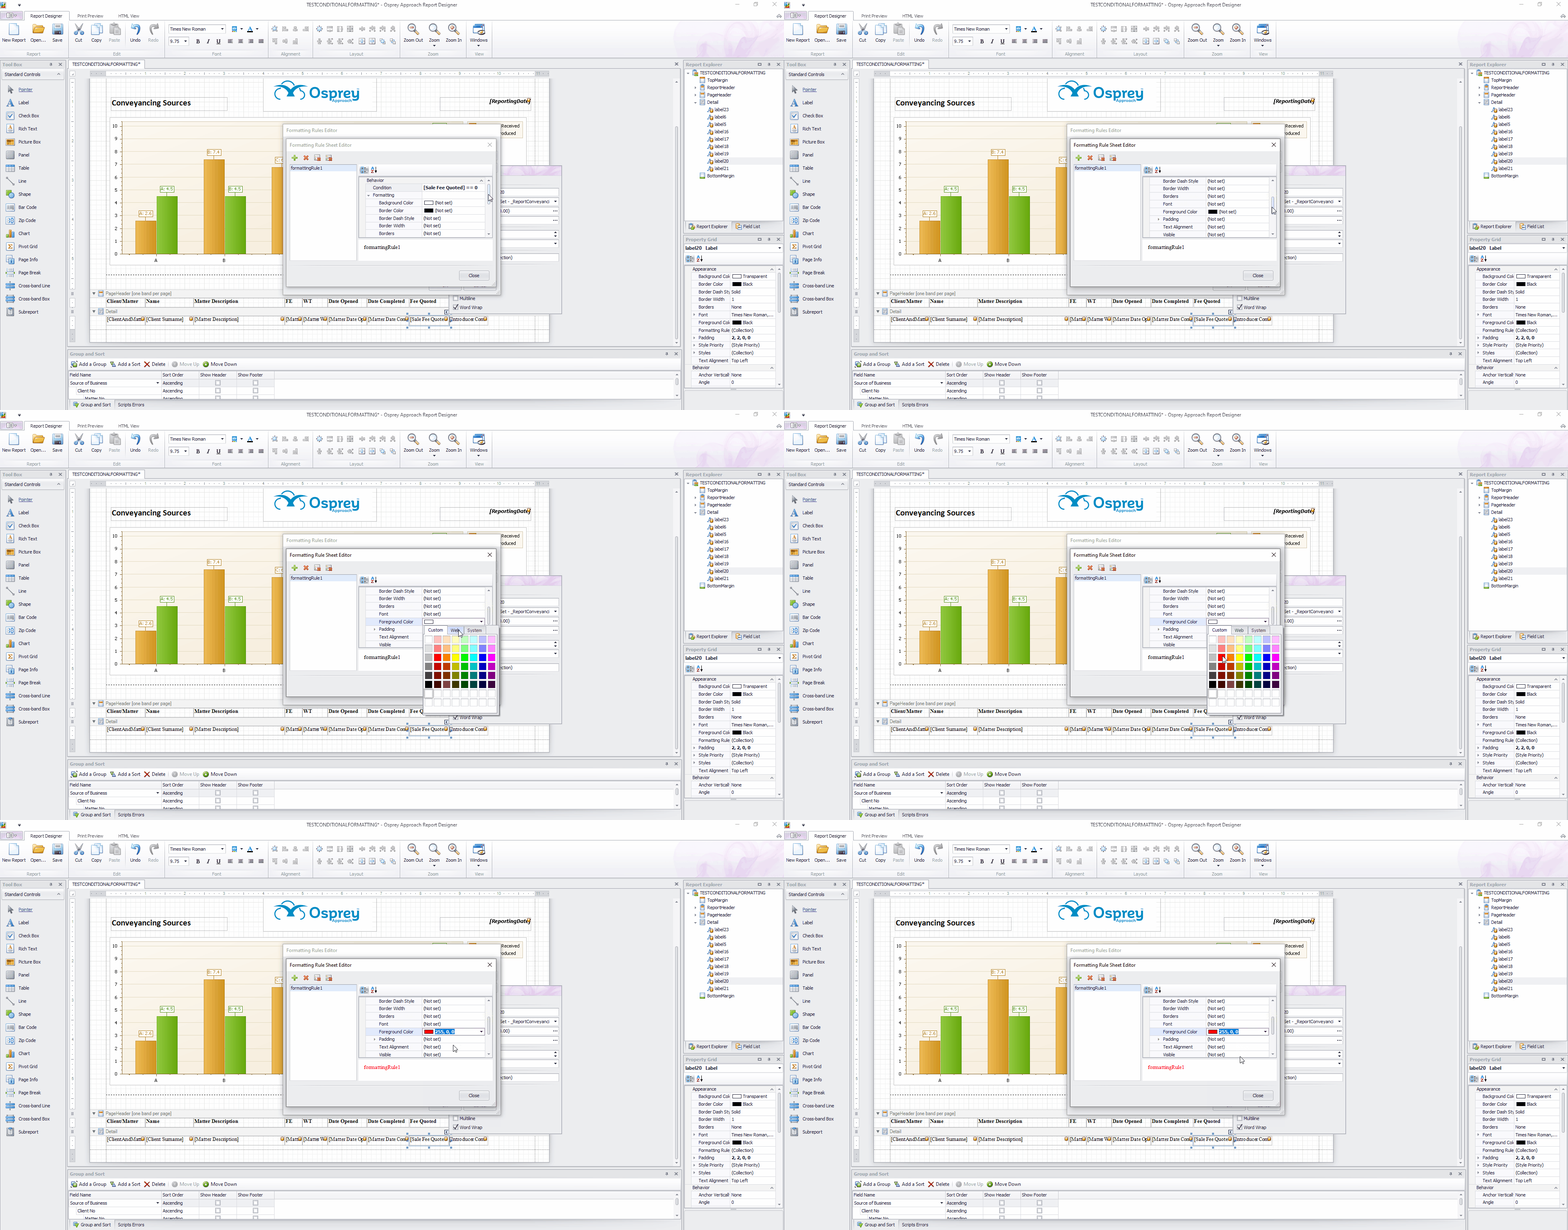
Use the condition editor to enter the condition for which you’d like to format your field differently. In this example we will look for a Fee Quoted of 0 and apply a format to it.

Now, set the format to apply to that condition (the box on the bottom right shows the result of your formatting):
Now give your conditional format a more explanatory name, press return and click Close:
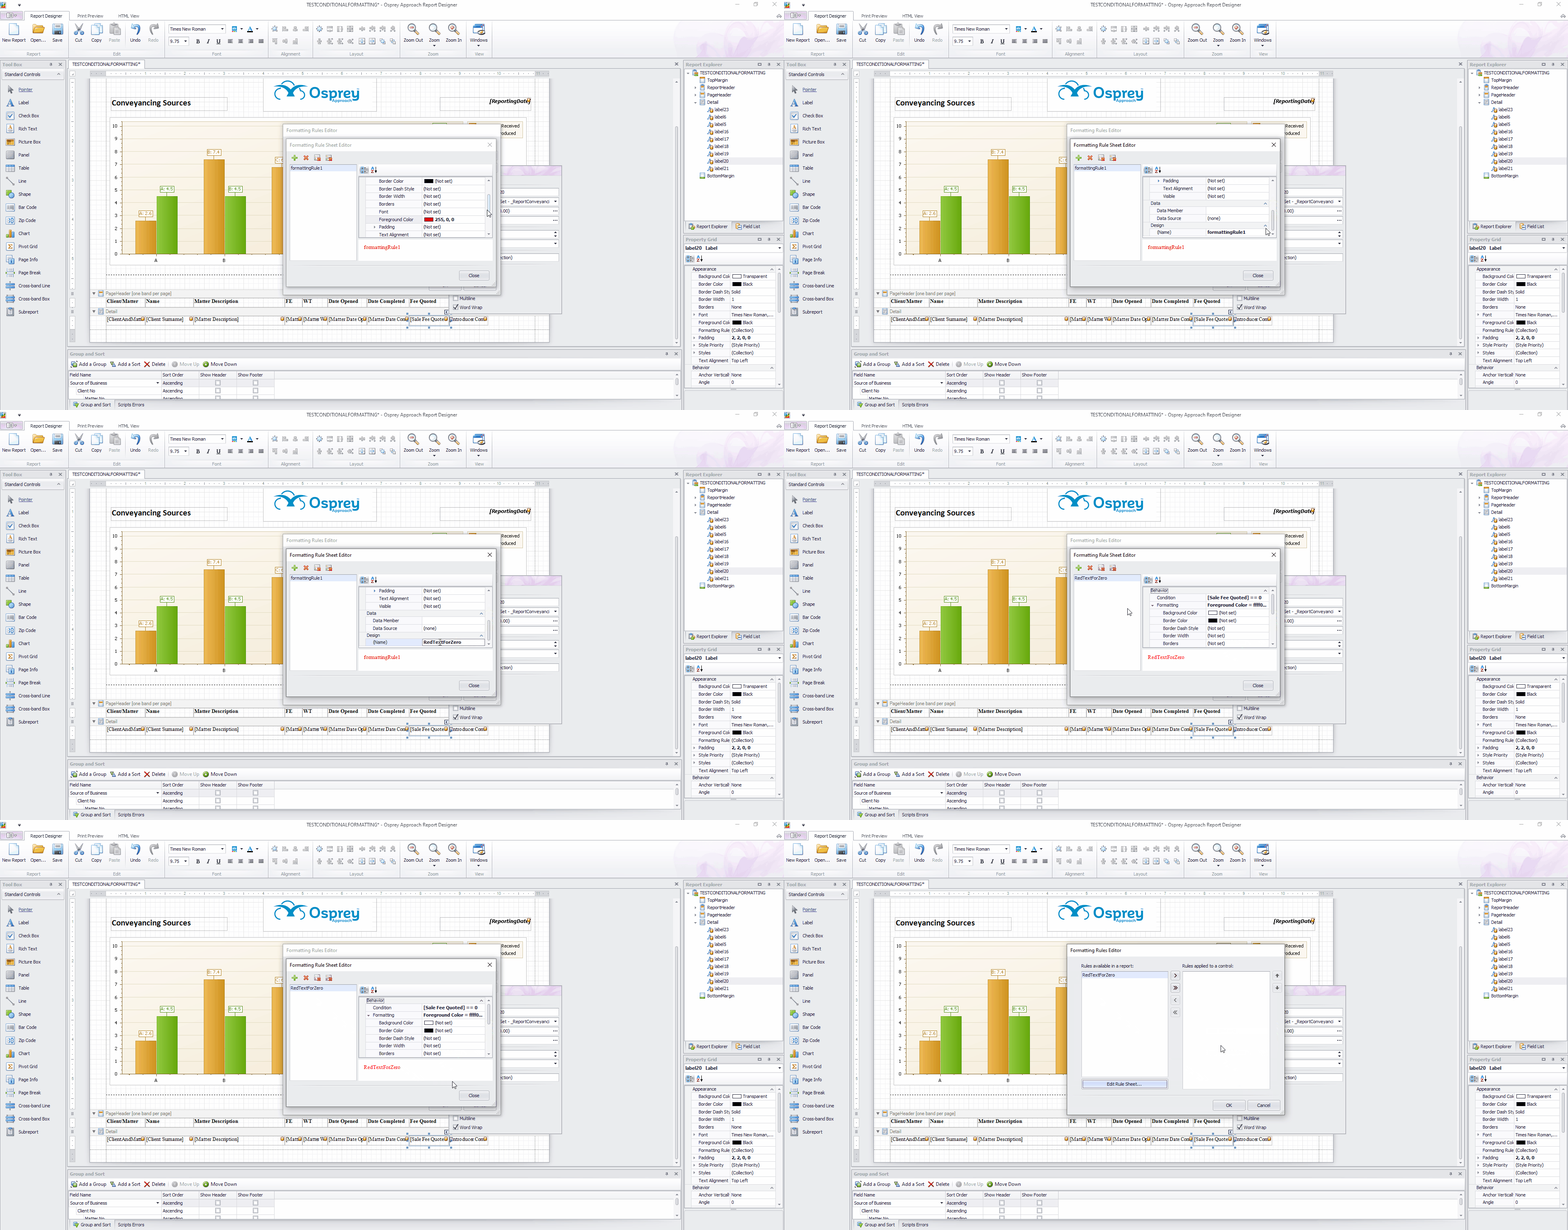
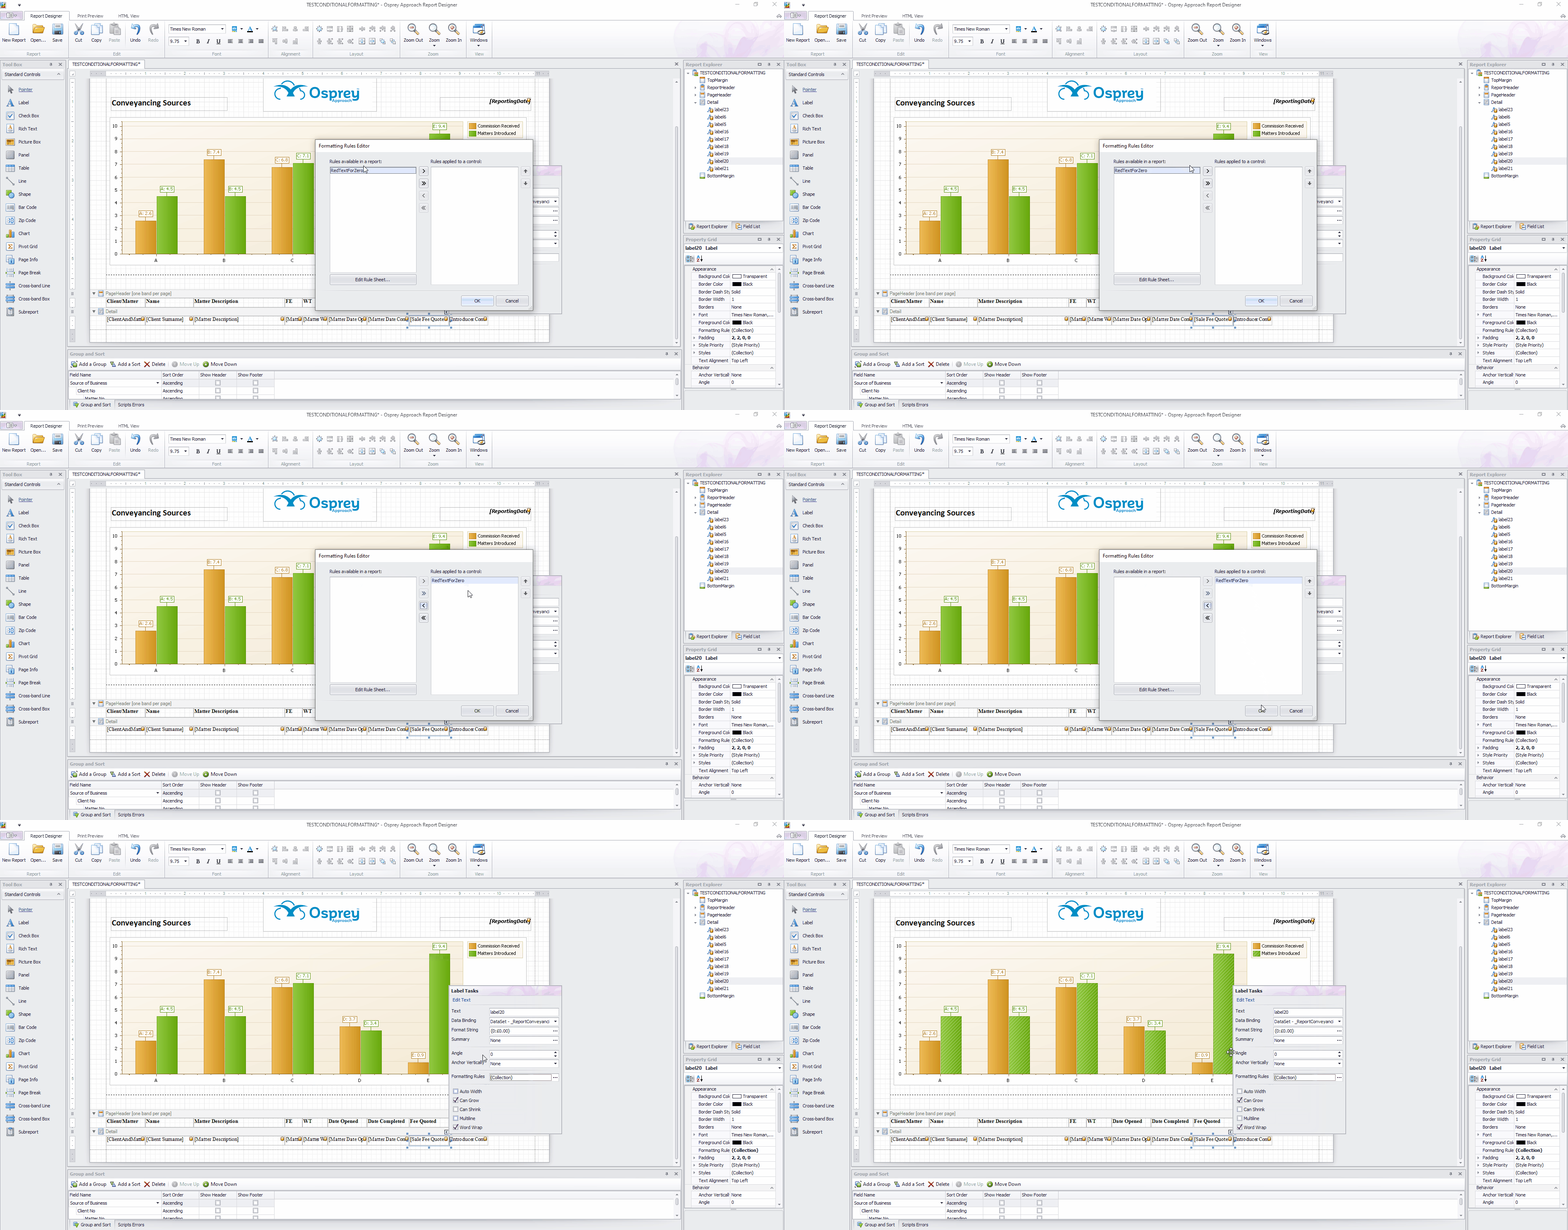
To apply this conditional format to the field, move the new rule you have created into the Rules applied to a control box on the right, by selecting and using the single > button. Click OK:
Now preview your report. The Fee Quoted field now appears in red text if it is zero:
