Searching for Clients
Updated Aug 9th, 2024
Who is this guide for?
Any Users
Osprey gives you several ways of searching for your clients in the system. This guide will take you through the best ways to perform searches
The main searches are the global search, name search, matter detail search and full client/matter search.
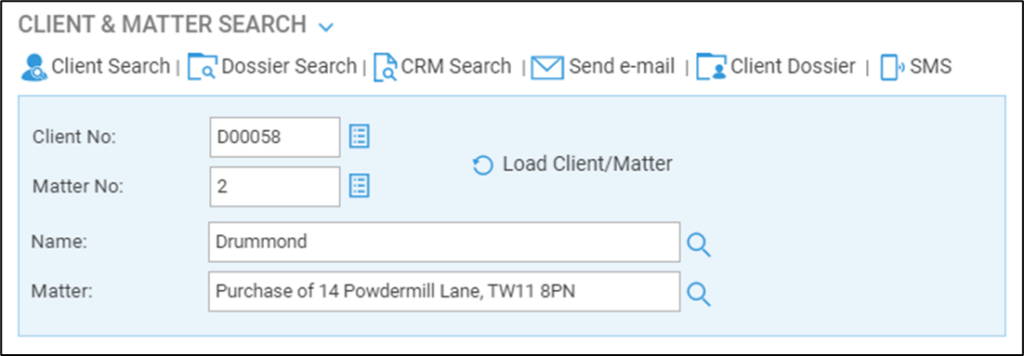
If you know the client and matter number, you can simply type these into the available Client No and Matter No boxes. Next to the Client No box is a small blue square, which allows you to view the last 20 matters you have selected.
Next to the Matter No box, the blue square will allow you to view all matters available for the selected client.
There are several ways of searching for a client.

Name search
First, select the ‘Name’ magnifying glass icon.

You may use this method if you know all or part of the client’s surname.

Type into the ‘Enter Surname Search Criteria’ box and click ‘Search’
Examples:
If you know that the client’s surname is Smith, enter ‘Smith’. This search will find clients whose names are exactly Smith.
If you think his name may end in son, then enter ..son and click search. This search would find Thomason, Jameson, Williamson, etc.
If you know his name contains a certain string of characters, but are not sure of the beginning and end, enter the characters in between the wildcard. For example, search criteria of ..one.. would find Jones, Monet etc.
Matter description search
Use this if you know all or part of the matter description. Select the ‘Matter’ magnifying glass icon.


Use the wildcards as above in the client name search – the example above will find any matter description containing “Sale of” – e.g. Sale of <property name>.
Full client/matter search
Use this option for more advanced searching. Select Client Search.

Use this screen to enter any information that you know about the client.
All fields that can be typed in can use the wildcard search as explained above.
This includes the client number box, so if your numbering convention is e.g. the first 3 letters of the surname, then a number, you could type e.g. BRO.. to find all client numbers beginning with BRO.
You can choose a certain work type and fee earner only if you know who is doing the work and what it relates to, as well as searching for legally aided or private matters only.
You can also choose to select whether or not to include archived matters in your search.

Dossier search
If you are using the Dossier area to hold database information, you can search for specific records using these fields. Select Dossier Search.


Select a Dossier Page from the drop-down list and then select a field within that Dossier Page from the Dossier Fields drop-down list.
After a field and page have been chosen, select an appropriate Operator. You can choose either Equal (Exact Match), Not Equal (Not an Exact Match), or Like. Then enter the Value to search for.
Select Add Filter. The search criteria set will be displayed underneath.

You can add as many criteria as you require, and edit or delete any of the existing criteria. Select Search to perform the search.

Global search
You can also use the Global search option. The Global search searches all areas of Osprey with no requirement for a wildcard to be entered and returns all matches. For example to search for Mitzi Broom you can search for either Mitzi or Broom. Should you know the client number you may enter this instead. You can also search for a client and matter combination e.g. B00002/1.

Once you have entered your search details in the Global search box and clicked the magnifying glass icon to perform your search, you can further filter the results found, as well as amending the layout of the columns.
To turn on the filter row, click the column chooser icon, and tick the Show Filter Row box:

When the filter row is turned on, you can search for additional values within each column of your search results:

In the top right of the search results screen, you can clear any grid filters you have added by clicking the Clear Grid Filters icon:

To change the columns that are displayed in the Global search, click the Configure Grid icon, and tick / untick the columns that you want to show/hide:

To reorder columns in the display, simply click and drag the column heading you want to move, and drag it to the required position:

You can also resize columns to fit:

To select a matter, simply click one of the columns of data for the relevant matter.
- Clicking any client information will take you to the Client Details page
- Clicking any matter information will take you to the Matter Details page
- If you have enabled the WIP Balance column, clicking this will take you to the Time Recording page.
- If you have enabled the Client Balance column, clicking this will take you to the client ledger.
You can also export your results to Excel/CSV using the Export button in the top left hand corner:

Please note that search results will now show an icon if there is a record for the client in COLP / COFA.

Next to the Global Search area is a hover-over Client Details button. This displays the current client details as you hover over it so there is no need to move away from the current page.
