Show Key Dates in Outlook
Updated Mar 5th, 2026
Who is this guide for?
Any Users
This guide will go through how to display key dates within your Outlook calendar
Osprey allows you to display any key dates present on your files in Outlook, so you can see at a glance if you have any appointments coming up relevant to your cases.
Please Note: This feature will only work if your email domain is on our Hosted Exchange or the Office 365 cloud. Clients with their emails hosted in other locations will not be able to use this service.
Add the Office 365 credentials
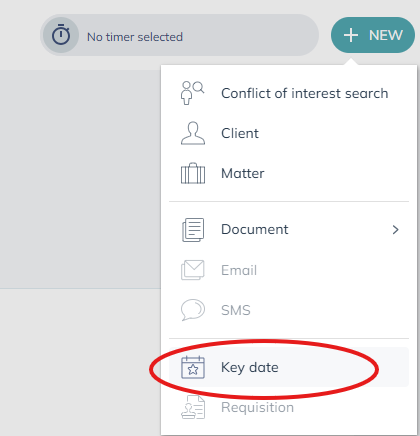
First, use the Action button and select Key Date.
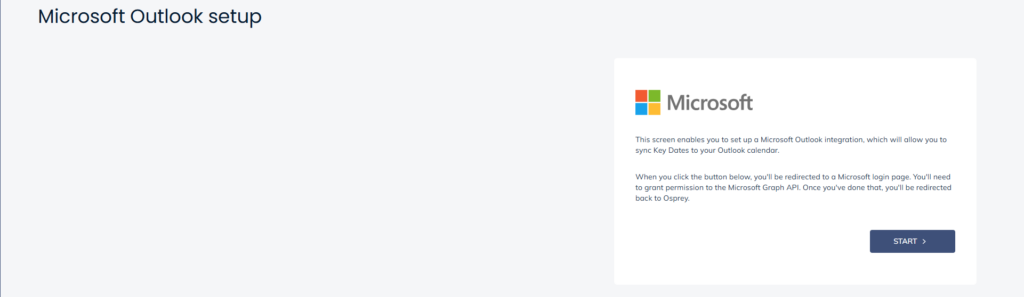
You’ll then see some informational text highlighted in blue, along with a clickable link labelled ‘set up an integration’. Click this link.

You’ll now see the Microsoft Outlook setup screen. Click the Start button to begin linking your Microsoft account to Osprey.
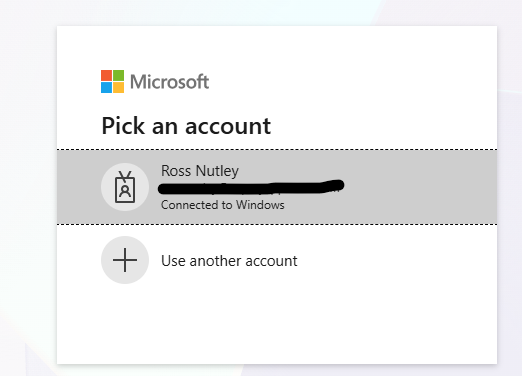
Now select your Microsoft account
Create a key date
Use the Action button and select Key Date.
Now complete the details, ensuring that the Sync to Outlook tick box is selected. You can choose a specific time if needed, or set the appointment as an all‑day event.
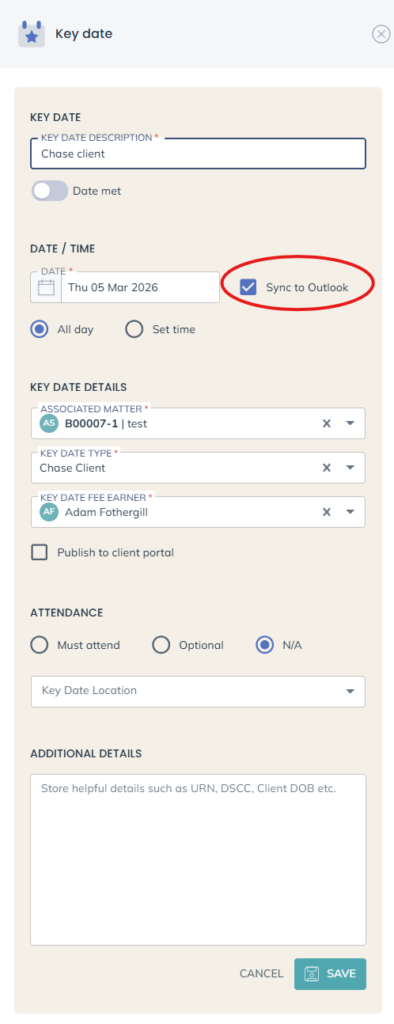
Click Save to add the key date to your Outlook calendar.