Smart Actions: Client and Matter Import
Updated Mar 10th, 2026
Who is this guide for?
Accounts Supervisors, Case Management Supervisors and System Supervisors
This guide will take you through using the Smart Actions function to import clients & matters
You can import client and matter data in bulk into your Osprey site. This is useful where you receive instructions from a third party for example in the form of a spreadsheet or CSV file. Rather than adding the matters manually to your Osprey system, you can create a template to use to import many matters at a time.
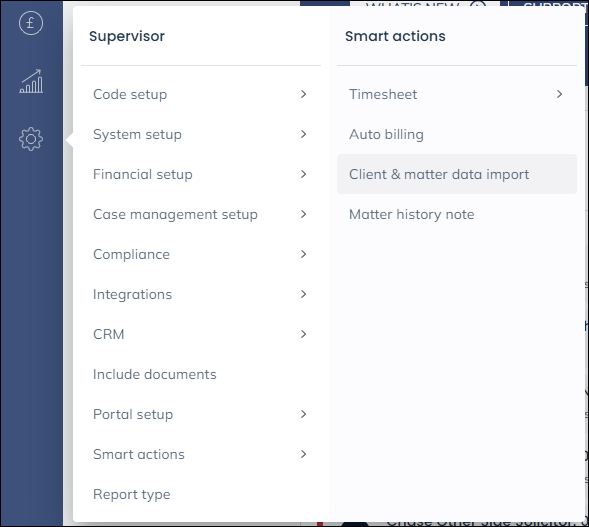
Navigate to the ‘Supervisor’ tab and ‘Smart Actions’ then select ‘Client and Matter Data Import’ as highlighted in the screenshot below:
Please note that if you cannot see this option in the menu, it will need to be enabled in your Access Template. Supervisor-level users can amend this by going to Supervisor > System Setup > Users > Access Templates.
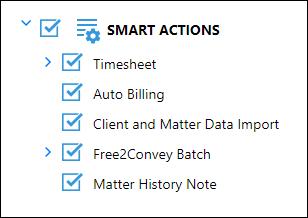
Select the ‘Edit’ icon against the template that needs to be changed, choose ‘Smart Actions’ from the menu that appears and then place a tick in the ‘Client and Matter Data Import’ checkbox, before then selecting ‘Save Access’ at the top to save your changes.
Once you have selected ‘Client and Matter Data Import’, you will be presented with the following ‘Column Setup’ panel.
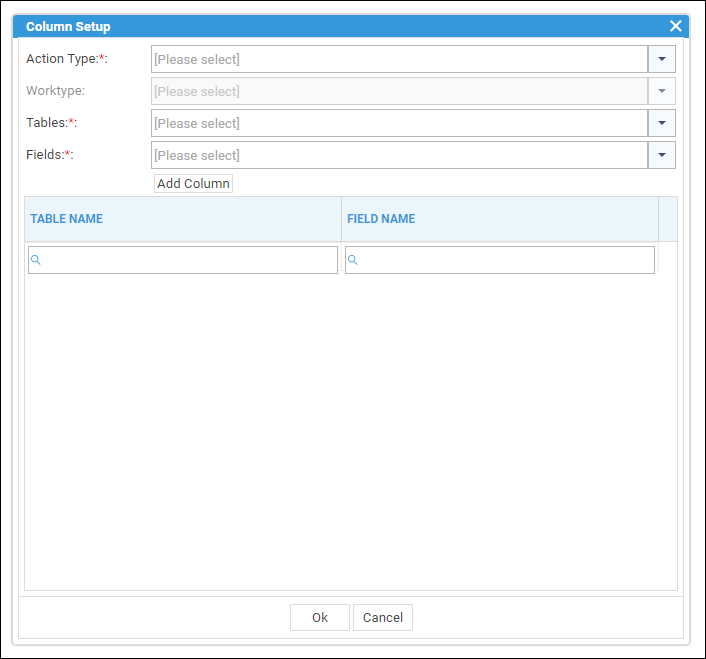
- Action Type: This gives you the choice to import standard client and matter data or standard client, matter and dossier data. The dossier option allows you to map data to your dossier fields.
- Worktype: This is only available if you are importing client and matter and dossier data, you will need to choose the worktype you will be importing the matters to.
- Tables: This allows you to choose the Table where the desired field is held.
- Fields: This allows you to choose the individual fields you wish to map.
The ‘Import Standard Client and Matter Data’ action type will allow you to bulk import clients and matters into your system. You will be able to import against all standard client and matter fields, in addition to any client-level dossier pages stored on your Osprey site.
Choose ‘Add Column’ to save your selection, and then repeat the process for any additional fields. Once complete, select ‘Ok’. Once you have selected ‘Ok’, the mandatory fields and some commonly used fields will be mapped for you, in addition to your selected fields Please note that the fields marked with an asterisk are mandatory.
- Client No*
- Client Type (Company or Individual)*
- Surname*
- Forename
- Title
- Initials
- Email Address
- Matter No*
- Work Type*
- Fee Earner ID*
- Branch*
- Department*
- Matter Description*
- Matter Date Opened*
- Private or LA*
- Remuneration ID*
At the top of the page, the following menu is displayed:

- Column Setup: This allows you to customise the columns available so you can add or remove mapped fields selected in the previous step.
- Import CSV: This allows you to import a CSV file containing all of the data you wish to import.
- New: This allows you to add a line to the table containing a client and matter to import.
- Clone: This allows you to clone a line in the table. This will only be available if you have selected a row.
- Remove: This allows you to remove a line from the table. This will only be available if you have selected a row.
- Save: This will save your clients and matters into your OspreyTM site.
- Download Template: This will allow you to download a template containing all of the default column headings in addition to the ones you have selected. You can populate it and then upload it using the Import CSV option. This feature is explained later on in the guide
Note: If your site uses client auto-numbering, you can enter #NEXT# in the ClientNo field to have OspreyTM automatically number the clients you are importing.
Once you have entered or imported your data, select the rows using the checkbox at the top, then select ‘Save’.
You will then be prompted to confirm you wish to save the rows. Select ‘Ok’ to continue and import the data into your Osprey site.
Once you have chosen the fields you wish to import to, you can use the ‘Download Template’ option. This downloads a CSV template which you can then populate with all the required information.

Save this CSV file somewhere to your computer. Then use the ‘Import CSV’ facility to add this data to the Smart Actions table.

You will then be able to select all the rows using the checkbox at the top. Select ‘Save’ to import into Osprey as described previously.
If you already have data exported from an alternative system that you wish to import using this method, please be aware that it must be in the same ordering as the template you have created.
NOTE: If the template is missing any mandatory information, it will display an error to let you know that data is missing. It will also highlight the rows for you so you can easily locate and rectify the problem.