Linking Fields to your Standard Documents
Updated Mar 31st, 2026
Who is this guide for?
Case Management Supervisors and System Supervisors
This guide explains how to link and unlink fields from your standard documents to include any information which you store within Osprey
Locating your document template
Navigate to Supervisor > Case Management Setup > Standard Documents. A list of all your available document templates will be displayed.
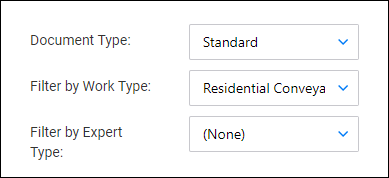
You can filter the list down using the options at the top left of the screen:
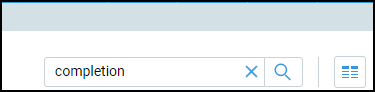
Or, you can search for a specific template name using the search box in the top right corner:
Linking fields to your document template
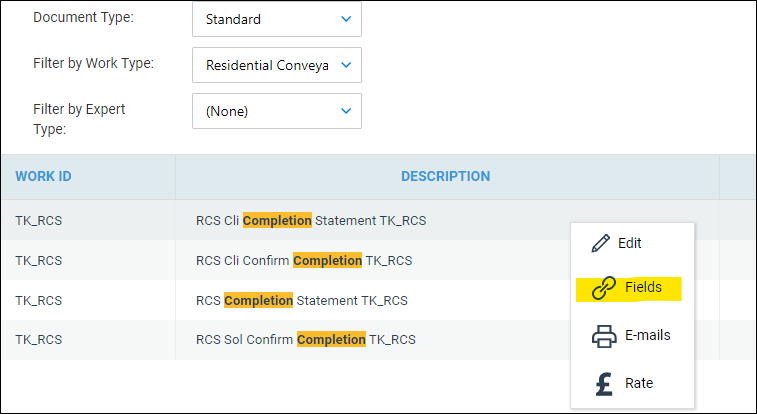
Right click on the document you wish to add fields to and select the Fields link button:
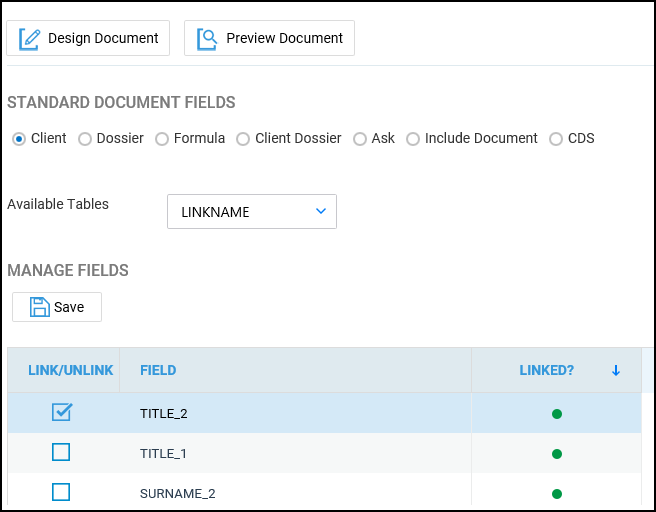
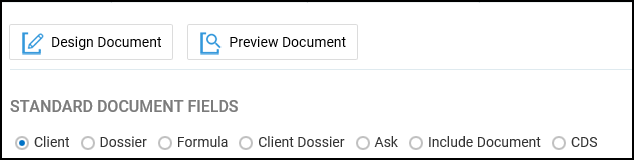
Use the radio buttons to select from the following table types:
- Client – contains all available tables relating to the client and matter
- Dossier – contains all Matter specific dossier page tables linked to the work type of the letter template
- Formula – contains all formula fields created under Supervisor > Case Management Setup > Formulae
- Client Dossier – contains all Global or Client Level dossier tables
- Ask – contains all Ask fields created under Supervisor > Case Management Setup > Formulae > Asks
- Include Document – contains all header and footer include documents created under Supervisor > Include Documents
- CDS – contains all fields relating to Contract Work forms under Case Management
Now choose from the available tables:
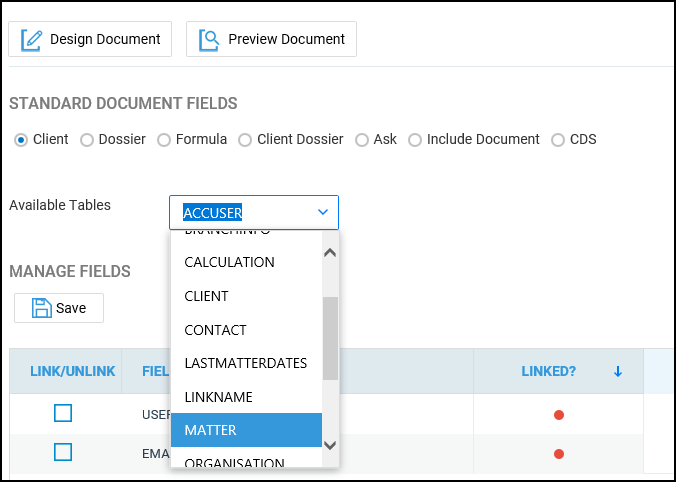
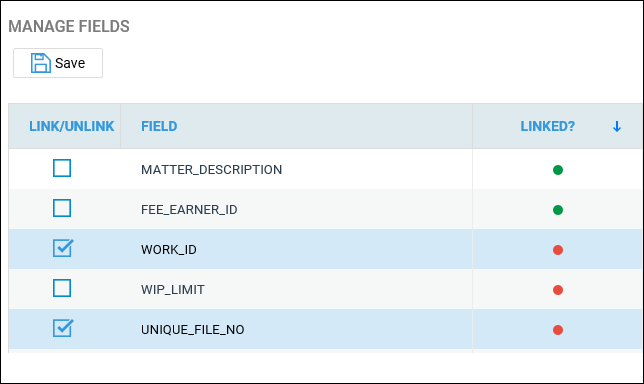
Once you have selected the relevant table, the list of fields in this table will be displayed. Place a tick in the box alongside the fields you wish to link, and click Save.
Select Design Document:

Word will open the document template:
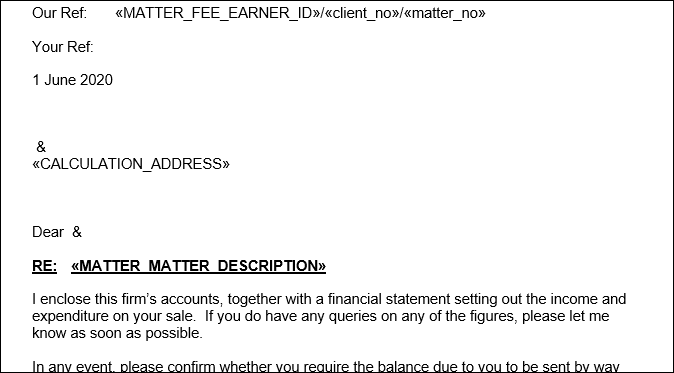
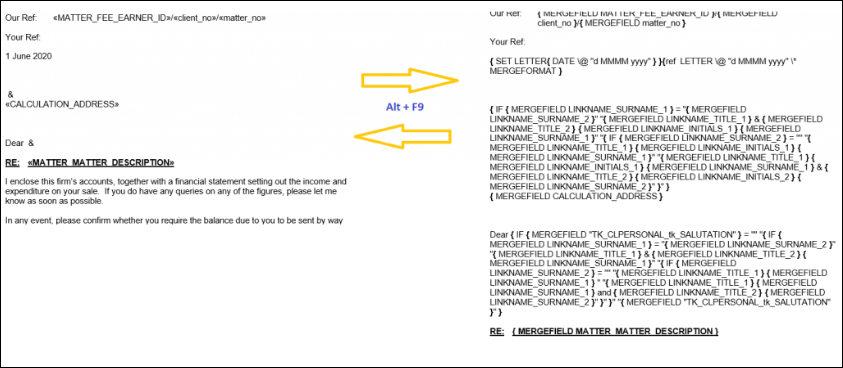
You may toggle field codes on or off by holding down the Alt key and pressing F9:
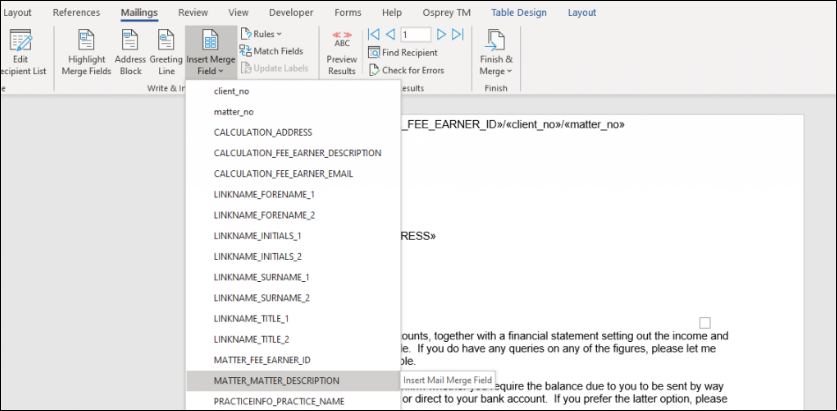
To link a new field to the document, position your mouse cursor in the place you would like the new field to appear, and from the Mailings menu tab select Insert Merge Field:
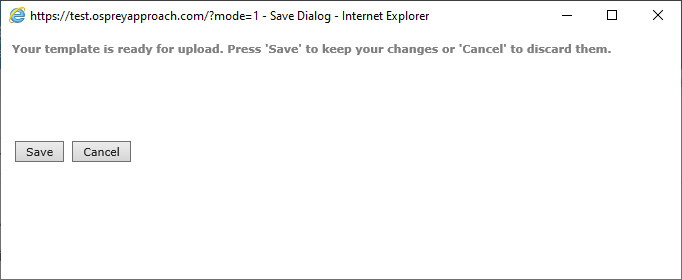
Once you have inserted all the required fields into the template, and made any text changes required, close Word using the red X in the top right hand corner, and save your changes:
To unlink any fields that you have removed from the template, select the relevant Standard Document Fields radio button and Available Table, place a tick in the Link/Unlink box, and click Save: