Use Custom Auto Posting
Updated Mar 24th, 2026
Who is this guide for?
Accounts Supervisors, Case Management Supervisors and System Supervisors
This guide will take you through the custom auto-posting function
Osprey has a number of automatic posting options which you can use to speed up your input. Given a CSV file containing all of the postings you need to make, in the correct format, Osprey can post these for you. Auto posting is available for:
- Cost Transfers
- Client Bank Receipts
- Client Bank Payments
- Matter Addition
Prerequisites
To use the Cost Transfer auto posting you must be running under the Standard style of VAT. This is because Cash Accounting firms need to fill in the VAT Cash Accounting question when posting a cost transfer to correctly reflect the VAT being recovered.
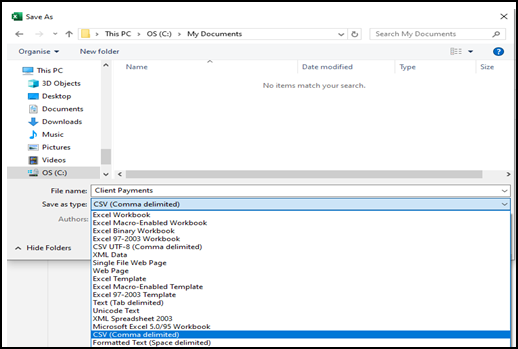
All files for uploading must be saved as CSV (Comma Separated Values) files. This can be done using the Save As option within Excel, and choosing Comma Delimited:
All Banks that you wish to use for auto posting must have their bank account numbers set:

Cost Transfer details
The auto posting will only allow posting from Client to Office, and not from Office to Client, nor from Client to Disbursements.
N.B. The Cost Transfer auto posting should ONLY be used if you are Standard style of VAT. This is because Cash Accounting firms need to fill in the VAT Cash Accounting question when posting a cost transfer to correctly reflect the VAT being recovered.
Example file:
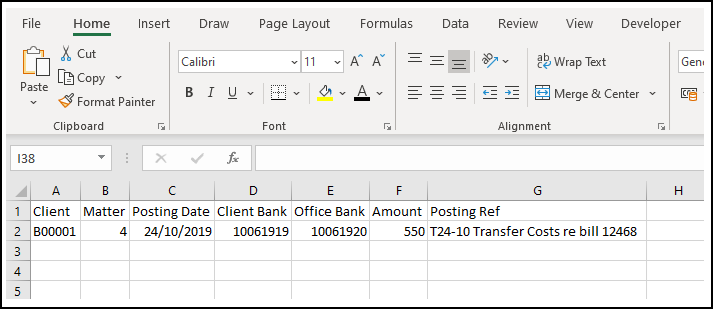
Columns:
Client – should be the client number of the client you wish to post to.
Matter – should be the matter number of the client/matter you wish to post to.
Posting Date – the date of the cost transfer.
Client Bank / Office Bank – these must be the bank account numbers of the client/office bank that the costs are coming from/going to (see Page 2).
Amount – the amount of the transfer, positive figure.
Posting Ref – this will be used for both the posting detail, and the posting reference. In the example above, the reference is placed prior to the detail, so the detail of the posting will be as shown, and the reference will be T24-10.
Client Bank Receipt details
The auto posting posts a client bank receipt into each client/matter’s ledger.
Example File:
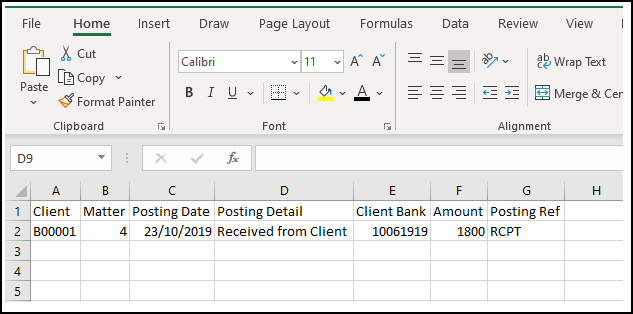
Columns:
Client – should be the client number of the client you wish to post to.
Matter – should be the matter number of the client/matter you wish to post to.
Posting Date – the date of the receipt.
Posting Detail – the detail of the receipt.
Client Bank – this must be the bank account number of the client bank that the receipt is received into (see page 2).
Amount – the amount of the receipt, positive figure.
Posting Ref – the reference for the receipt.
Client Bank Payment details
The auto posting posts a client bank payment into each client/matter’s ledger.
Example File:
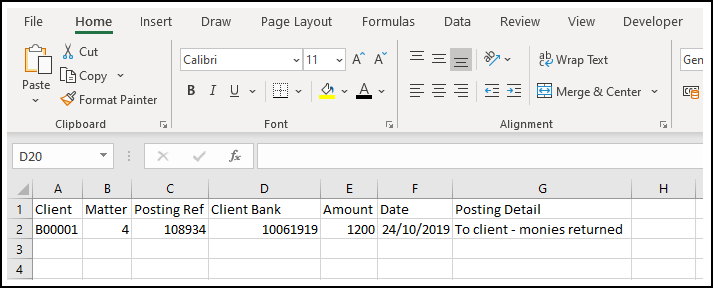
Columns:
Client – should be the client number of the client you wish to post to.
Matter – should be the matter number of the client/matter you wish to post to.
Posting Ref – the reference for the posting.
Client Bank – this must be the bank account number of the client bank that the payment is coming from (see page 2).
Amount – the amount of the payment, positive figure.
Date – the date of the payment.
Posting Detail – the detail of the payment.
Matter Addition details
This auto posting allows you to add new matters to existing clients. To import new Clients, please use Smart Actions.
Example File:
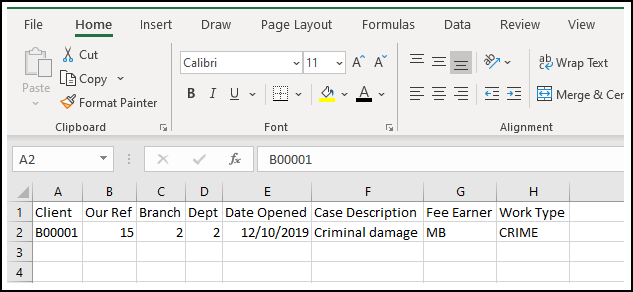
Client – the client number to which you want to add the new matter.
Matter – the new matter number – must not already exist.
Branch – the branch you wish to save the new matter under.
Dept – the department you wish to save the new matter under.
Date Opened – the opening date for the matter.
Case Description – the matter description.
Fee Earner – the fee earner ID of the fee earner who will be dealing with the matter.
Work Type – the work type ID for the new matter.
Perform the import/auto posting
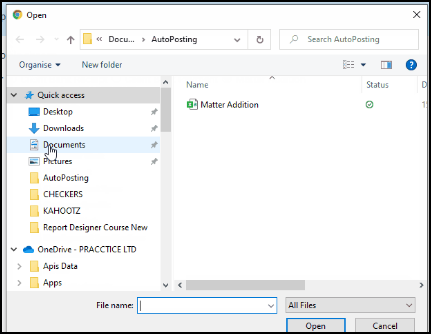
Once you have set up your file(s) for uploading, navigate to Client Ledgers > Custom Auto Posting, and select the relevant radio button, followed by Choose file.

Select and open the file you wish to use for the upload – the file name will then be shown:
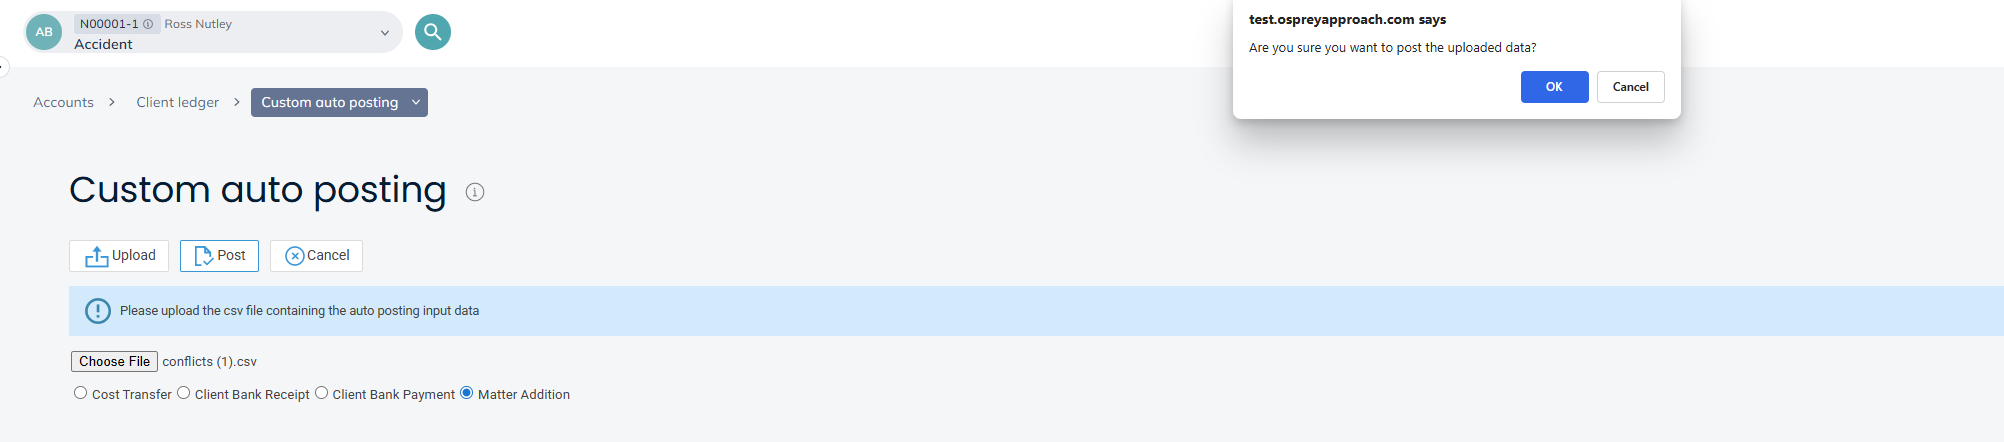
Click Upload. The data in your CSV file will then be displayed, showing any errors or issues the system may have come across:
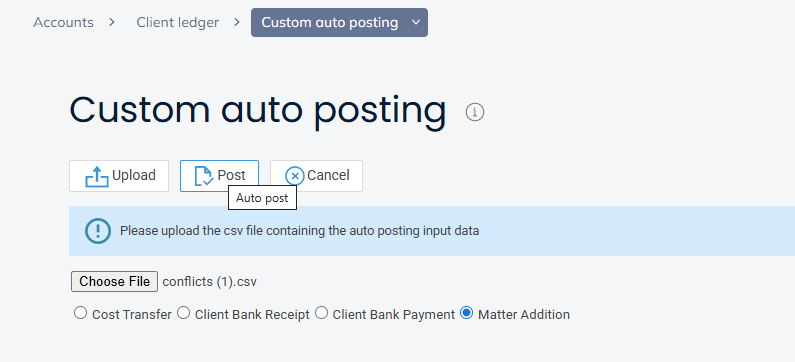
CHECK THE DATA that you are about to upload. There is no simple way to rectify any mistakes. When you are happy, click Post to upload the data. Any issues found will be reported:
Example Sheets
Click below to download an Excel Spreadsheet containing example layouts for the auto posting routines explained above.
Please see the custom auto posting example spreadsheet here >