Cheque Printing Setup
Updated Feb 25th, 2026
Who is this guide for?
Accounts Supervisors
This guide will go through the cheque printing setup, enabling you to run any cheques on pre-printed stationery
Osprey can print your cheques onto pre-designed stationery, saving time writing cheques which have already been posted on the system.
You should contact your bank to arrange for pre-designed stationery to be provided. Once you have pre-designed stationery or a template copy from your bank, you can set up the system ready to start printing your cheques.
Enable cheque printing
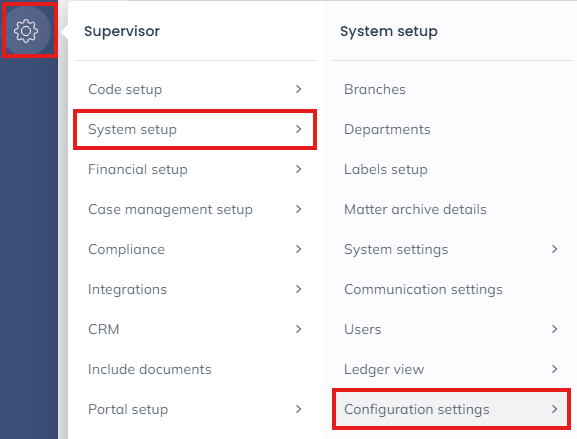
Before you can print cheques, you will need to enable the option on the system. Select Supervisor > System Setup > Configuration Settings.
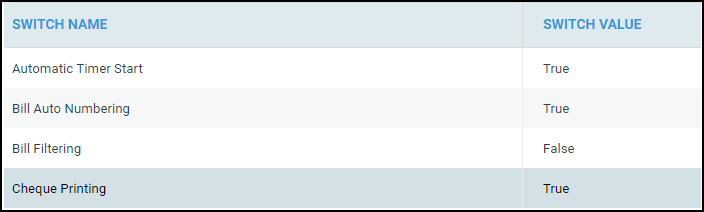
Locate the switch called Cheque Printing, right click it and select Edit

Change False to True, then Save your changes.
Design your cheque template
You will now need to design the Word document template to fit your stationery.
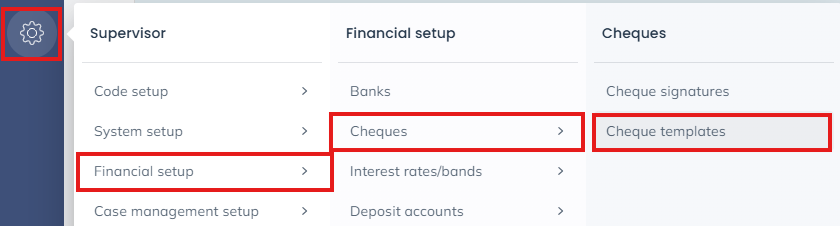
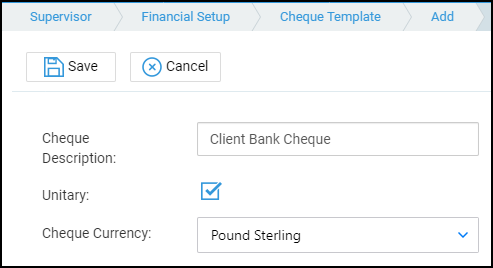
Select Supervisor > Financial Setup > Cheques > Cheque Templates
Select New

Enter a description, and select whether you would like your cheque to display as unitary or as a sentence.
e.g. Unitary cheques have the units split so an amount of £2320.25 would look like this:

Non-unitary cheques have the amount shown in words e.g.

Finally, choose the currency and click Save.
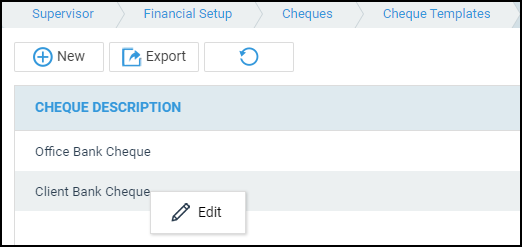
To open the template for editing, right click your template, click Edit
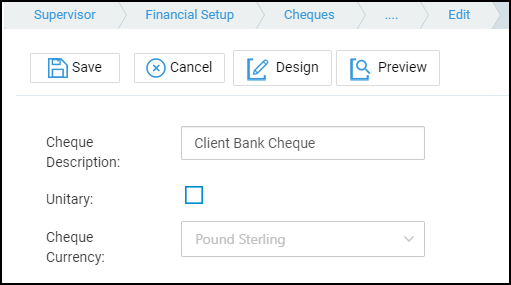
Now select Design
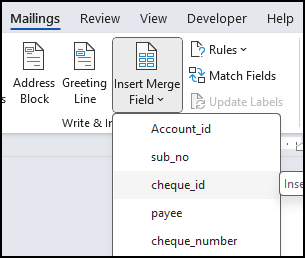
Word will open, and you can now create your template to match your stationery. We would recommend using tables for this.
You may insert the relevant merge fields by selecting the Mailings menu and choosing Insert Merge Field to select the field to insert.
When you are finished close and Save the template
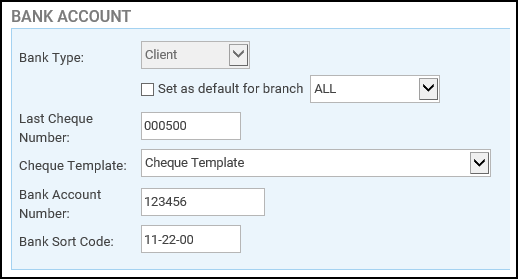
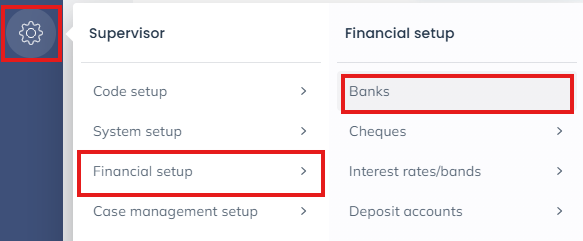
Linking your cheque template to the relevant bank(s)
Now that you have designed your Cheque Template you will need to link it to the Bank or Banks that you want to use it for. Navigate to the Supervisor menu, Financial Setup and Banks.
Click Edit, set the last cheque number (Osprey will add one to this when you post your next cheque), select the Cheque Template and click Save.