Generating and Printing Cheques
Updated Mar 3rd, 2026
Who is this guide for?
Accounts Users
This guide will go through generating cheques for you to print on your office stationery
Once your supervisor has created a cheque template >, you can start posting and printing cheques.
Generating a Printable Cheque
Client Bank Payment or Office Bank Payment postings will have a tick box – Cheque Required?
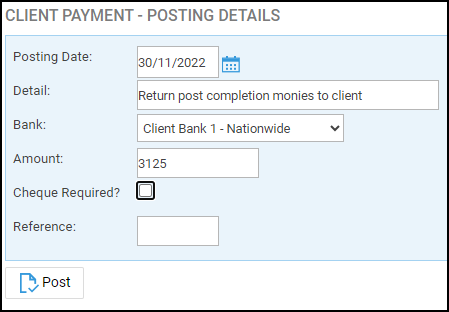
This box must be ticked during the financial posting in order to generate a printable cheque in Osprey.
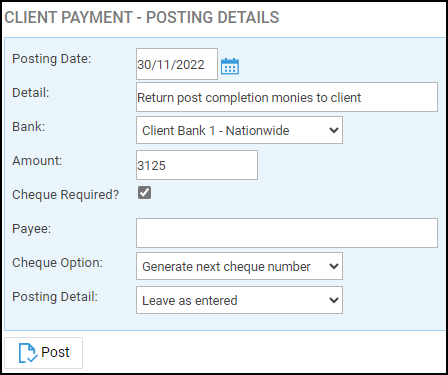
Once you have ticked this box, you will be presented with 3 further boxes:
- Payee: Enter the Payee name as you want it to appear on the printed cheque.
- Cheque Option: This drop down gives you 3 options
- Generate next cheque number – The system will automatically enter the next cheque number based on the value held against the relevant bank.
- Enter next cheque number – This option allows you to type in the cheque number.
- Add to existing cheque – This allows you to add the amount for this cheque to another you have already posted for the same payee – for example, if you have a client with several matters that you want to pay client monies back to. See guide here for assistance with this option.
- Posting Detail: This drop down also gives you 3 options:
- Leave as entered – The posting detail will be retained as originally entered.
- Add payee to detail – The payee name will be added to the detail.
- Replace detail with payee – The posting detail you entered will be removed and replaced with the payee detail.
Clicking Post will then post your entry and also add a printable cheque into the list within the Banks and Journals area.
Printing Cheques
Navigate to Banks & Journals, Cheque Printing.
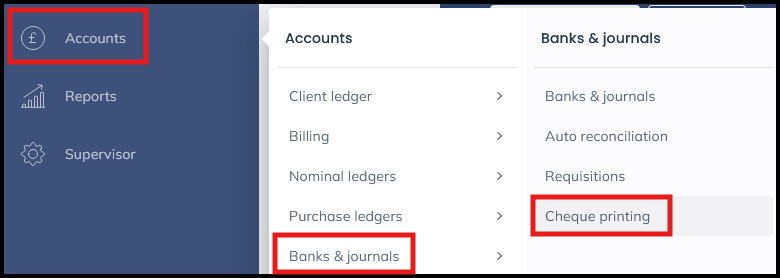
Select the bank that you want to print cheques for. The system will alert you if there is no cheque template set up for this bank.
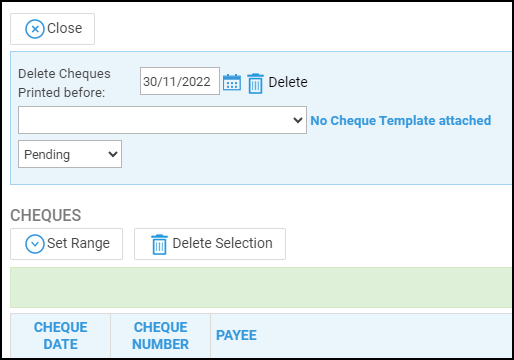
Tick the cheques you want to print, or select the first and last and click Set Range to print a range.
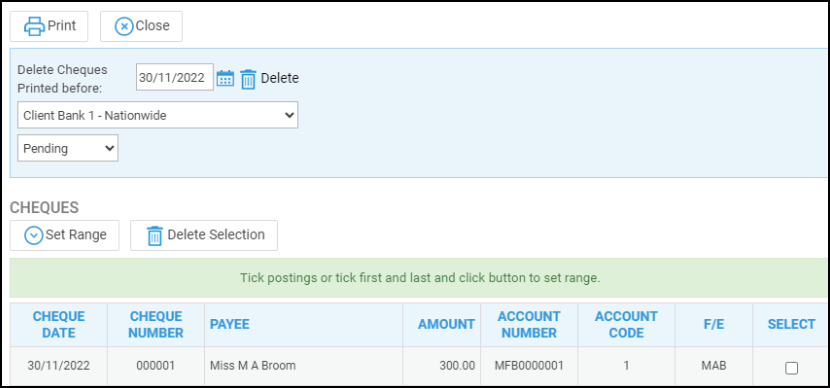
Click Print to open Word and produce the cheques, print the cheques and close the document.