Customising your Client Ledger with Ledger and Posting Type views
Updated Oct 30th, 2025
Who is this guide for?
Accounts Users and Accounts Supervisors
This guide will show you how to customise your Client Ledger so that it displays exactly as needed
Osprey allows you to customise your client ledger view to display the columns in different orders, with or without debit/credit breakdown columns, and also to customise the posting types you can see in the drop down list – this can be useful if you have staff who are only permitted to post client ledger entries but not office or vice versa.
New Ledger Views
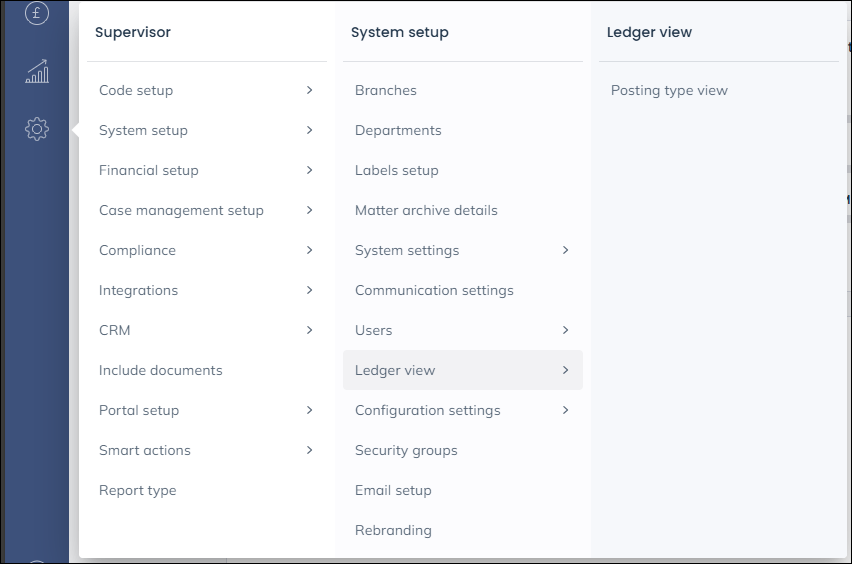
You will need Supervisor access to set up a new ledger view. This will enable you to decide which columns to show on the Client Ledger, and in which order.
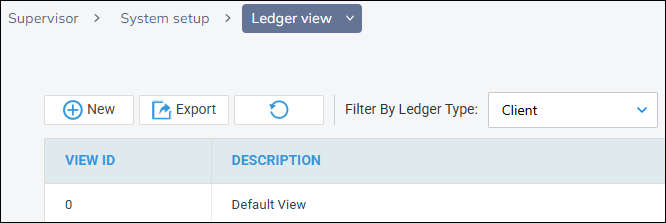
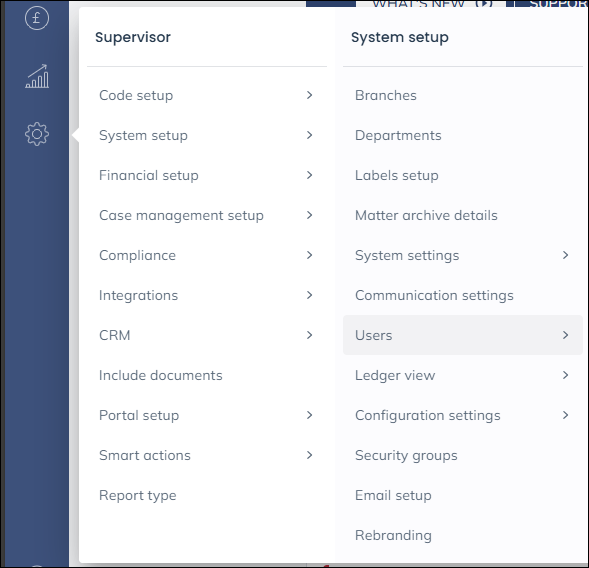
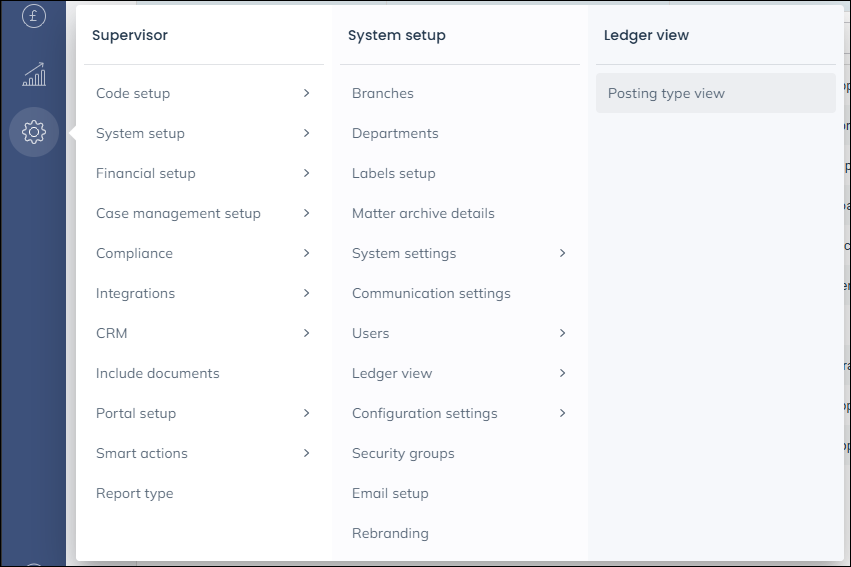
In the browser, navigate to Supervisor > System Setup > Ledger View
On the following screen click New
On the next screen, firstly give your new view a name/description so that you can identify it easily, then select the columns you want to see and click Add to add them into the right hand side selection box:
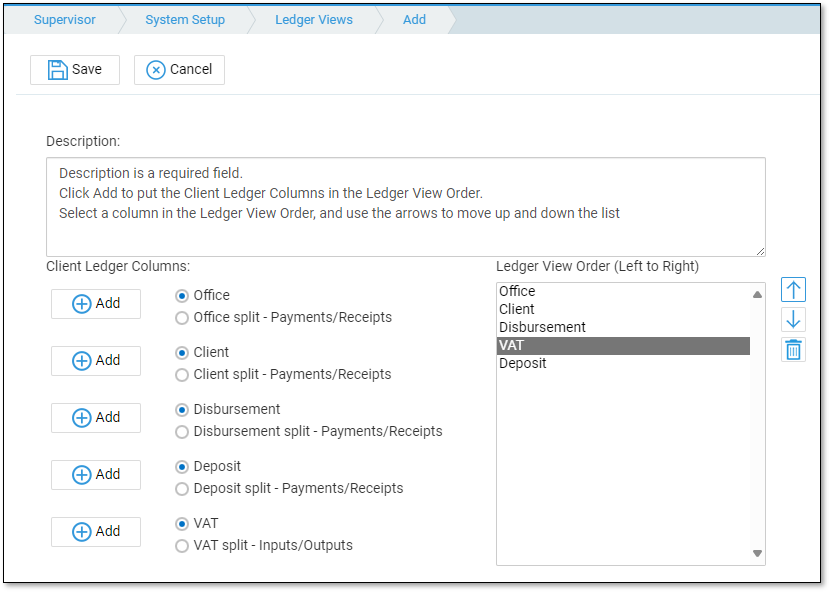
For each monetary column there is the option of showing just a single column (Office, Client, Disbursement, Deposit, VAT) with the entries in black or red denoting credits/debits e.g.:

Or you can show each monetary column split into Payments/Receipts e.g.:

You can then move the columns up or down by selecting them in the right hand side box and using the arrow up/down buttons, or remove them again by selecting them in the right hand side box and clicking the bin icon.
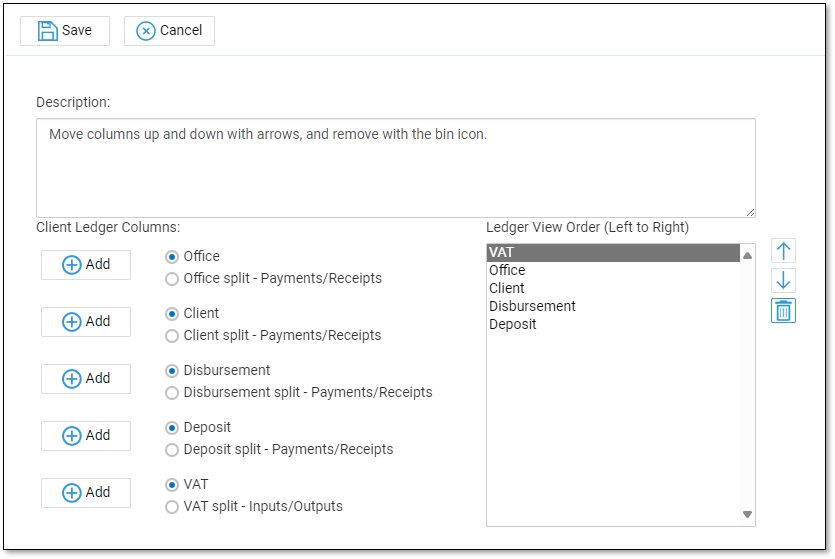
Once you are happy with the order of your columns click Save.
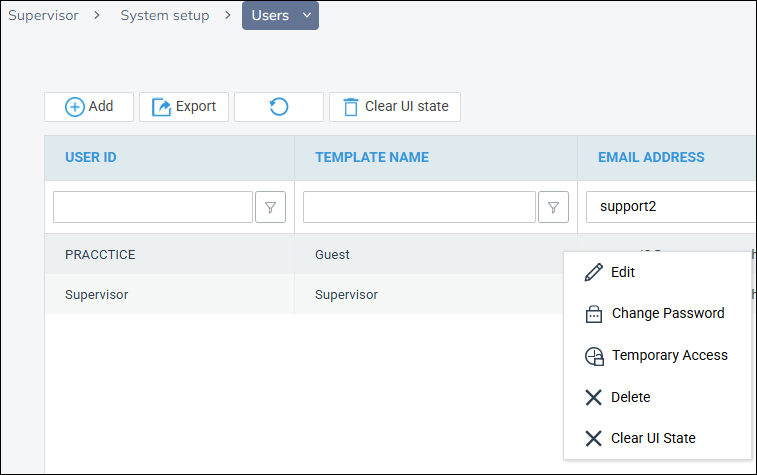
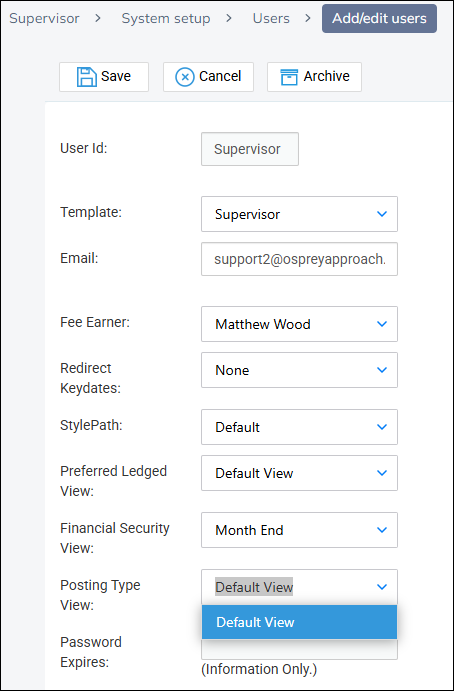
You can now assign this Ledger View to your users. To do this, navigate to Supervisor > System Setup > Users.
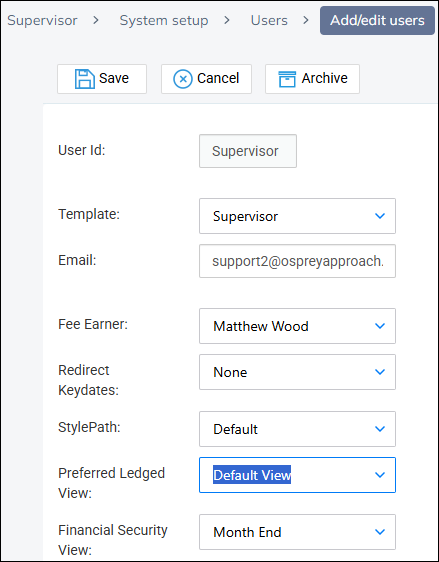
Right click on the user you wish to assign this view to, and click Edit.
Select your new Ledger View from the drop down list, and click Save when you’re done.
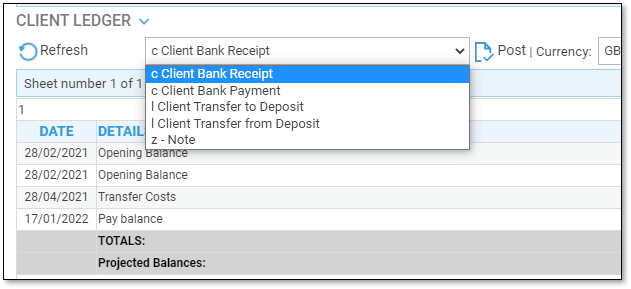
Posting Type Views
You will need Supervisor access to set up a new posting type view. This will enable you to decide which posting types to show on the Client Ledger.
Navigate to Supervisor > System Setup > Ledger View > Posting Type View.
Click New. Give your new posting type view a name. Select the ledger you want to affect. Now select each of the posting types you want to grant access to and click the + icon to add them to the list. You can use the up and down arrows to move a posting type up or down in the list, and the bin icon to remove a posting type from the list.
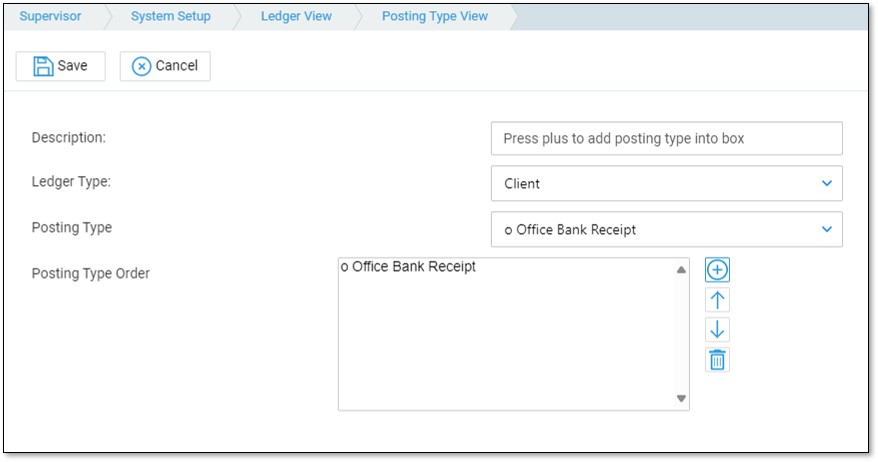
Click Save when complete.
Now you are ready to assign this posting type view to the users who are to have this restricted posting type view. Navigate to Supervisor > System Setup > Users and right click to Edit the user you want to apply the view to.
Select your new posting type view from the list and then click Save when finished.
The ledger will now only display a list of the posting types you selected.