Passwords and Security
Updated Mar 27th, 2026
Who is this guide for?
Any Users and System Supervisors
This guide will take you through customising your passwords and logins for Osprey
Osprey allows you to customise how your users log into the software. Supervisor users are able to set password length and complexity, as well as assigning a number of incorrect login attempts, with the option to lock the account should an incorrect password be entered a number of times.
Resetting forgotten passwords
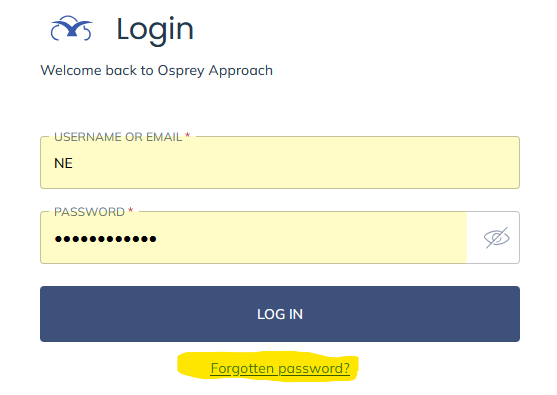
Users can reset forgotten passwords by clicking the Forgotten password link on the login screen:
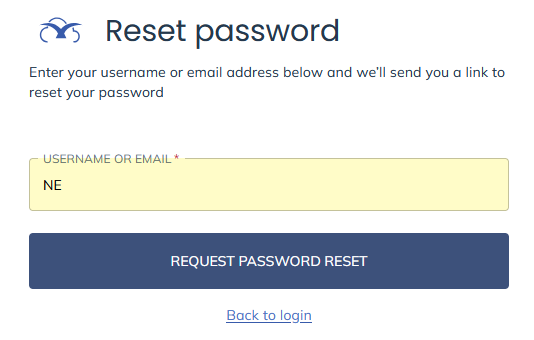
Now enter the User Name or the email address for the password reset and click Request Password Reset:
An email will be sent to the email address registered against the user account containing a link to create a new password.

You will then be prompted to create a new password.

The user profile
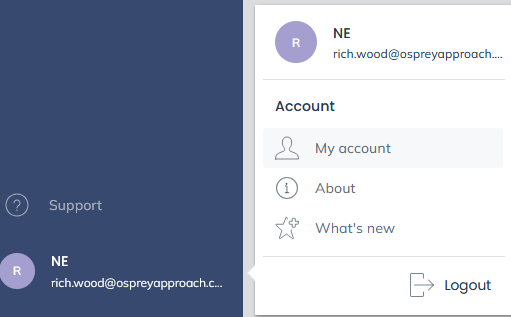
Once logged in, you can make changes to your user settings through the My account area, accessible in the bottom left hand corner of the software:
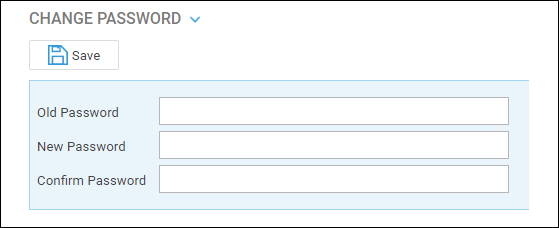
- To change your password, enter your current password, your new password in the New Password/Confirm Password boxes, and click Save:
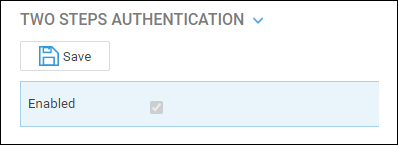
- To turn on Two Steps Authentication tick the box and click Save. This feature means that after entering your password, you will also be required to enter a code sent to your email address prior to being able to access the system. A greyed out ticked box means that your Supervisor has already set Two Steps Authentication:
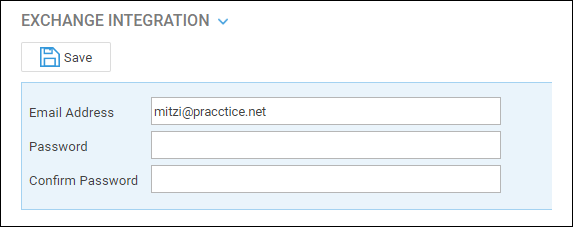
- To set your Outlook password for use with Exchange integration, enter it into the Password/Confirm Password boxes below your email address and click Save:
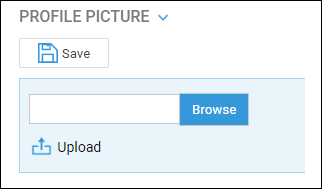
- To upload a profile picture, click the Browse button, choose the file you want to upload and click the Upload button, then Save:
Your profile photo will now appear in place of the User Profile icon:
Supervisor settings
Supervisor users also have further control over security settings. To change how users log into the software, follow the steps below.
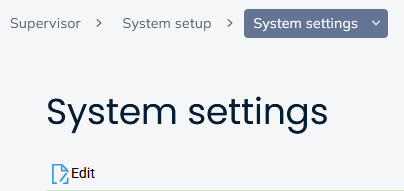
Navigate to Supervisor > System Setup > System Settings, and click Edit.
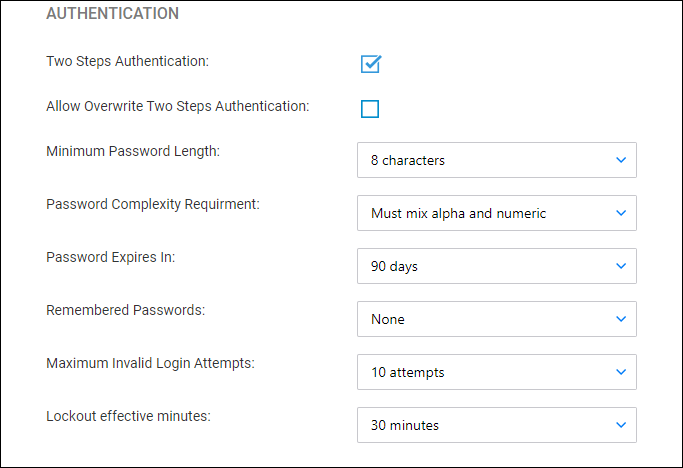
Scroll down the page to the section marked Authentication:
Edit settings as required.
- Two Steps Authentication – Ticking this ensures that upon successfully entering their login details users will be asked to enter a code emailed to them.
- Allow Overwrite Two Steps Authentication – Ticking this means that users can decide whether or not they want to use the Two Steps Authentication – if ticked, users will be able to untick the Two Steps Authentication setting within their own User Profile area.
- Minimum Password Length – choose between 8 or 10 characters.
- Password Complexity Requirement – choose between No Restriction (users can use letters or numbers only) or Must mix alpha and numeric.
- Password Expires In – choose between Never/30 Days/60 Days/90 Days/a Year. When set, will require the user to change their password after the set number of days.
- Remembered Passwords – choose between None/3 passwords/5 passwords. When set, will remember the last 3 or 5 passwords per user, meaning that these cannot be used again.
- Maximum Invalid Login Attempts – choose between No Limit/3 attempts/5 attempts/10 attempts. When set, will lock the user out after the specified number of failed attempts to log in.
- Lockout Effective Minutes – choose between Forever (must be unlocked by a supervisor)/15 minutes/30 minutes/1 hour/2 hours. When set, upon the Maximum Invalid Login Attempts being reached, the user will be locked out for the specified length of time. Where Forever has been chosen, only a supervisor user can unlock the user enabling them to log in again. To unlock a locked user, navigate to Supervisor > System Setup > Users, right click the user and select Unlock.
Save your changes once completed.