Setting up InfoTrack Integration
Updated Mar 24th, 2026
The new InfoTrack Disbursement Feature is available exclusively in Osprey v1.5. If you’re not yet on v1.5, you’ll need to upgrade to start using this powerful integration.
Released March 2025
To activate the InfoTrack integration and begin using automatic disbursement posting, please contact your Client Success Manager or reach out to Support to schedule the update. Once you’re on v1.5, you’ll be able to streamline your financial workflow and unlock all the benefits this feature has to offer.
Who is this guide for?
Case Management Supervisors and System Supervisors
This guide will go through setting up the InfoTrack integration in Osprey
Osprey Approach offers integration with InfoTrack, allowing you to run InfoTrack searches. To use these, a supervisor level user will need to ensure that the integration has been set up.
Setting up credentials
If you attempt to use InfoTrack without having your InfoTrack credentials set, a warning will appear.

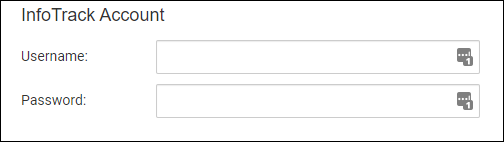
The credentials can be set by going to Supervisor > System Setup > Users, right click the user in question and click Edit.
Scrolling to the bottom of the page you can fill in the InfoTrack credentials and then click Save at the top.
InfoTrack mapping
You can map the Osprey fields to the fields of InfoTrack, automatically populating the InfoTrack screen.
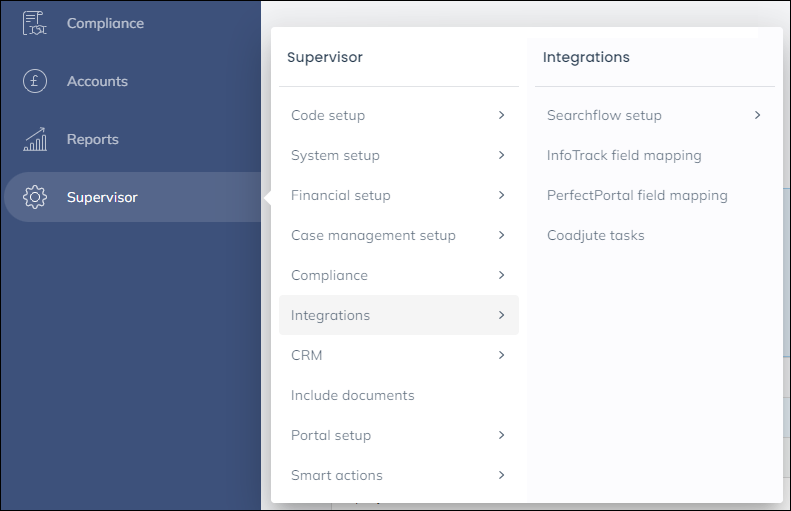
Select Supervisor > Integrations > InfoTrack Field Mapping
Select the InfoTrack Field.
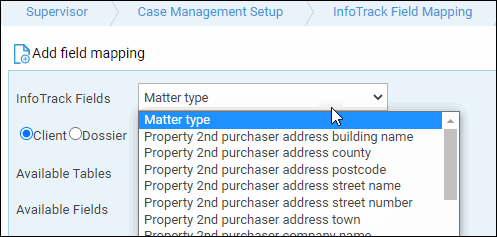
Choose either Client or Dossier and then select the appropriate Available Table and Field to map to.
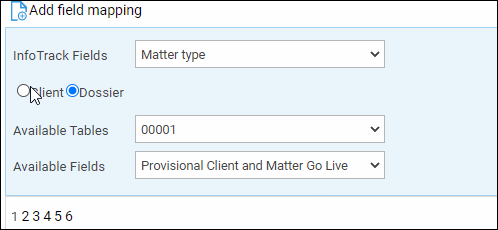
Click Add field Mapping. The mapping will appear underneath, repeat the process with any further fields.

Auto posting disbursements
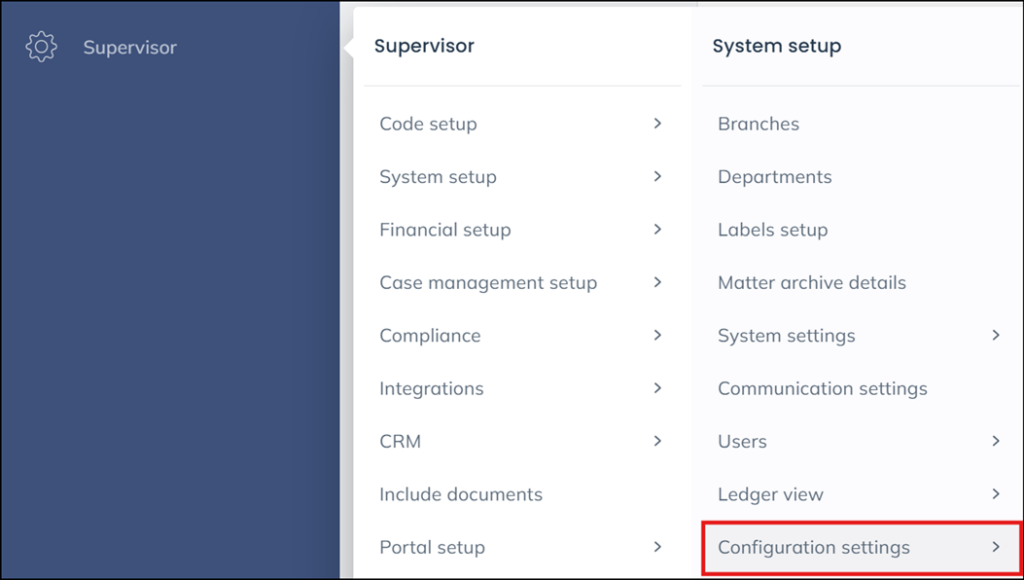
To allow Osprey to automatically post the costs of the searches as office bank payments go to Supervisor > System Setup > Configuration Settings.
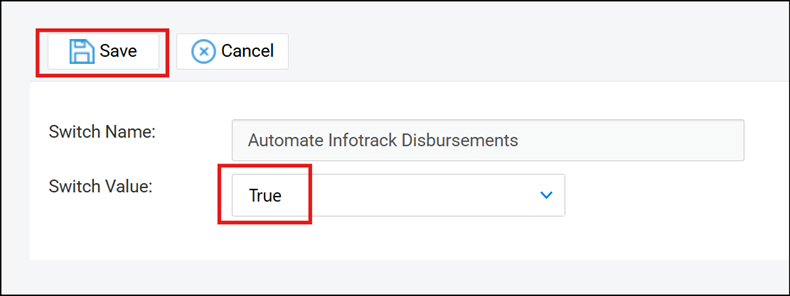
Search for the setting Automate InfoTrack Disbursements, right click it and select Edit to set it to True and click Save.
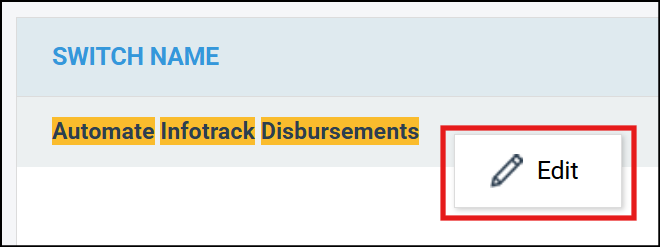
You will also need to set the Office Bank to post to using the switch InfoTrack Disbursement Bank Account Id, right click it and select Edit to set the Office Bank and click Save.

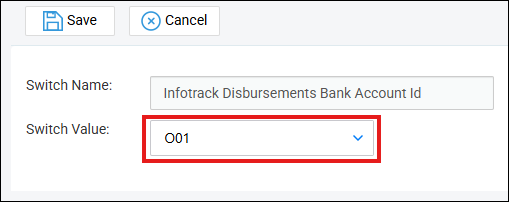
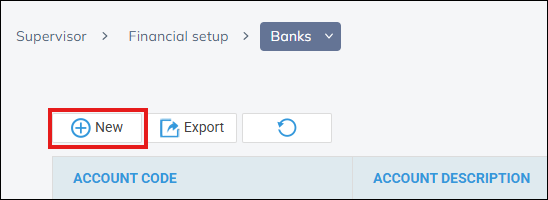
We recommend this be a “dummy” bank account, should you need to setup a new bank you may do so in Supervisor > Financial Setup > Banks.
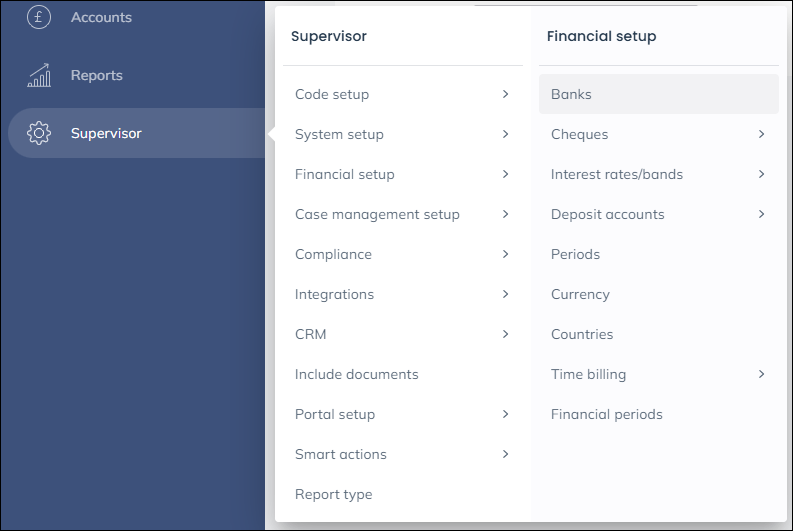
Click New at the top of the page