Setting Up Security Groups
Updated Apr 24th, 2024
Who is this guide for?
System Supervisors
This guide will go through setting up security groups, making it easier to apply permissions throughout Osprey
You could set these up as departments to ensure that staff in your conveyancing team are unable to view documents for family matters for example, or the groups could be designed around your staff members seniority.
Set up Security Groups
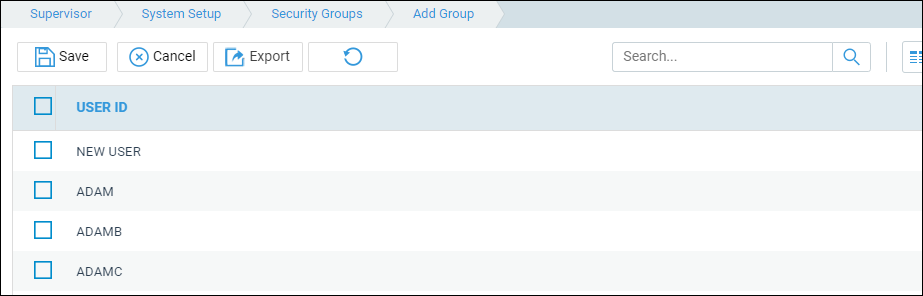
Navigate to Supervisor > System Setup > Security Groups and click on Add Group.
Select New at the top of the screen to bring up the following area:
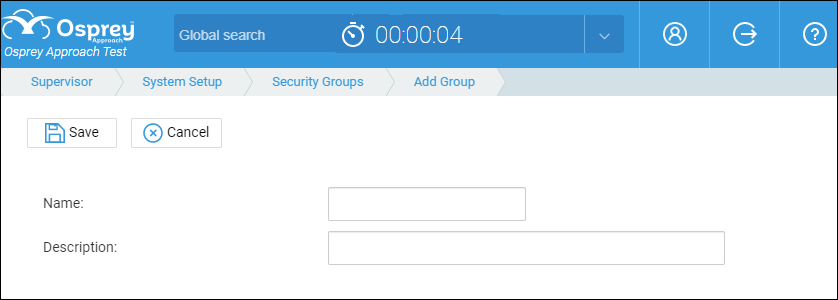
Enter an appropriate name for your Group.
For example, Conveyancing Team or All Staff and then enter a description, which would generally be the same as the name of the group.
Select Save and repeat for any further groups as required.
Linking users to groups
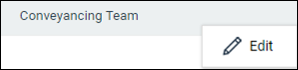
Users now need to be linked to any new groups which have been created. Right click on the group you want to link users to and select Edit.
Tick the box to the left-hand side of a user’s name to link to the selected group, repeat as required and click Save.
Please note that this list of users will include supervisor users and therefore they will still have full permissions.