Using Include Documents to Populate Headers & Footers
Updated Mar 24th, 2026
Who is this guide for?
Case Management Supervisors and System Supervisors
This guide will take you through using the Include Documents function in Osprey
Osprey’s Include Documents functionality allows you to upload your header and footer into your Osprey documents. If you need to update your header or footer, you are able to upload a new version of your header or footer, instantly updating all your Osprey Document Templates.
This helps ensure all users are able to produce documents with the correct headers and footers.
Each branch can also be set up with their own headers and footer if required.
You must have your header and footer saved locally to upload them to the Include Documents area.
The details must also be in the MAIN BODY of the document to be uploaded.
Graphic in Main Body of Document:

Graphic in Header of Document:

Add a new Include Document
Once your header or footer document is saved locally, go to Supervisor > Include Documents.

Select New to create a new Include Document

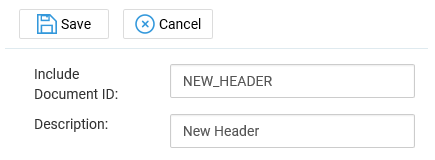
You will now be asked to enter an ID and Description for your Include Document.
The Include Document ID cannot contain spaces.
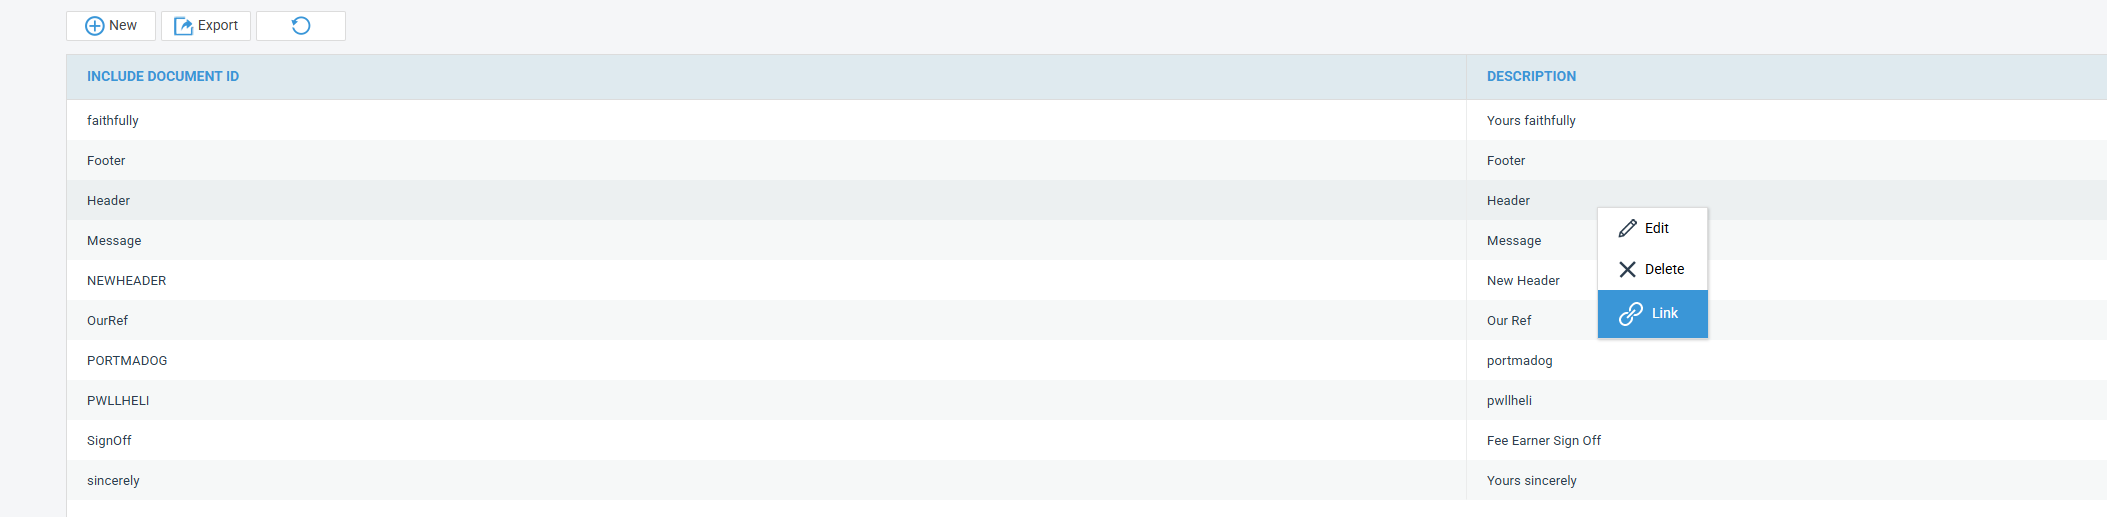
Your new header will now be visible on the Include Document screen.
Right-click and select Link, as highlighted below.

You will now be asked to select a branch. If you have just one branch, or you wish to use the same header/footer for all branches, this can be left as the top entry in your Branch list.

Once a branch has been chosen, select Browse to open a file explorer window.
Select your header/footer from here and the Document field should now display the relevant file name.

Click Save to upload the Include Document.
Once added, you can right-click and select View to confirm that the header has been uploaded correctly should you wish.
Update an existing Include Document
Navigate to Supervisor > Include Documents. Right click the document you wish to update and select Link.
To download a copy of the existing Include Document, right-click on the relevant branch, and select View.
You will have options to Open or Save the document.

You may use your downloaded Include Document to make amendments. Once done, save to your local PC. This can then be uploaded, overwriting the existing Include Document.
To overwrite the Include Document, select the branch you wish to overwrite in the top section of the screen, then browse to the folder that has your new header document in it. Select the document, and then click Save.

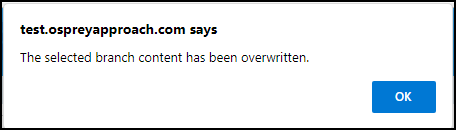
A prompt will appear, confirming the header is now updated.
Linking your Include Document to your standard documents
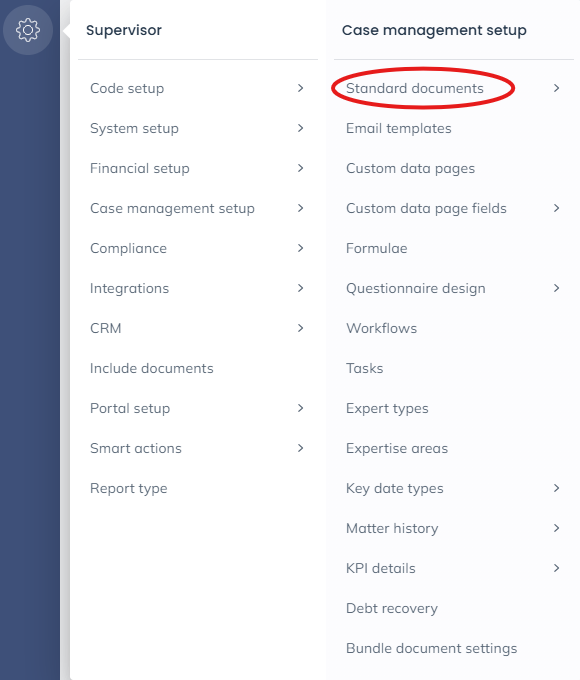
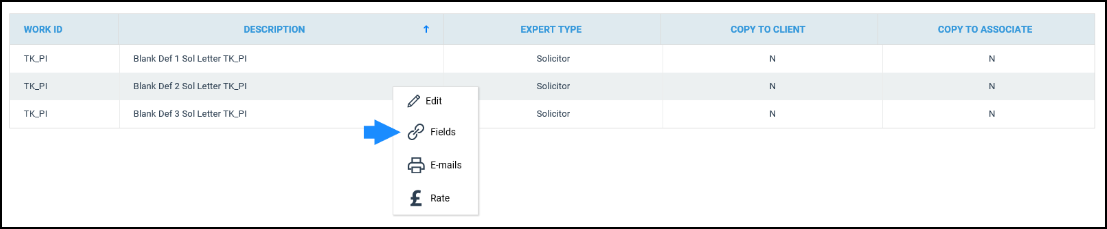
Navigate to Supervisor > Case Management Setup > Standard Documents area to bring up a list of all available documents on the system.
Locate the document you wish to add your header/footer to and right-click on it.
Select Fields.
The letter overview will now open. Select Include Document radio button under the Standard Document Fields to show all available Include Documents.
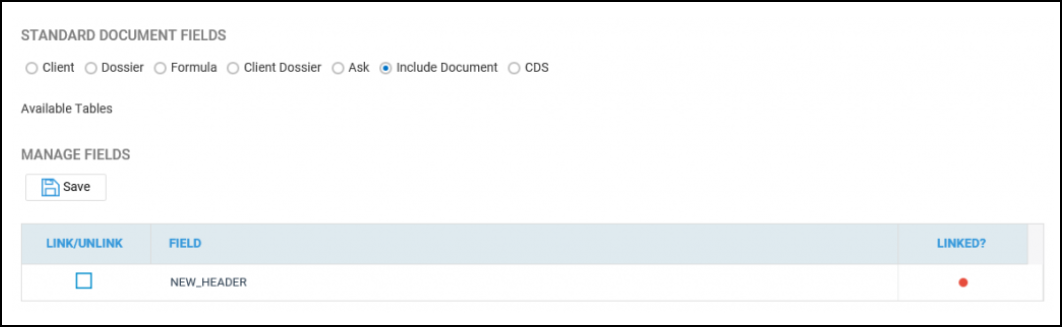
Left click the Link/Unlink field on the relevant Include Document and click Save. The Linked column will now show as Green, indicating that the Include Document is now linked.

Once linked, select Design Letter at the top of the screen to place the Include Document into your template.
Double left-click into the document header, or go to Insert > Header > Edit Header,
Left click within the header area of the document to ensure that your Include Document merge field is placed within the header area.
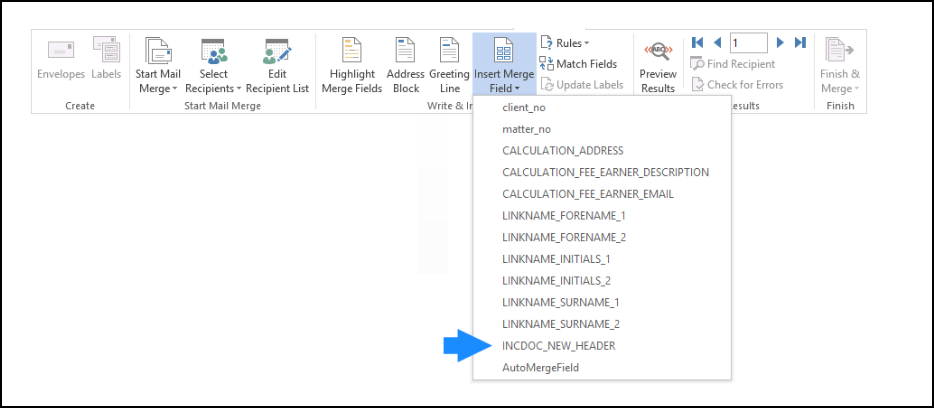
To add the merge field, go to Mailings > Insert Merge Field and locate your Include Document. These will have the prefix INCDOC_.
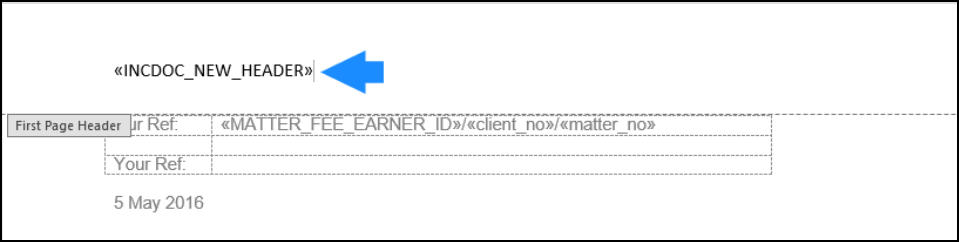
Clicking this will insert the header into your document as shown here.
You can make any further adjustments you wish. Once complete, close the document using the X in the top-right corner.
The Osprey Save window will display. Click Save.
You may now preview the document to ensure that the header appears as needed. The above process can also be repeated for any footers which need to be included.