Report Writer Quick Start
Updated Jan 30th, 2025
Who is this guide for?
Accounts Supervisors, Case Management Supervisors, System Supervisors and Report Writers
Osprey Approach has its own report writing software which can be used to create your own custom reports.
Prior to taking the Report Designer course, please check all of the following. Failure to do so may result in the training being postponed.
To use the report writer, your Osprey user must be linked to the Supervisor access template, and you will need permissions on your local machine to enable installation of the report writer software.
Checklist
Check Access Template to ensure all relevant areas are accessible
When logged in as a Supervisor user, ensure you can see the following areas:
- Reports > Reports (New) and the list of currently available reports:

- Supervisor > Report Setup > Report Type:

If you do not have access to either of these areas, please follow the steps below.
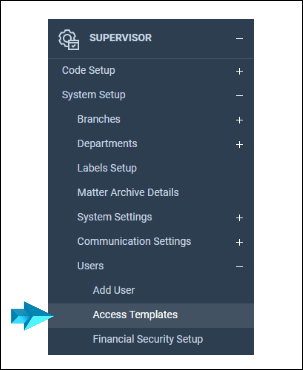
Go to the Supervisor area of Osprey and then select ‘System Settings’. When the menu appears, click on ‘Users’ and then ‘Access Templates’.
This will open a list of the areas of Osprey which can then be edited to allow access for users linked to a specific template.

Edit the ‘Supervisor’ template and scroll toward the bottom of the list of Supervisor check boxes. Ensure the areas displayed below are checked:

In order to allow users access to any saved reports, ensure that the following options are checked against any relevant access template under the Reports area.

Install the Report Designer software
Ensure that you have installed the Report Designer software on the PC that you intend to perform the training session on, using the link below. This may require administrator rights, so we recommend that you discuss this with your IT team.
https://apps.ospreyapproach.com/products/tools/ReportDesigner/ReportDesigner.zip
Click the link above, and a box similar to the below will open:

Click Open.
A File Explorer box will open:

Double click the ReportDesigner folder, then double click the setup.exe file:

Follow the instructions to install the Report Designer.
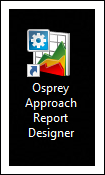
Once installed, the Report Writer will be available on your computer. The icon is shown below. You can search for the application in the bottom left hand corner search box, or select it from the Programs menu.

Be aware that the .NET Framework 4 will need to be installed on your computer to enable you to use the Report Writer. When installing the software for the first time, you will be prompted to download it if this is not found. Please note that this is simply a Microsoft update and can be downloaded from their website should the prompt not appear. If any assistance is required, please contact your network administrator.
Set your Osprey URL
You can now select the icon to open the Report Writer.
When using the Report Writer for the first time, you will be prompted to enter the URL for your Osprey database. For example https://pracctice.ospreyapproach.com/main.

Once entered, you must supply your Osprey username and password. In order to log in your user name must be set up to use the Supervisor access template.

Select ‘Login’ to access the Report Writer and begin creating your reports. If any assistance is required in terms of creating and editing reports, please contact our Support team on 03300 604 940.
Ensure your User ID is set up to use the Supervisor Template
Ensure that your Osprey User ID is linked to the Supervisor access template – only Supervisor users are permitted to log in to the report designer. This can be checked from Supervisor > System Setup > Users:
