Produce a Document
Updated Feb 17th, 2026
Who is this guide for?
Any Users
This guide will show you how to produce a document and time record when saving it
To generate documents from Osprey Browser, you will need to have the Osprey Gateway installed.
Produce a Document
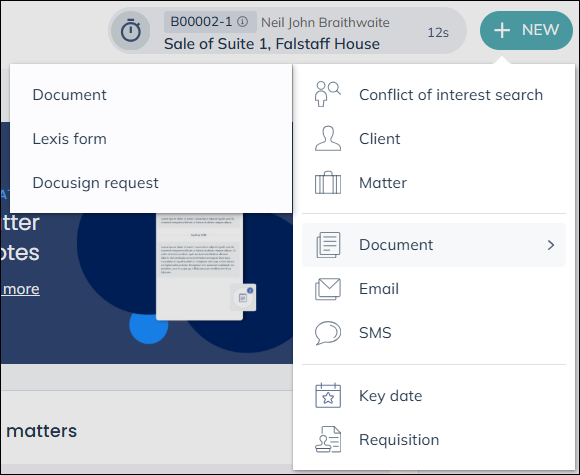
To produce a document, load the relevant client, then navigate to NEW > Document > Document.
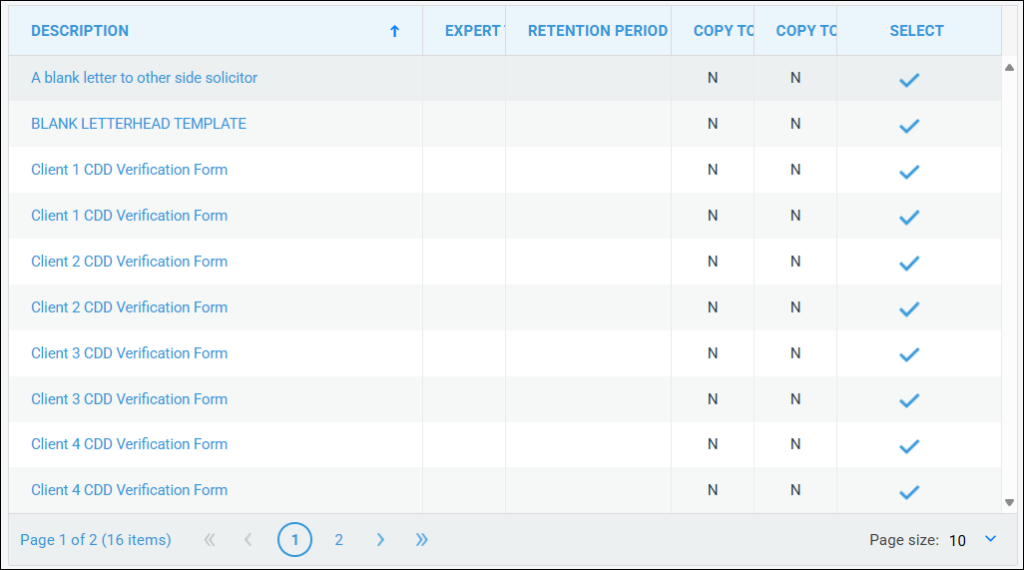
Use the filters to locate the document you wish to run.

- Expert Type – Filters down to show all documents assigned to that Expert Type.
- Document Type – Select the relevant document type, i.e. Standard Letter, PDF, Excel or General
- Description search – Locate document via name. This box utilizes a “wildcard” search. The wildcard search is “..” which replaces text e.g. if you were searching for a Blank Client Letter, you could search for “Bla..”, “..Letter” or “..Client..” and the document would return.
- Include Global – Include non-work type specific documents.
Left click on the document you wish to generate. Word should now open.
If you do not have the gateway installed, you may use the Online Editor >.
Make any changes needed to the document and print it (if necessary).
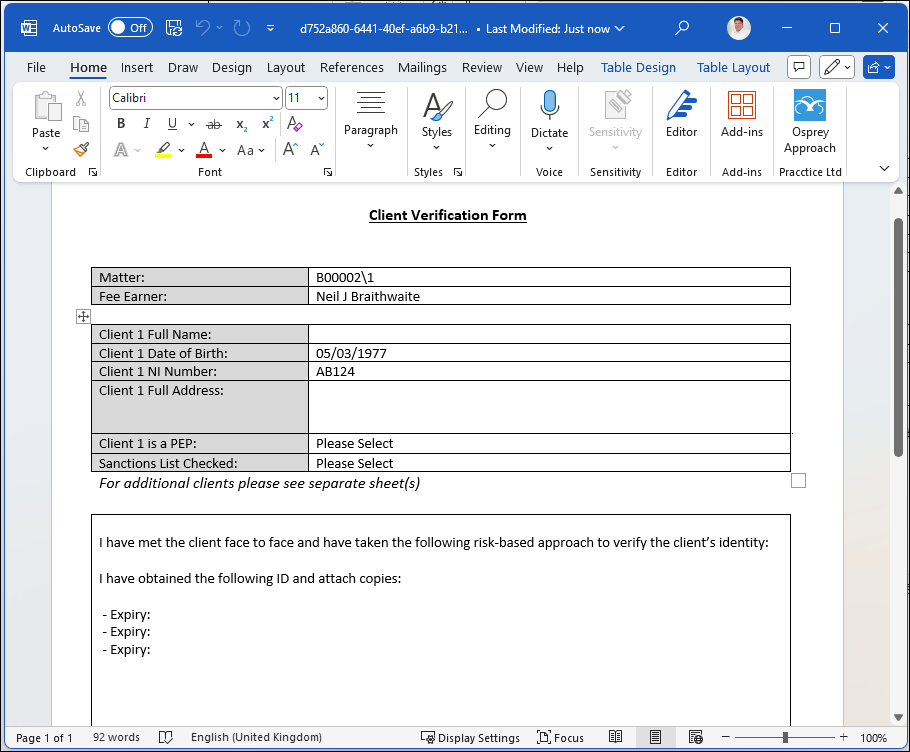
Close the document using the ‘X’ in the top-right corner.
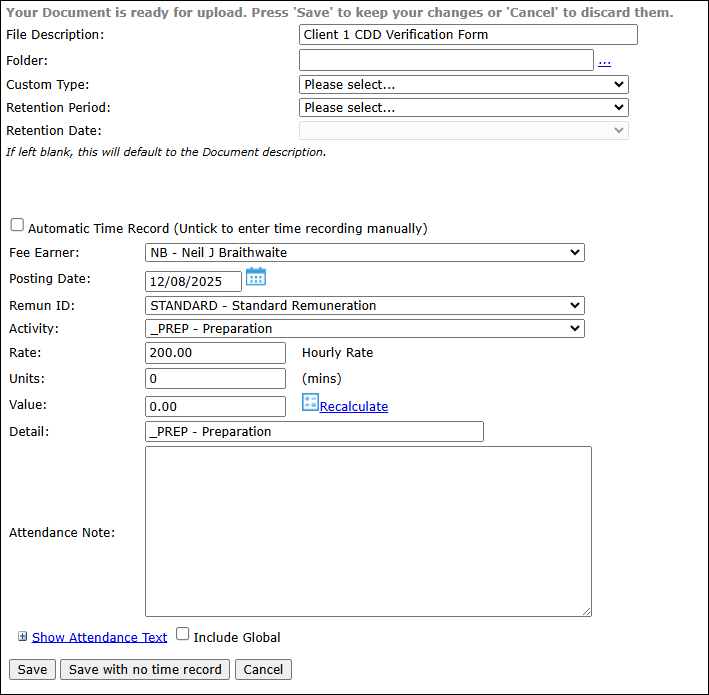
Saving a Document
You have three options for Time Recording.
To post the default letter rate simply select ‘Save’ with Automatic Time Record selected.
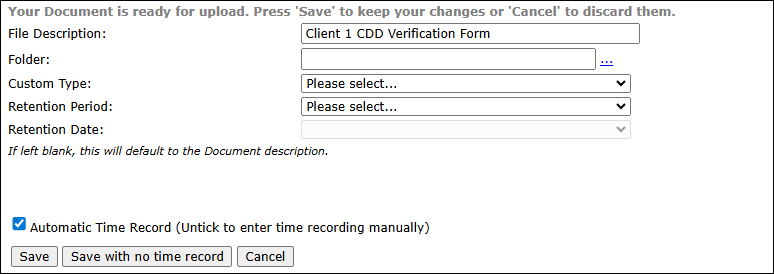
If you wish not to post a time entry select Save with No Time Record.
If, however, you wish to post your own time entry, untick Automatic Time Record. A posting screen will now appear to allow you to enter the details manually. Once you have completed the posting form, select Save.
Documents and Workflows can be run from within Word directly using our Word Add-ins Osprey Office 365 Word Add-in or Osprey Office Add-in