Set up Banks and Deposit Accounts
Updated Nov 5th, 2026
Who is this guide for?
Accounts Supervisors, Accounts Users and System Supervisors
This guide will assist you with setting up new office, client and deposit bank accounts
You will need access to the Supervisor area to follow this guide.
Add a new bank
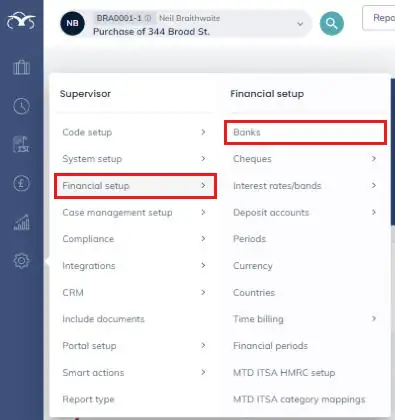
Hover over the Supervisor cog on the left hand navigation bar, then Financial setup, and click Banks.
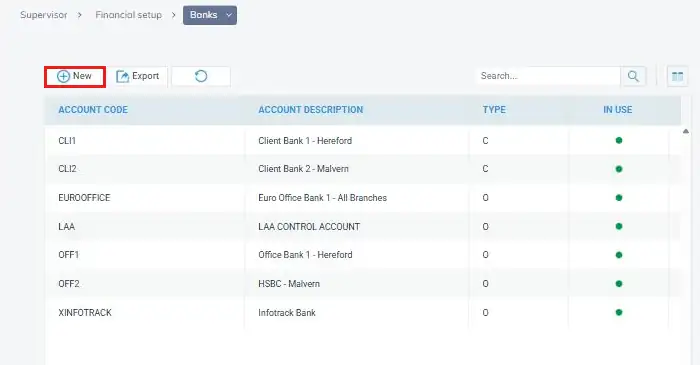
A list of your existing office and client banks is shown. Click New.
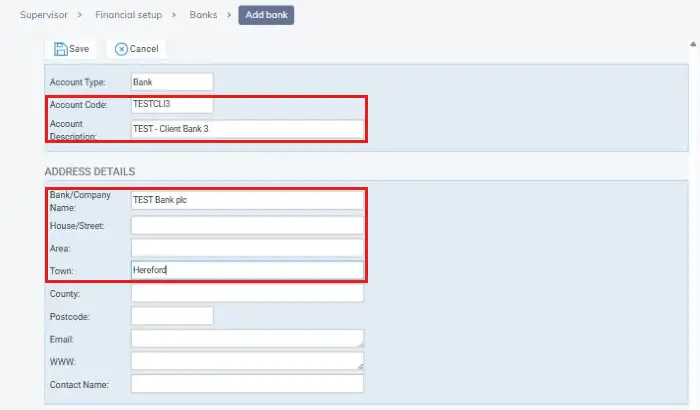
Enter an Account Code (up to 10 characters) and an Account Description for the bank. Then complete the Address Details, such as the Bank/Company Name and the branch address.
Scroll down to the Bank Account section and choose the Bank Type: Client for a client bank account or Office for an office bank account. If this should be the default bank for a branch, tick Set as default for branch and select the branch. Enter the Bank Account Number and Bank Sort Code.
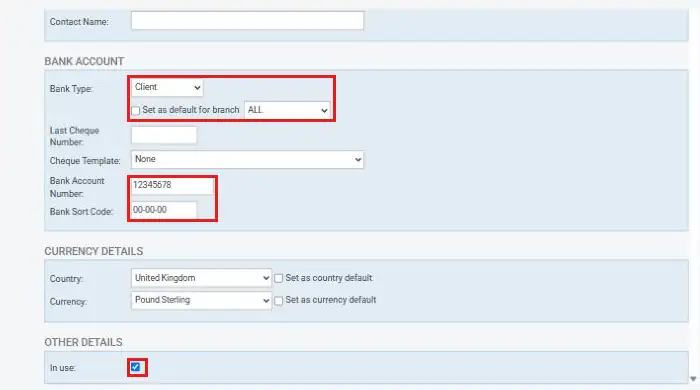
The other fields on this page are optional:
| Field | What it does |
| Last Cheque Number | The number of the last cheque issued from this account, so Osprey can number the next cheque. |
| Cheque Template | The template used when printing cheques from this bank. See Cheque Printing Setup > |
| Country / Currency | The country and currency of the account. Tick Set as country default or Set as currency default to make this the default bank for that country or currency. |
| In use | Ticked by default. Untick it to stop a bank being used for new postings. |
Make sure In use is ticked, then scroll back to the top of the page and click Save. The new bank now appears in the list of banks.
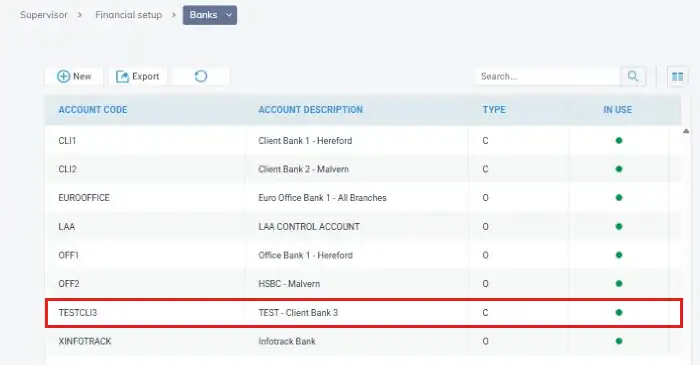
Add a new deposit account
Hover over the Supervisor cog, then Financial setup, and click Deposit accounts.
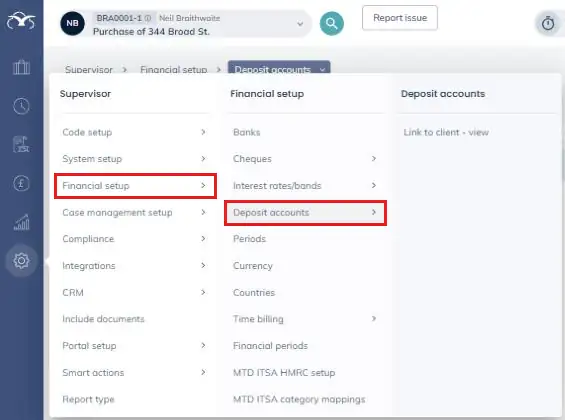
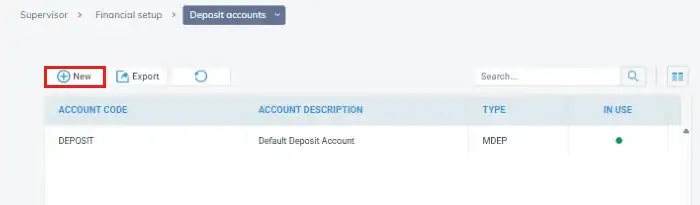
Click New.
Enter an Account Code and Account Description, then complete the Address Details in the same way as for a bank.
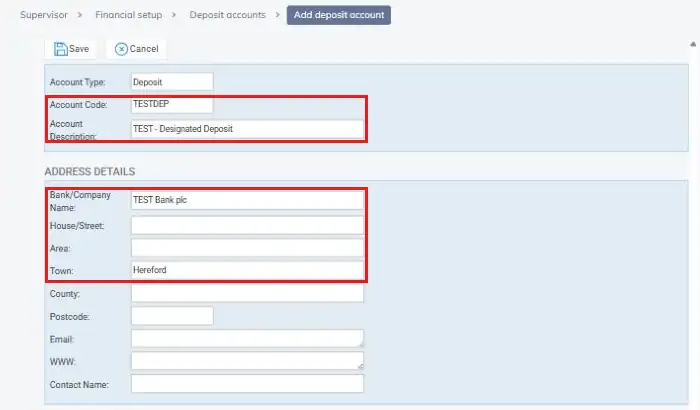
Scroll down and enter the Bank Account Number and Bank Sort Code. In the Deposit Details section, enter the Deposit Account No and choose the Deposit Type.
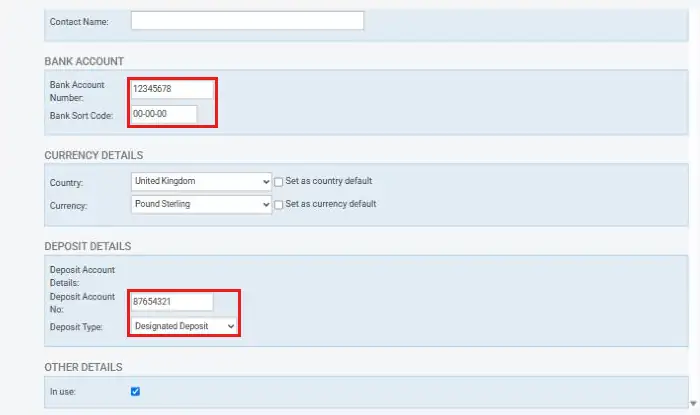
| Deposit Type | When to use it |
| Controlled Trust | For money your firm holds as a trustee. |
| Designated Deposit | For a deposit account opened for a single client. |
| Multiple Deposit | For a general deposit account holding money for several clients. |
Make sure In use is ticked, then click Save at the top of the page. The deposit account now appears in the list of deposit accounts.
Before you can post money to a deposit account, you need to link it to the matter. Our guide Link a Deposit Account > explains how to do this.